Description
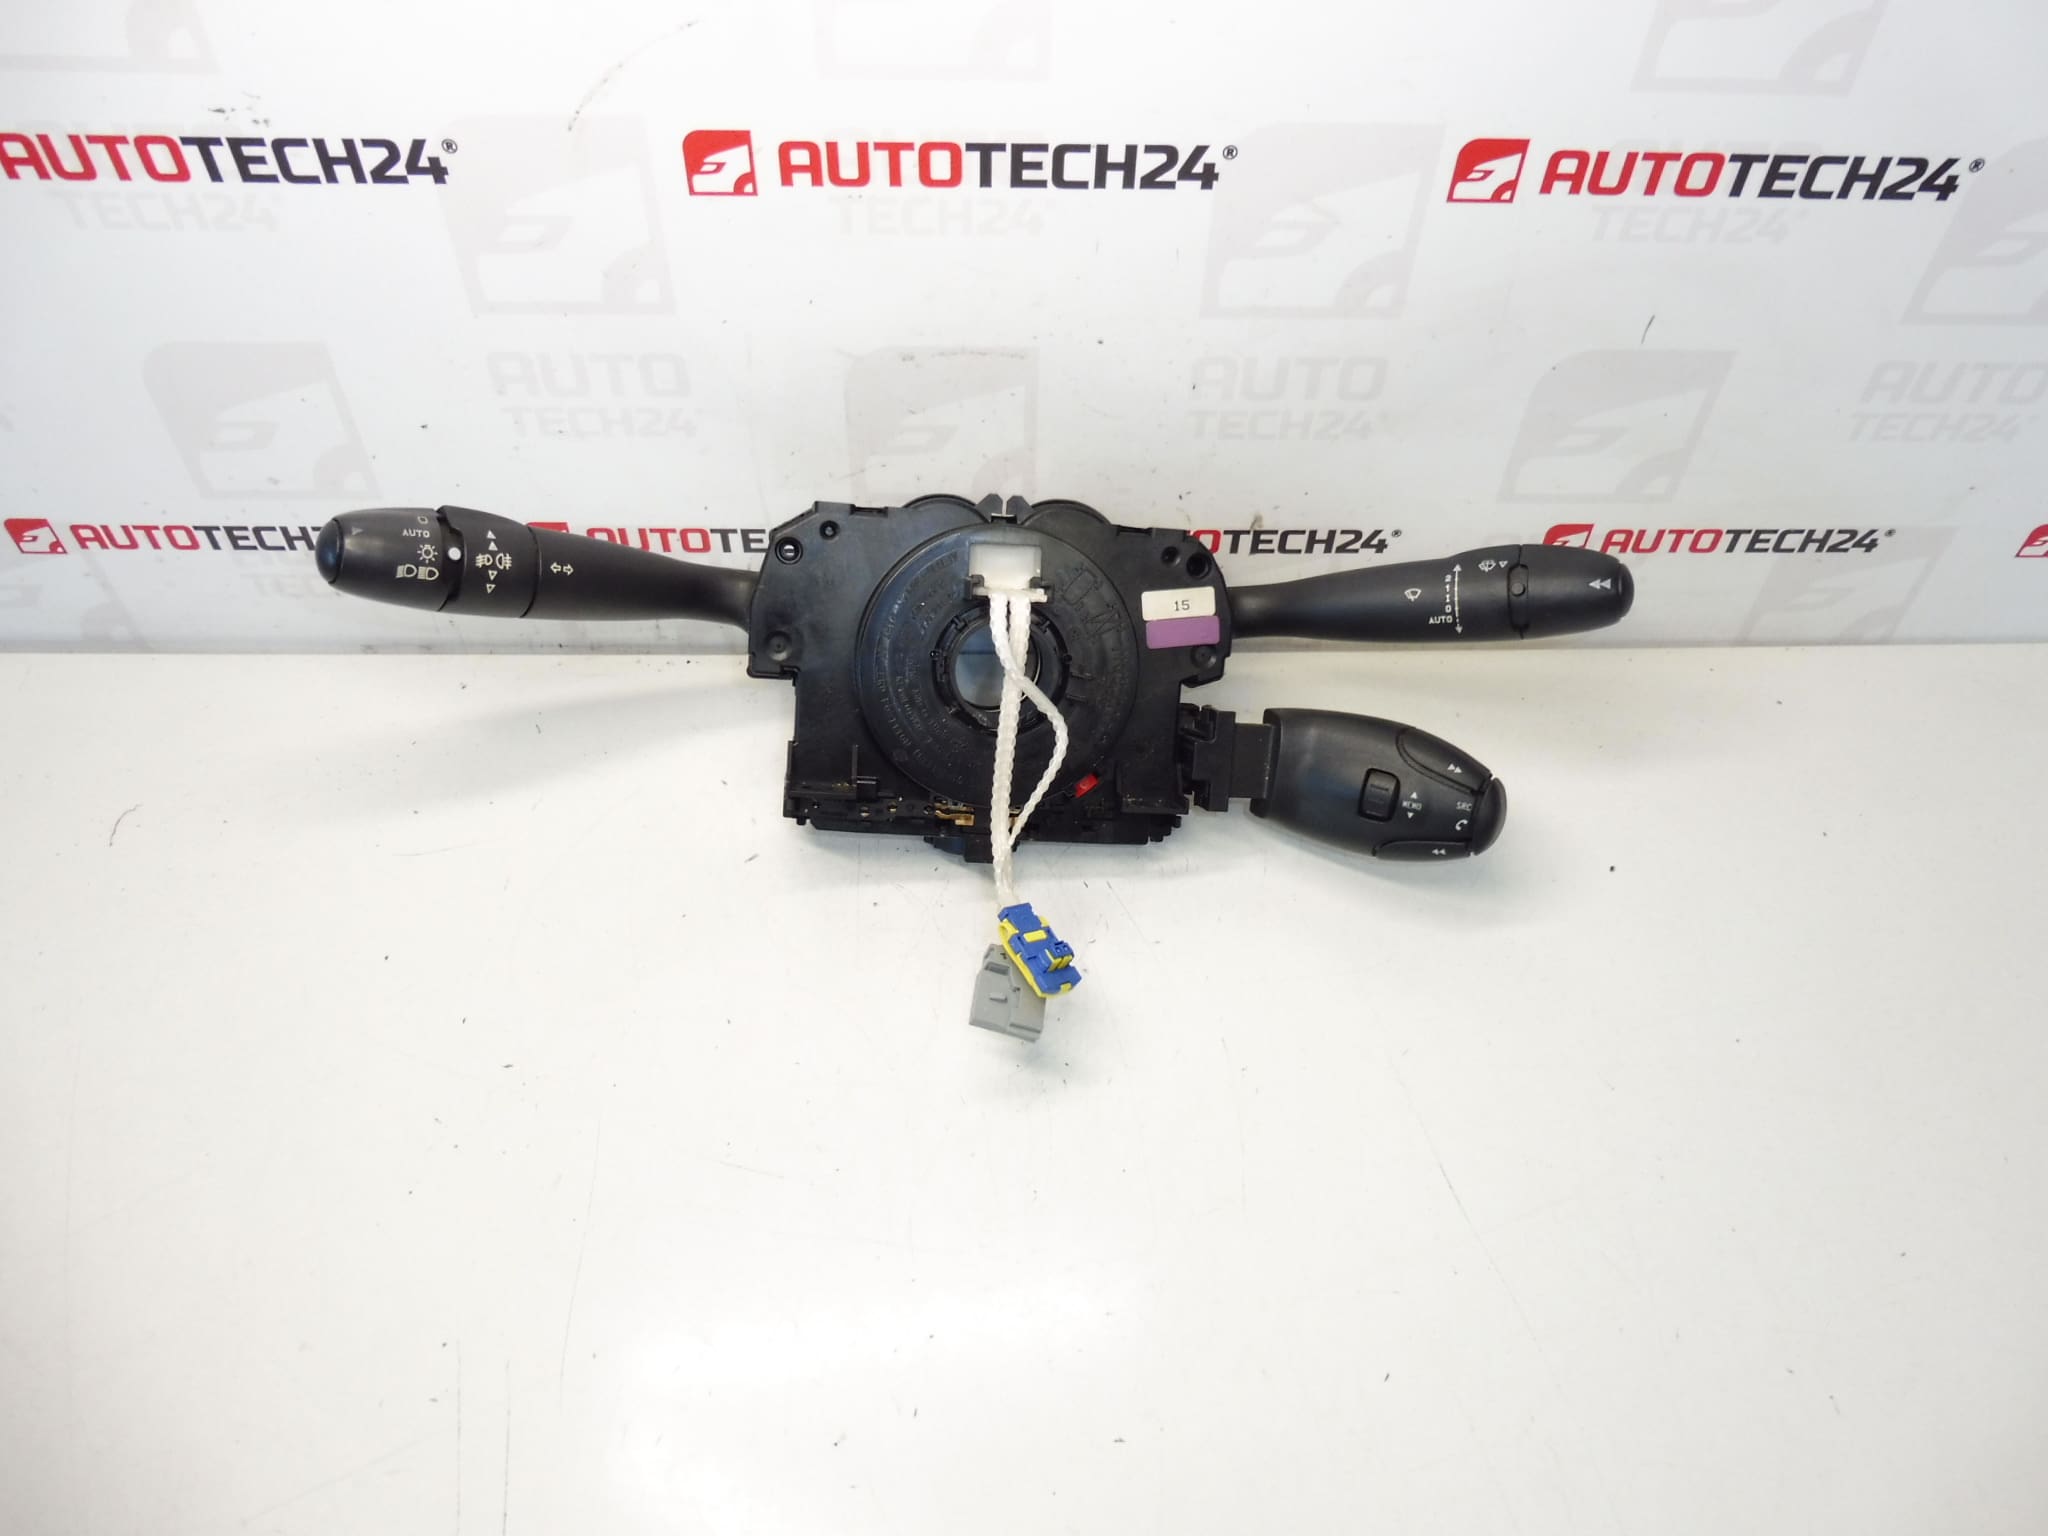
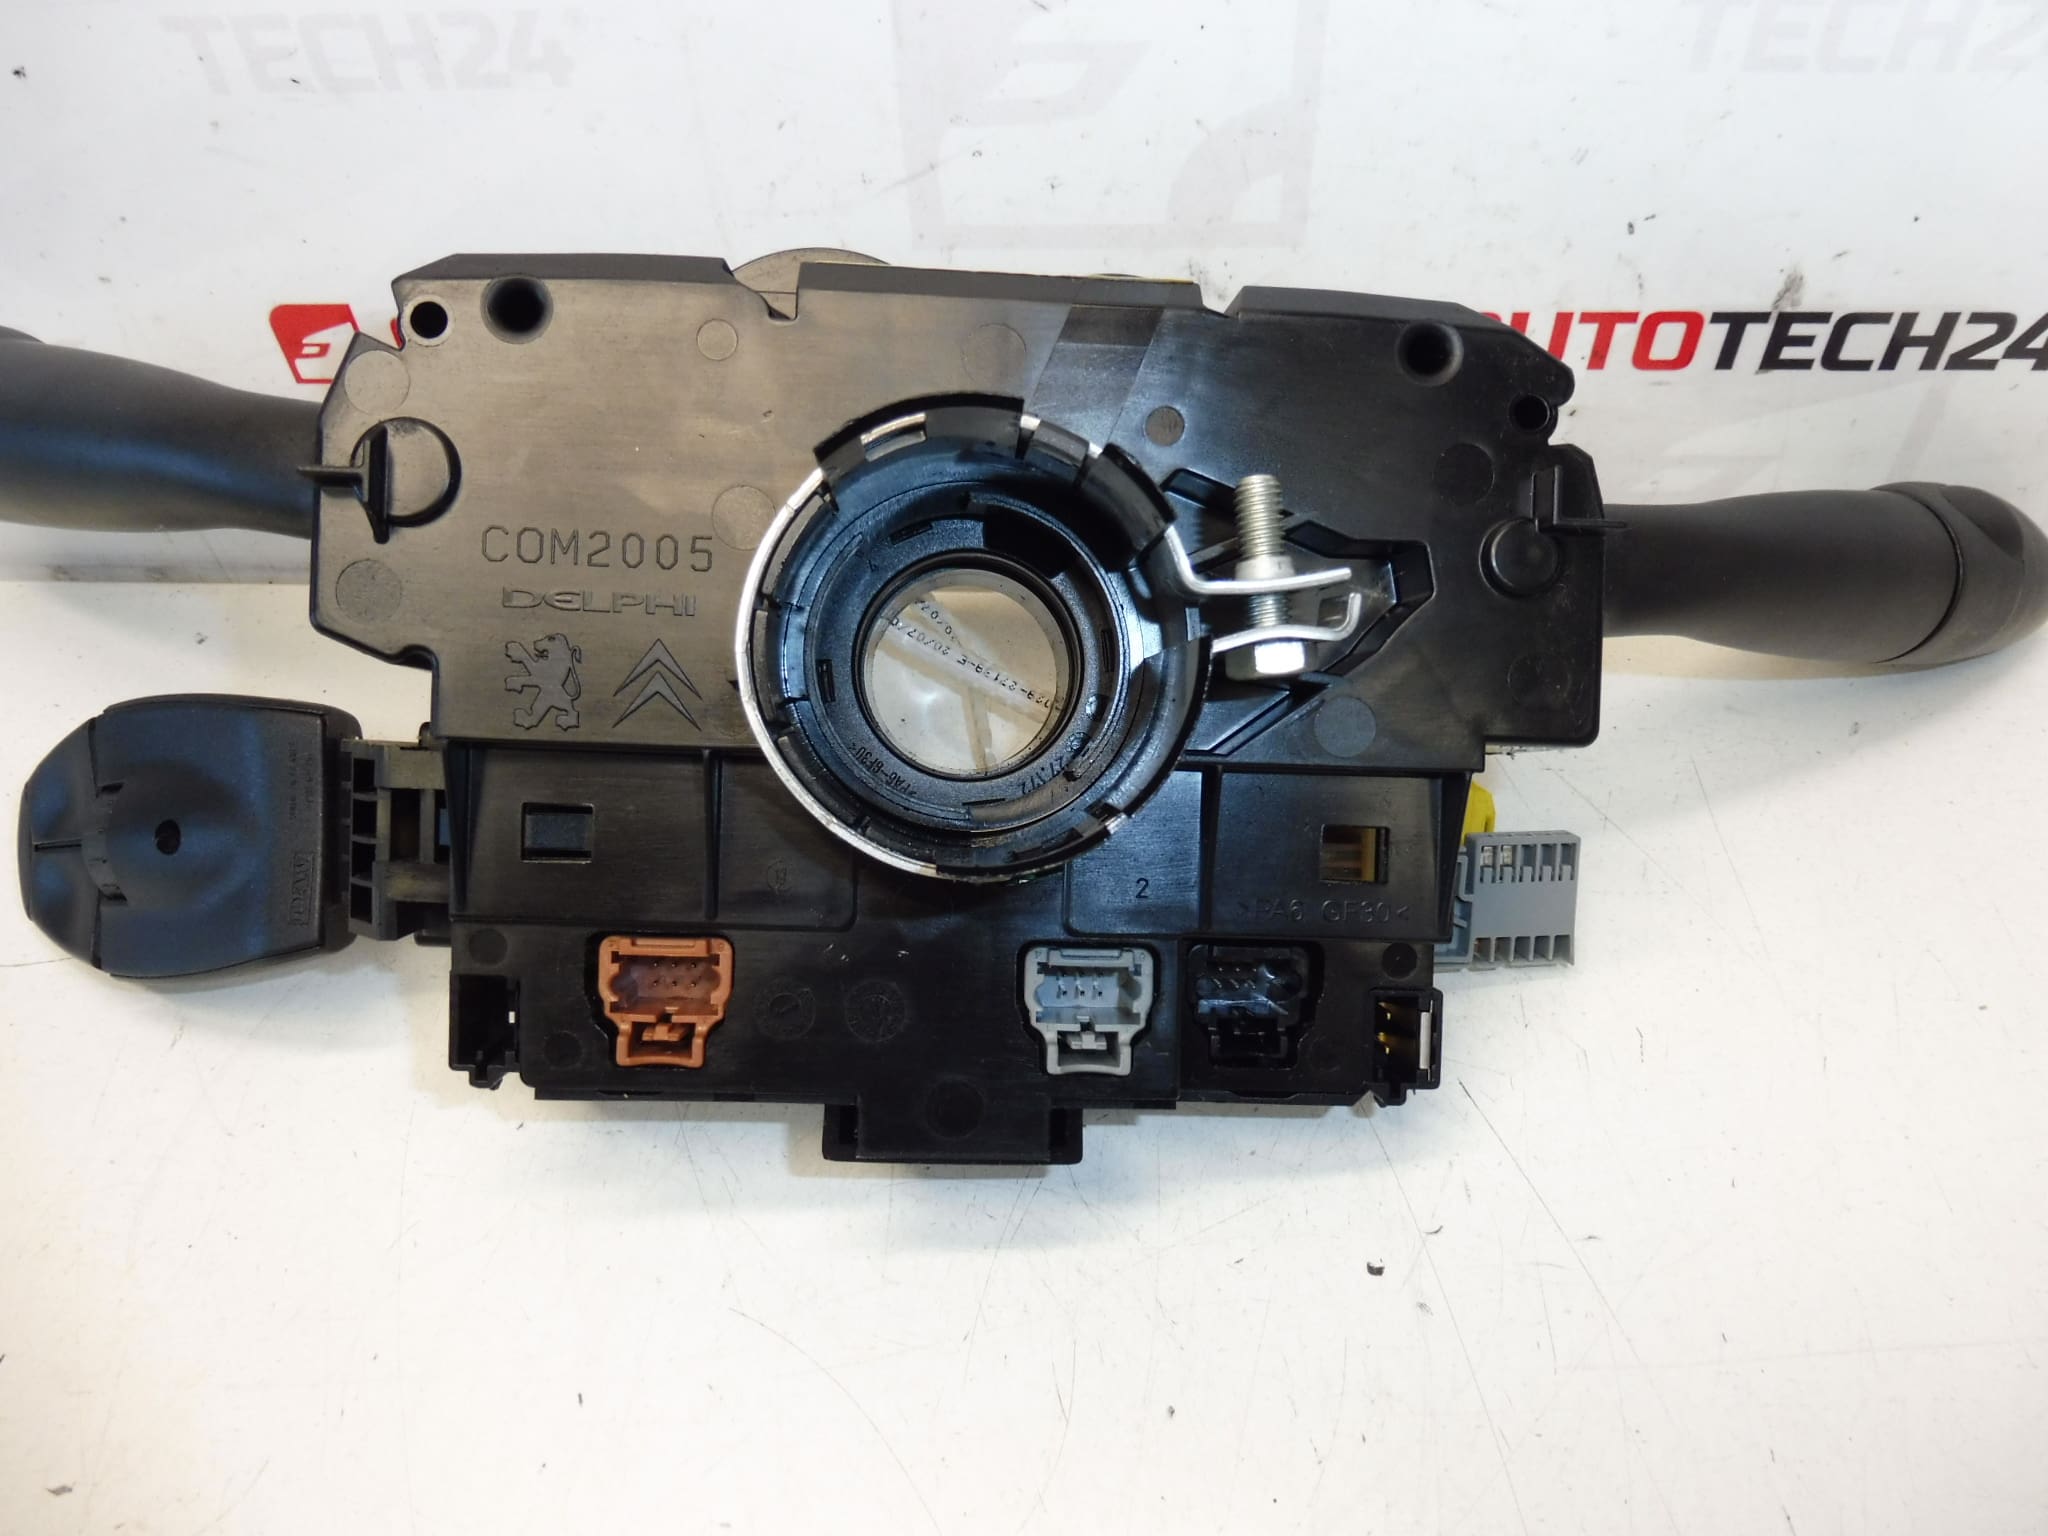
Controls under the steering wheel, multifunction control DELPHI COM2003 from PEUGEOT 307 CC from 2005
They control the fog lights, on-board computer, front wipers, wiper sensor, on-board computer, ESP
Cruise control and car radio (controller must be supplied or transferred)
Part description
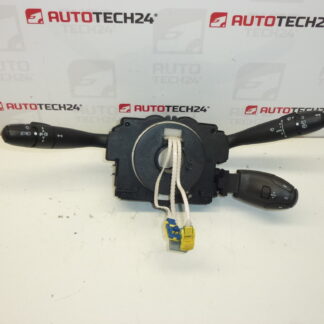
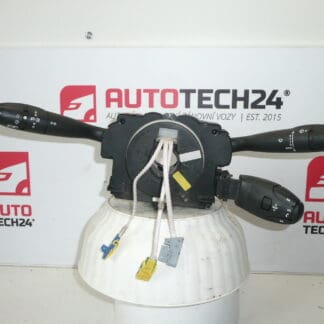
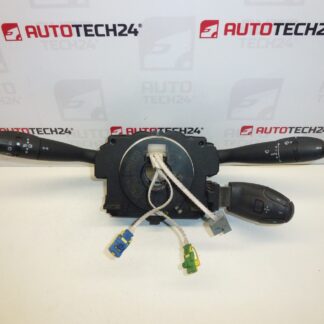
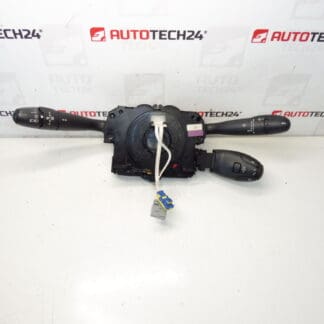
This used Citroën Peugeot 96635796XT 6242AA lever control is intended for Citroën and Peugeot cars in the steering wheel controls category. It is a multifunctional DELPHI COM2003 module that combines the control of several important car functions into one unit.
The advantage of this design is the concentration of commonly used functions directly under the steering wheel, which facilitates control while driving and increases operator comfort. According to the supplied documents, the driver ensures, for example:
- control of fogs,
- control of the board computer,
- control of front wipers,
- cooperation with the wiper sensor,
- control of the ESP function,
- possibility of a solution for cruise control and car radio after delivery or transfer of the relevant controller.
For mechanics and home repairers, the marking of the part and the matching of the connectors, the design of the levers and the equipment are especially important. With these controllers, the right part is often searched for precisely by the product number, which makes it much easier to choose the right variant.
Technical information
Manufacturer: DELPHI
Model: PEUGEOT 307 CC
Other numbers: 98069979XT, 6242AA
Product codes
Product codes: 96635796XT, 98069979XT, 6242AA
Model names: Peugeot 307, Peugeot 307 CC
Installation recommendations
Generally/typically for steering wheel controls, the exact replacement procedure may vary depending on the specific model, equipment and make of the car. Below is a safe and practical general procedure for this type of electrical part.
1) Before assembly
- Compare the new and original part by part numbers, body shape, connectors, mounting and lever design.
- Check for damage to plastic parts, latches, connectors or controls.
- Verify that the driver’s equipment corresponds to the functions that the car is supposed to use.
- Before starting work, set the wheels in a straight line and prepare a clean work area.
- For electrical parts, always disconnect the battery first and wait a while before disassembling.
2) Necessary tools and materials
- set of common hand tools,
- screwdrivers or bits corresponding to the joints used,
- plastic crowbar for removing covers,
- clean cloth,
- preparation for gentle cleaning of contacts, if needed,
- protective gloves and sufficient lighting of the work area.
3) Step-by-step assembly procedure
- Park the vehicle in a safe place, turn off the ignition and disconnect the battery.
- Wait a reasonable amount of time for the car’s electrical systems to settle down.
- Remove the steering column covers to access the controls module under the steering wheel.
- Carefully disconnect the electrical connectors of the original part. Do not pull on the wiring, but only on the body of the connector.
- Unfasten the original controller according to the design of the specific car.
- Remove the old part and again compare its design with the assembled piece.
- If a separate cruise control or car radio controller is being transferred, do this operation carefully and without force on the latches.
- Place the new controller in the correct position and check that it fits without tension.
- Connect all connectors so that they are fully secured and free of play.
- Reinstall the steering column covers and check that nothing rubs or pinches.
- Connect the battery and perform a basic function check with the ignition on.
- Try the individual control functions of the levers gradually and without haste.
-
4) Post-assembly checks and test drive/function verification
- Check the function of wipers, fog lights, on-board computer and other available elements according to the car’s equipment.
- Verify the correct response of the levers in individual positions.
- Make sure that the steering wheel turns smoothly and that nothing mechanically restricts the area around the steering column.
- During a short test drive, watch for control failures or non-standard behavior of the switches.
5) The most common assembly mistakes + how to avoid them
- Swapping mismatched part variants – always compare part numbers and feature designs.
- Damage to connectors – disconnect and connect connectors gently, without prying with force.
- Assembly without checking the physical condition – before installation, check latches, connectors and operation of levers.
- Insufficient verification of functions after assembly – always try all available modes and controls.
- Normal wear and tear caused by frequent use of levers and switches.
- Mechanical stress during careless handling or during unprofessional disassembly of the surrounding plastics.
- Wearing of internal contacts, which can be manifested by failure of individual functions.
- Intrusion of dust and dirt into the controller mechanism.
- Damage to connectors or wiring from previous repairs.
- Moisture or long-term adverse operating conditions that can impair the function of electrical parts.