Description
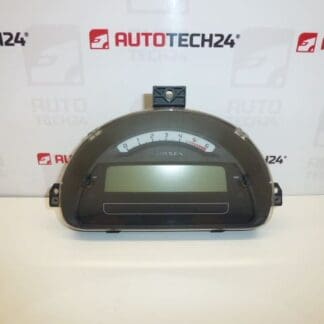
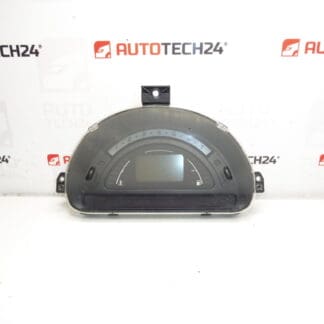
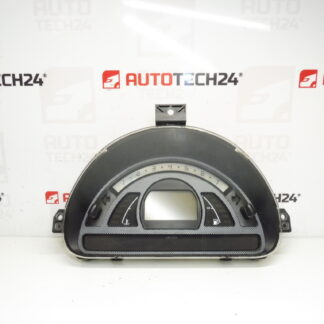
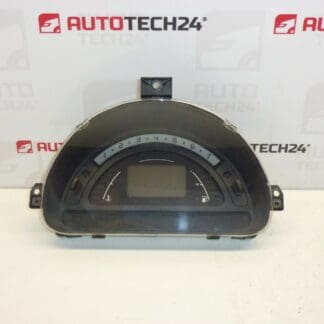
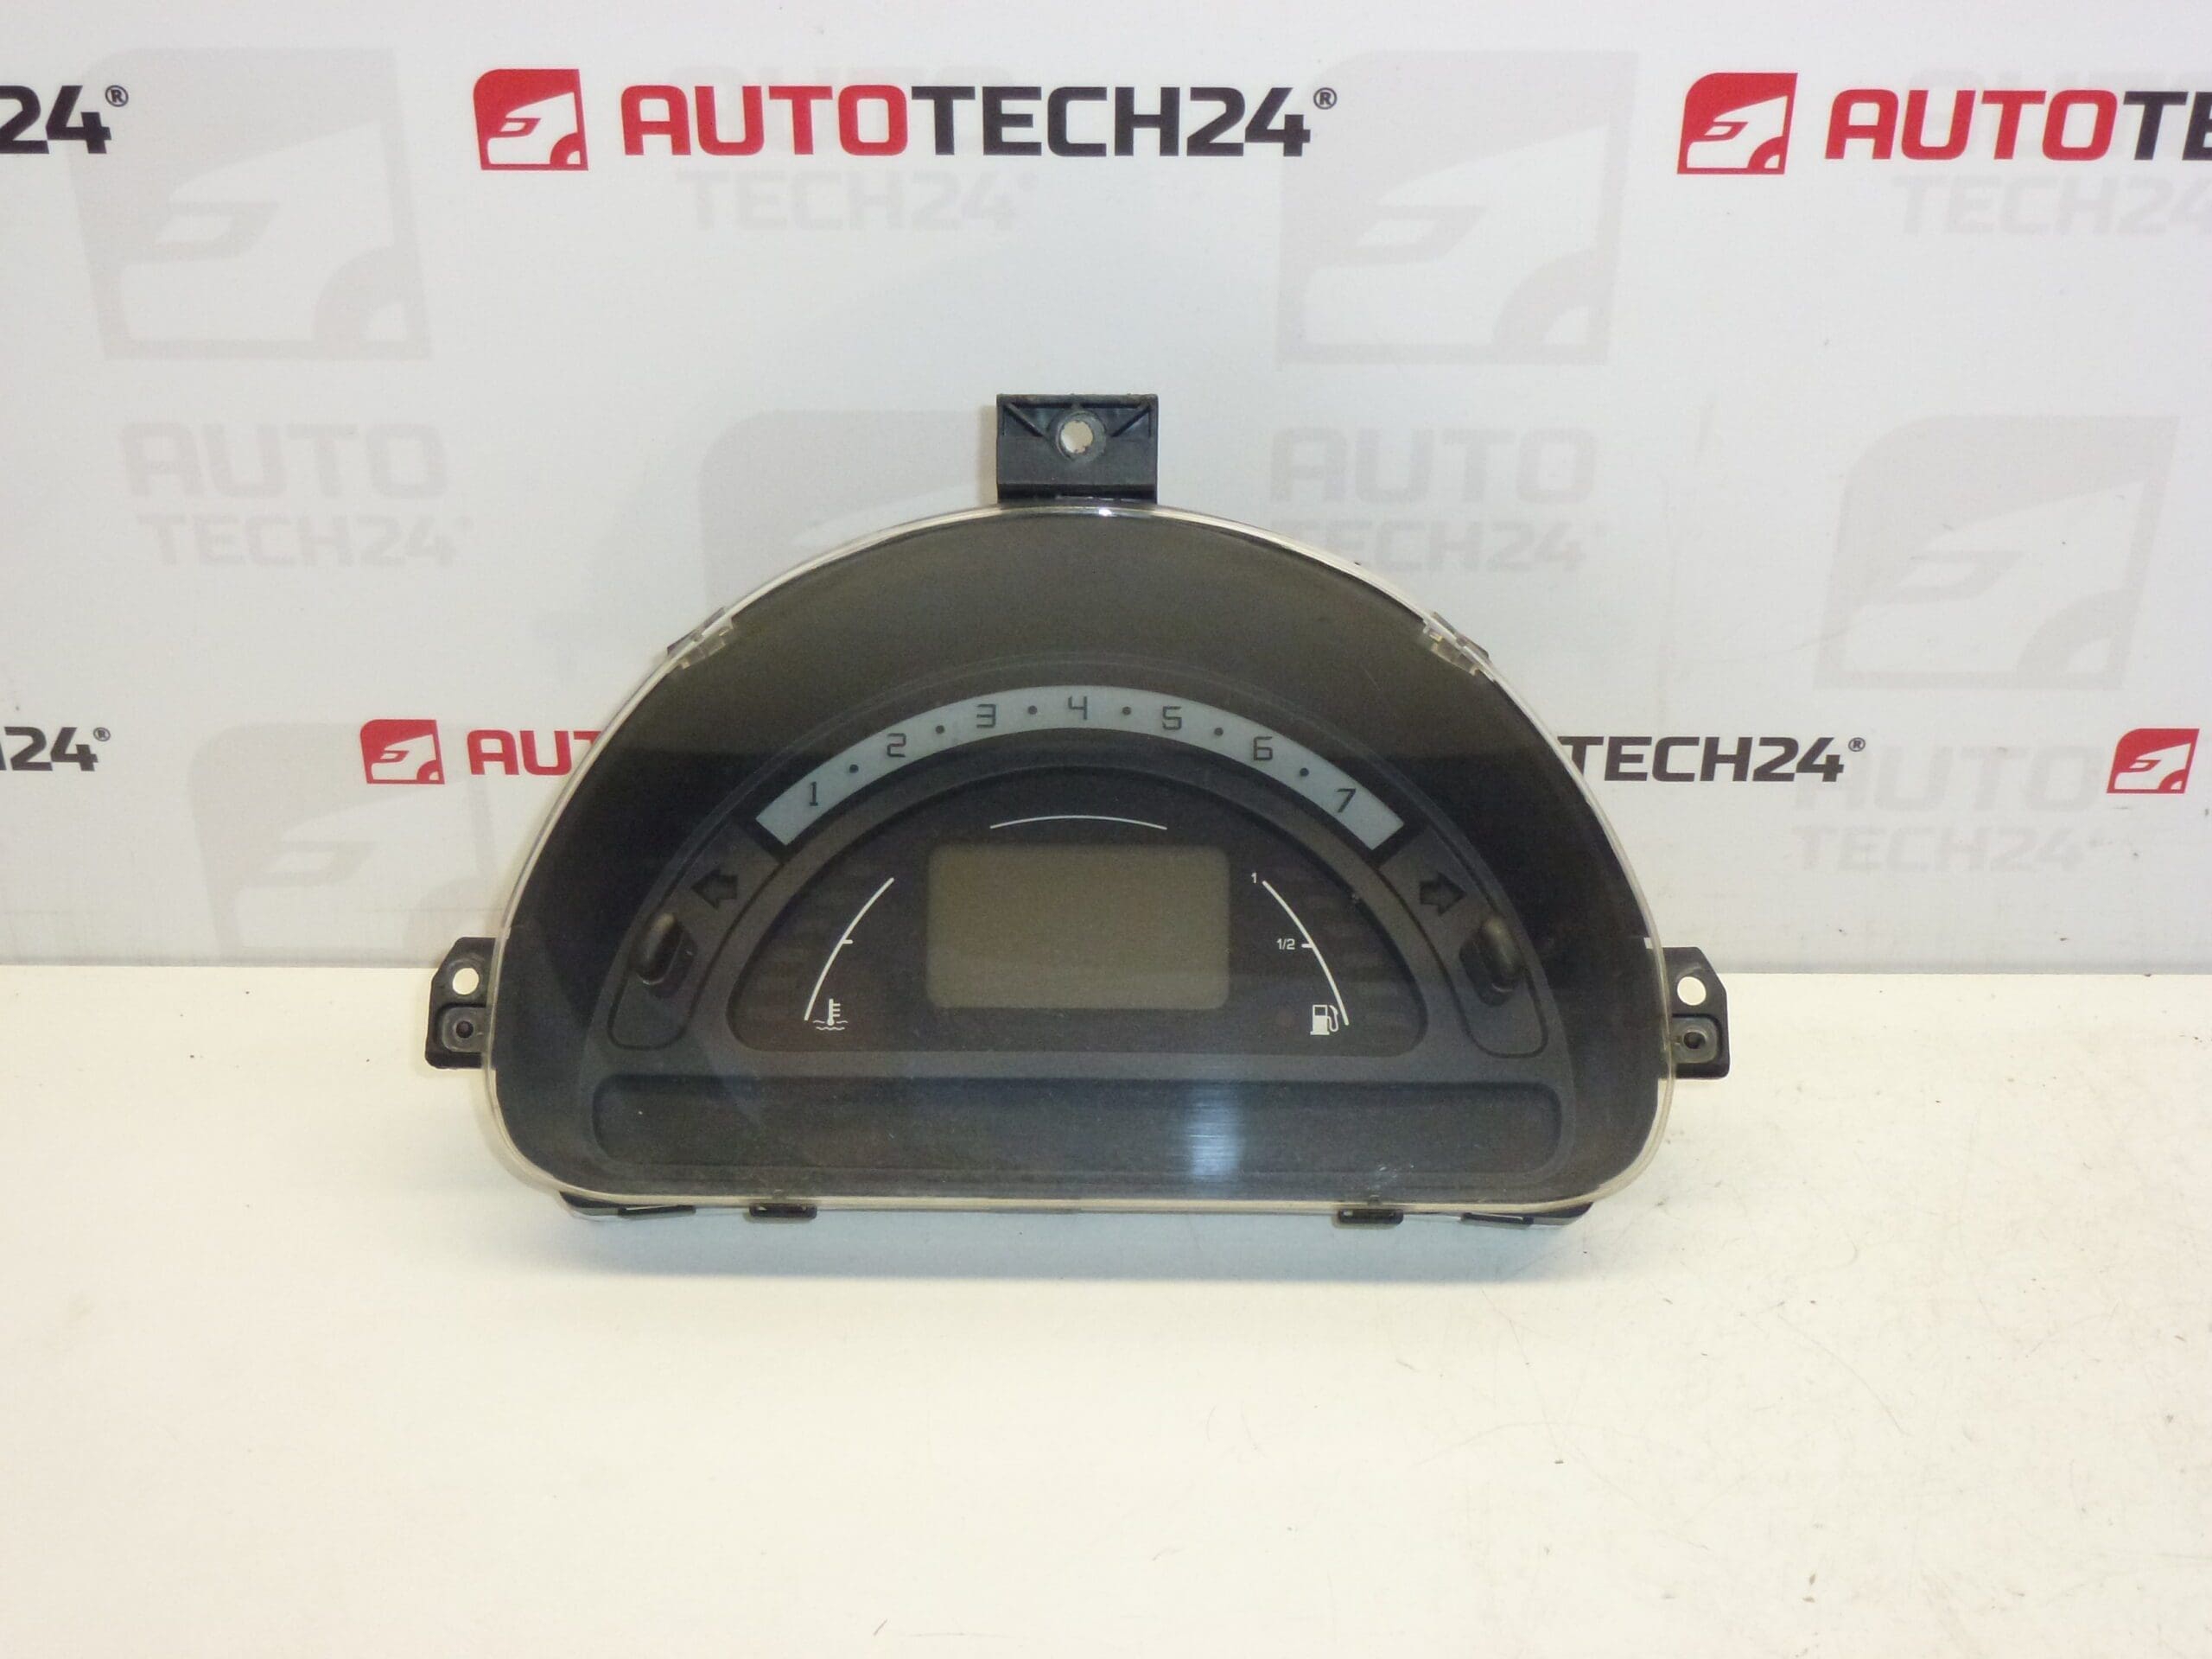
Complete combined instrument cluster SAGEM for CITROËN C2, C3 1.4 HDi. From a vehicle with mileage 242000 km.
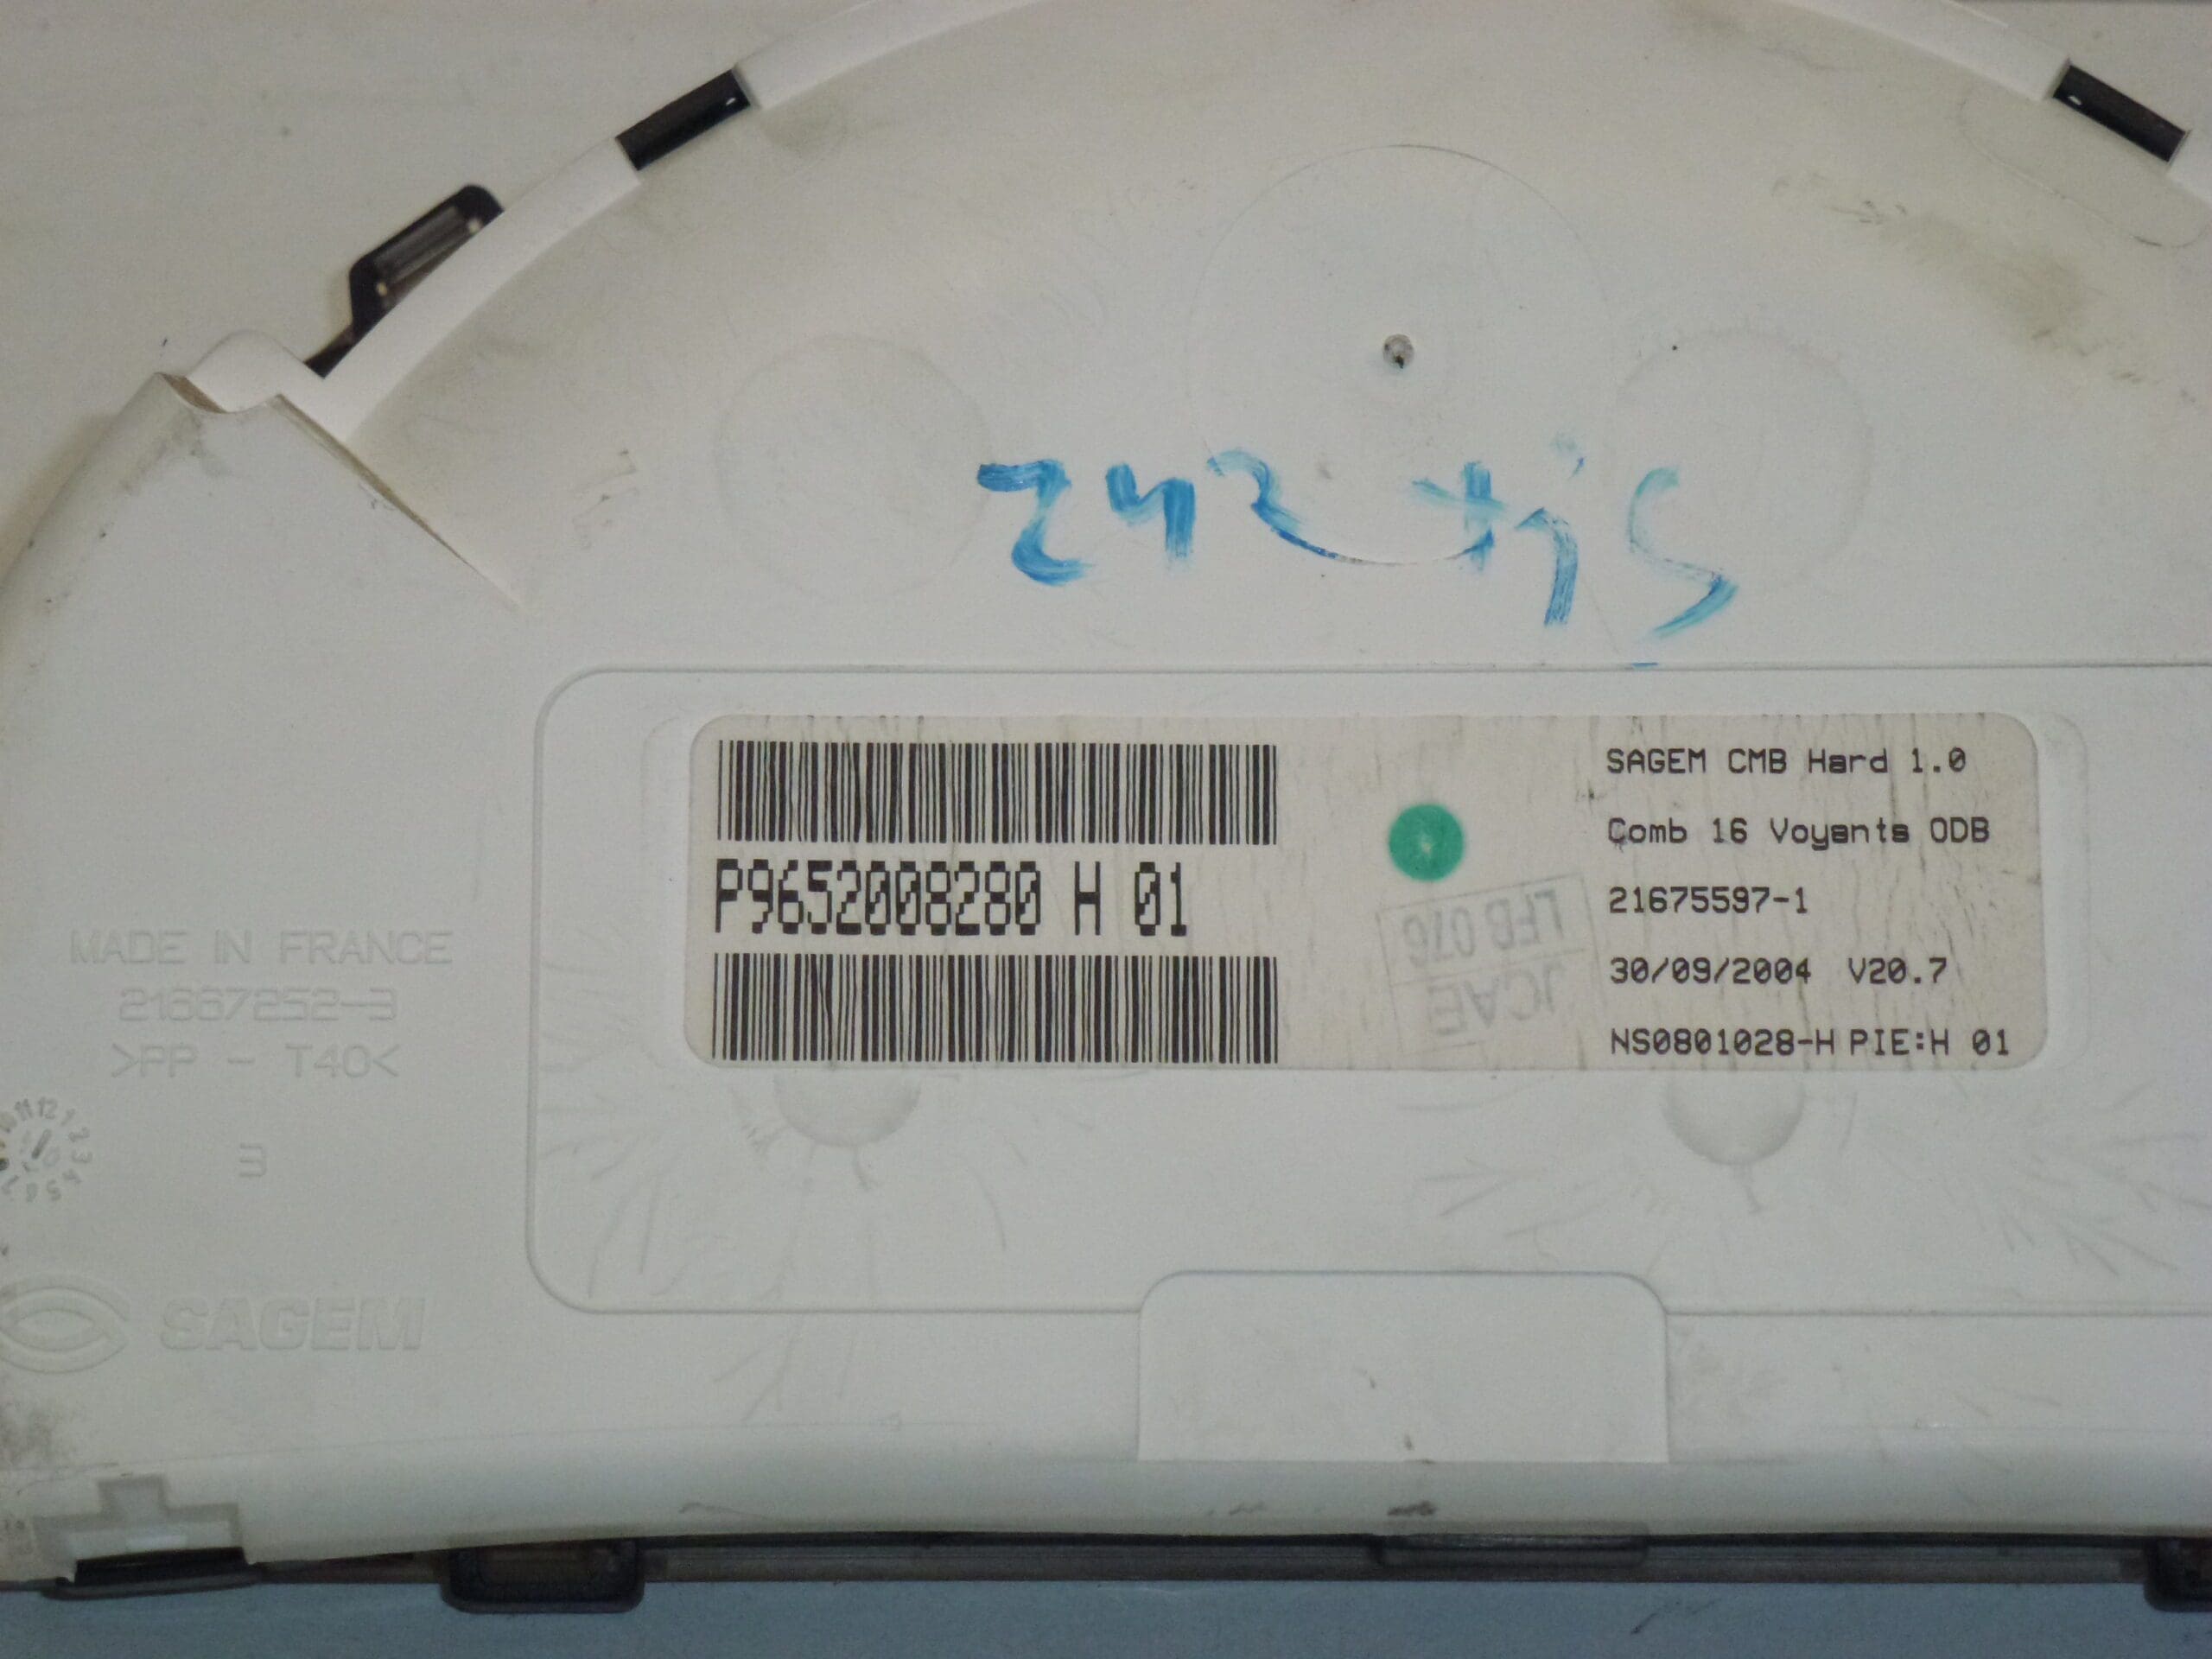
This full instrument cluster is a direct-fit replacement unit commonly referenced by part numbers 9652008280, P9652008280 and 6105EV. Designed for Citroën C2 and C3 models with the 1.4 HDi engine, it is particularly relevant for professional mechanics and experienced DIYers who search by product code when sourcing electrical and dashboard components. The listing includes the exact codes stamped on the unit to help you find the correct match for your vehicle.
The instrument cluster provides essential driver information: vehicle speed, odometer/trip mileage, fuel level, engine warning indicators and other status lights. As a combined unit it houses both mechanical stepper motors for gauges and electronic modules for the display and warning lamp logic, integrating with the vehicle’s electrical network.
How To Replace
- Prepare: Park on a level surface, switch off ignition and remove key.
- Safety: Disconnect the negative terminal of the battery to avoid short circuits and airbag/airbag wiring issues.
- Access: Remove the trim bezel around the dashboard cluster—typically secured with clips and a few screws. Keep fasteners organized.
- Unplug: Unscrew the instrument cluster, carefully tilt it forward and unplug the multi-pin connectors. Note connector orientation and any locking tabs.
- Swap: Install the replacement unit, reconnect plugs and secure the cluster with its screws. Refit trim bezel.
- Verify: Reconnect the battery, start the vehicle and check all gauges, warning lights and odometer readout for correct function. If any warning lights remain or communications errors appear, perform electrical diagnostics on related circuits and fuses.
Installation Recommendations
- Use Proper Tools: Trim tools and a small Torx set reduce damage to dashboard plastics and fasteners.
- Battery Disconnection: Always disconnect the negative battery terminal before unplugging the cluster to protect vehicle electronics and prevent short circuits.
- Cable Care: Inspect connectors and wiring for corrosion or damaged pins; clean contacts if necessary before reassembly.
- Static Precautions: Avoid static discharge when handling the electronic module. Ground yourself or work on an anti-static mat if available.
- After Installation: Confirm odometer and trip counters are functioning and compare display behavior to the original unit to ensure proper fitment.
Common Failure Reasons
Instrument clusters on older Citroën C2/C3 models typically fail due to a few recurring causes: internal solder joint cracks from thermal cycling, worn or stuck stepper motors causing inaccurate needle movement, LCD or segment failure in the display, water ingress or moisture damage behind the dashboard, and corrosion on connector pins. Electrical surges or intermittent vehicle wiring faults can also damage the cluster electronics. Recognizing the failure pattern (flickering display, stuck needles, or partial/blank readouts) helps direct effective repair or replacement.
Technical Information
- Manufacturer: SAGEM
- Model: Citroën C2; Citroën C3; Citroën C3 Pluriel (1.4 HDi)
- Product Codes: 9652008280; P9652008280; 6105EV
- Additional Numbers: H 01; Mileage On Unit: 242000 km
Part numbers and revision codes printed on the housing are the most reliable way to confirm fitment. This listing highlights the exact codes found on the unit to help mechanics and knowledgeable DIYers locate the correct replacement quickly.