Description
Air fan for cars with automatic air conditioning for CITROEN C8 and PEUGEOT 807 cars
Part description
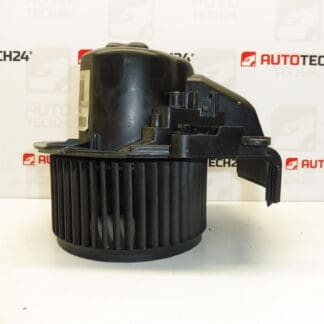
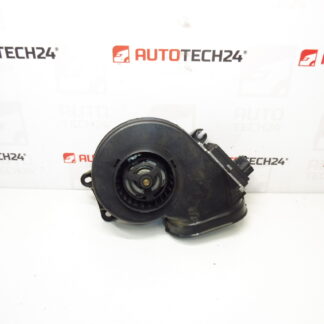
The air fan (heating/air conditioning fan) ensures the flow of air into the interior and the proper functioning of the heating and air conditioning. If the fan does not work, blows only occasionally, has fluctuating performance or makes unusual noises, this part may be the cause.
This is a used original part for Citroën C8 and Peugeot 807 cars. When choosing, it is crucial to compare the markings and product numbers directly on the part.
Technical information
- Manufacturer: Stellantis (Citroën / Peugeot)
- Model: Citroën C8, Peugeot 807
- Other numbers: 1400970280, 6441T9, 6441Y5
Product codes
- Product codes: 1499032080, 1400970280, 6441T9
Installation recommendations
Generally/typically for the heating and air conditioning fan, the exact procedure may vary depending on the specific design of the car and access to the fan.
1) Before assembly (checks)
- Compare the old and new part: product numbers (1499032080 / 1400970280 / 6441T9), body shape, connectors, mounting and seating direction.
- Check the condition of the connector and wiring (creeping, oxidation, loose pins).
- Turn the fan impeller by hand – it should run smoothly without rubbing or excessive play.
2) Necessary tools and materials
- Common set of screwdrivers and bits, gola set
- Pryers for dismantling plastic parts (trim tools)
- Flashlight
- Electrical contact cleaner (recommended)
3) Step-by-step assembly procedure
- Turn off the ignition and disconnect the battery.
- Ensure access to the fan (typically removing the necessary covers/paneling according to the car design).
- Disconnect the fan electrical connector – do not pull on the cables, only the body of the connector.
- Unfasten the fan fastening (screws/latches depending on the design) and carefully remove the part.
- Check the landing area: dirt, leaves, small objects and traces of spillage – clean everything.
- Compare the new fan with the old one again (connector, attachment, dimension).
- Place the fan in the correct position and fix it in the original way.
- Connect the electrical connector, if necessary, treat the contacts with cleaner and check for a firm fit.
- Reinstall all removed covers/trims.
- Connect the battery.
- Verify the operation of the fan at different stages and with the automatic air conditioning on.
-
4) Post-assembly checks and test drive/function verification
- Check that the fan runs smoothly, without vibration or unusual noise.
- Verify that the airflow matches the setting and there are no dropouts.
- After a short ride, check again that nothing resonates and that the connectors hold tight.
5) The most common assembly mistakes + how to avoid them
- Replacement of a similar part – matching of product numbers and connectors is always decisive.
- Damage to connector/pins when disconnecting – use proper connector release procedure.
- Leaving dirt in the fan compartment – can cause noise, vibration and early wear.
- Insufficient fastening – leads to resonances and gradual loosening.
Reasons why the part is damaged
- Bearing wear and long-term operation (noise, whistling, vibration).
- Pollution (dust, leaves and debris) causing impeller imbalance and motor overload.
- Moisture ingress and subsequent corrosion/oxidation of the connectors.
- Electrical problems in the power supply (fluctuations, transient resistances on the contacts) that overload the fan.
- Mechanical damage due to previous unprofessional disassembly or dirt hitting the impeller.