Description
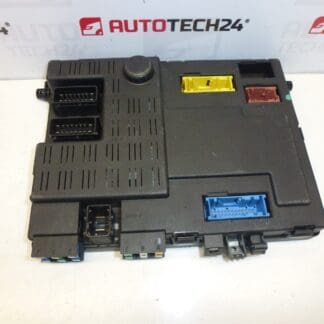
Intelligent BSI control unit Johnson Controls for Citroën and Peugeot vehicles HARD 28119248-3C
This BSI04EV (K04-00) comfort control unit is a direct-fit, used Johnson Controls module designed for a range of Citroën and Peugeot models. Frequently searched by part numbers such as 9678477180, 1613316380 or 1663366080, this unit handles body and comfort electronics — central locking, interior lighting, window and wiper commands, alarm/immobiliser interface and communication with other vehicle modules. It is aimed at professional mechanics and experienced DIY enthusiasts who need a reliable replacement BSI for PSA (Stellantis) vehicles.
Key Benefits
Fast identification by original product codes improves findability and reduces downtime. The unit restores lost or erratic comfort functions, fixes intermittent electrical faults related to body electronics and can be commissioned either by cloning or by initialization and coding procedures. Ideal for workshops that have PSA diagnostic tools and for owners repairing their own vehicles with the right equipment and know‑how.
Technical Information
- Manufacturer: Johnson Controls (for Stellantis/PSA)
- Model: BSI04EV K04-00
- Product Codes: 9678477180, 1613316380, 1663366080
- Other Numbers: 28119248-3C, 28120836-4
- Applicable Models: Citroën C4 Picasso, Citroën C5, Peugeot 3008 I, Peugeot 5008 I (verify exact fitment by code)
Installation And Coding – Important
- The unit is used and is “paired” with the original vehicle (VIN/PIN/keys).
- Options for commissioning:
- Cloning data from the old unit (EEPROM/Flash) – after cloning the unit is plug and play.
- Virginisation and subsequent initialization/telecoding via DiagBox (or online) + key adaptation.
- Recommended to be performed by a specialist with PSA service equipment (DiagBox/Lexia/PP2000).
- Before removal/installation always disconnect the battery and follow the manufacturer’s procedure to avoid damaging the unit.
Recommended Installation
- Disconnect the negative battery terminal and wait a few minutes before starting work to avoid short circuits and data corruption.
- Locate the BSI (usually behind the glovebox or under the dashboard); handle the unit and connectors carefully to avoid bent pins.
- Ensure all connectors and ground points are clean and corrosion‑free. Replace damaged seals to prevent future water ingress.
- After mechanical installation, perform cloning or virginisation and coding using DiagBox/Lexia/PP2000 as required for full functionality (see section above).
- Check fuses and perform a full function test: central locking, interior lights, wipers, windows, immobiliser and communication with other control modules.
Why This Part Fails Most Often
- Water Ingress And Corrosion: Moisture reaching the unit or its connectors causes corrosion and intermittent faults.
- Electrical Surges And Poor Grounding: Voltage spikes, incorrect jump‑starting or weak grounds can damage internal electronics.
- Age And Thermal Stress: Repeated heating/cooling cycles and solder joint fatigue can lead to component failure.
- Connector Damage Or Pin Corrosion: Faulty wiring, loose pins or poor connector mating results in loss of functions.
Helpful Notes
Mechanics searching for this part often use the product codes 9678477180, 1613316380 or 1663366080 — include those in your diagnostics and ordering process. Proper commissioning is critical: a physically identical BSI may still need cloning or telecoding to operate correctly with vehicle immobiliser and key set.
Compatibility And Fitment
Compatibility is code‑driven. Check the unit’s printed/reference numbers against the vehicle’s required part numbers before installation. This BSI is commonly fitted to first‑generation Peugeot 3008/5008 and selected Citroën C4 Picasso and C5 variants; however, exact fitment depends on model year and equipment level.
Final Advice
Replace BSI units in a workshop environment with proper diagnostic equipment. If you plan to clone or code the module yourself, ensure you have experience with PSA tools and follow ESD and safety precautions to protect electronic components.