Description
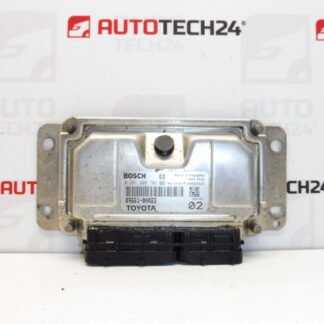
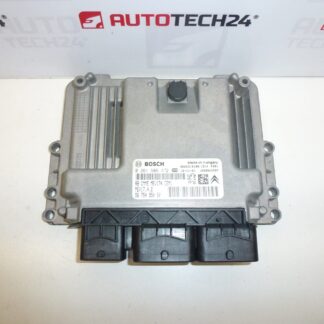
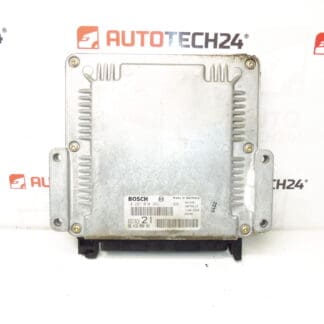
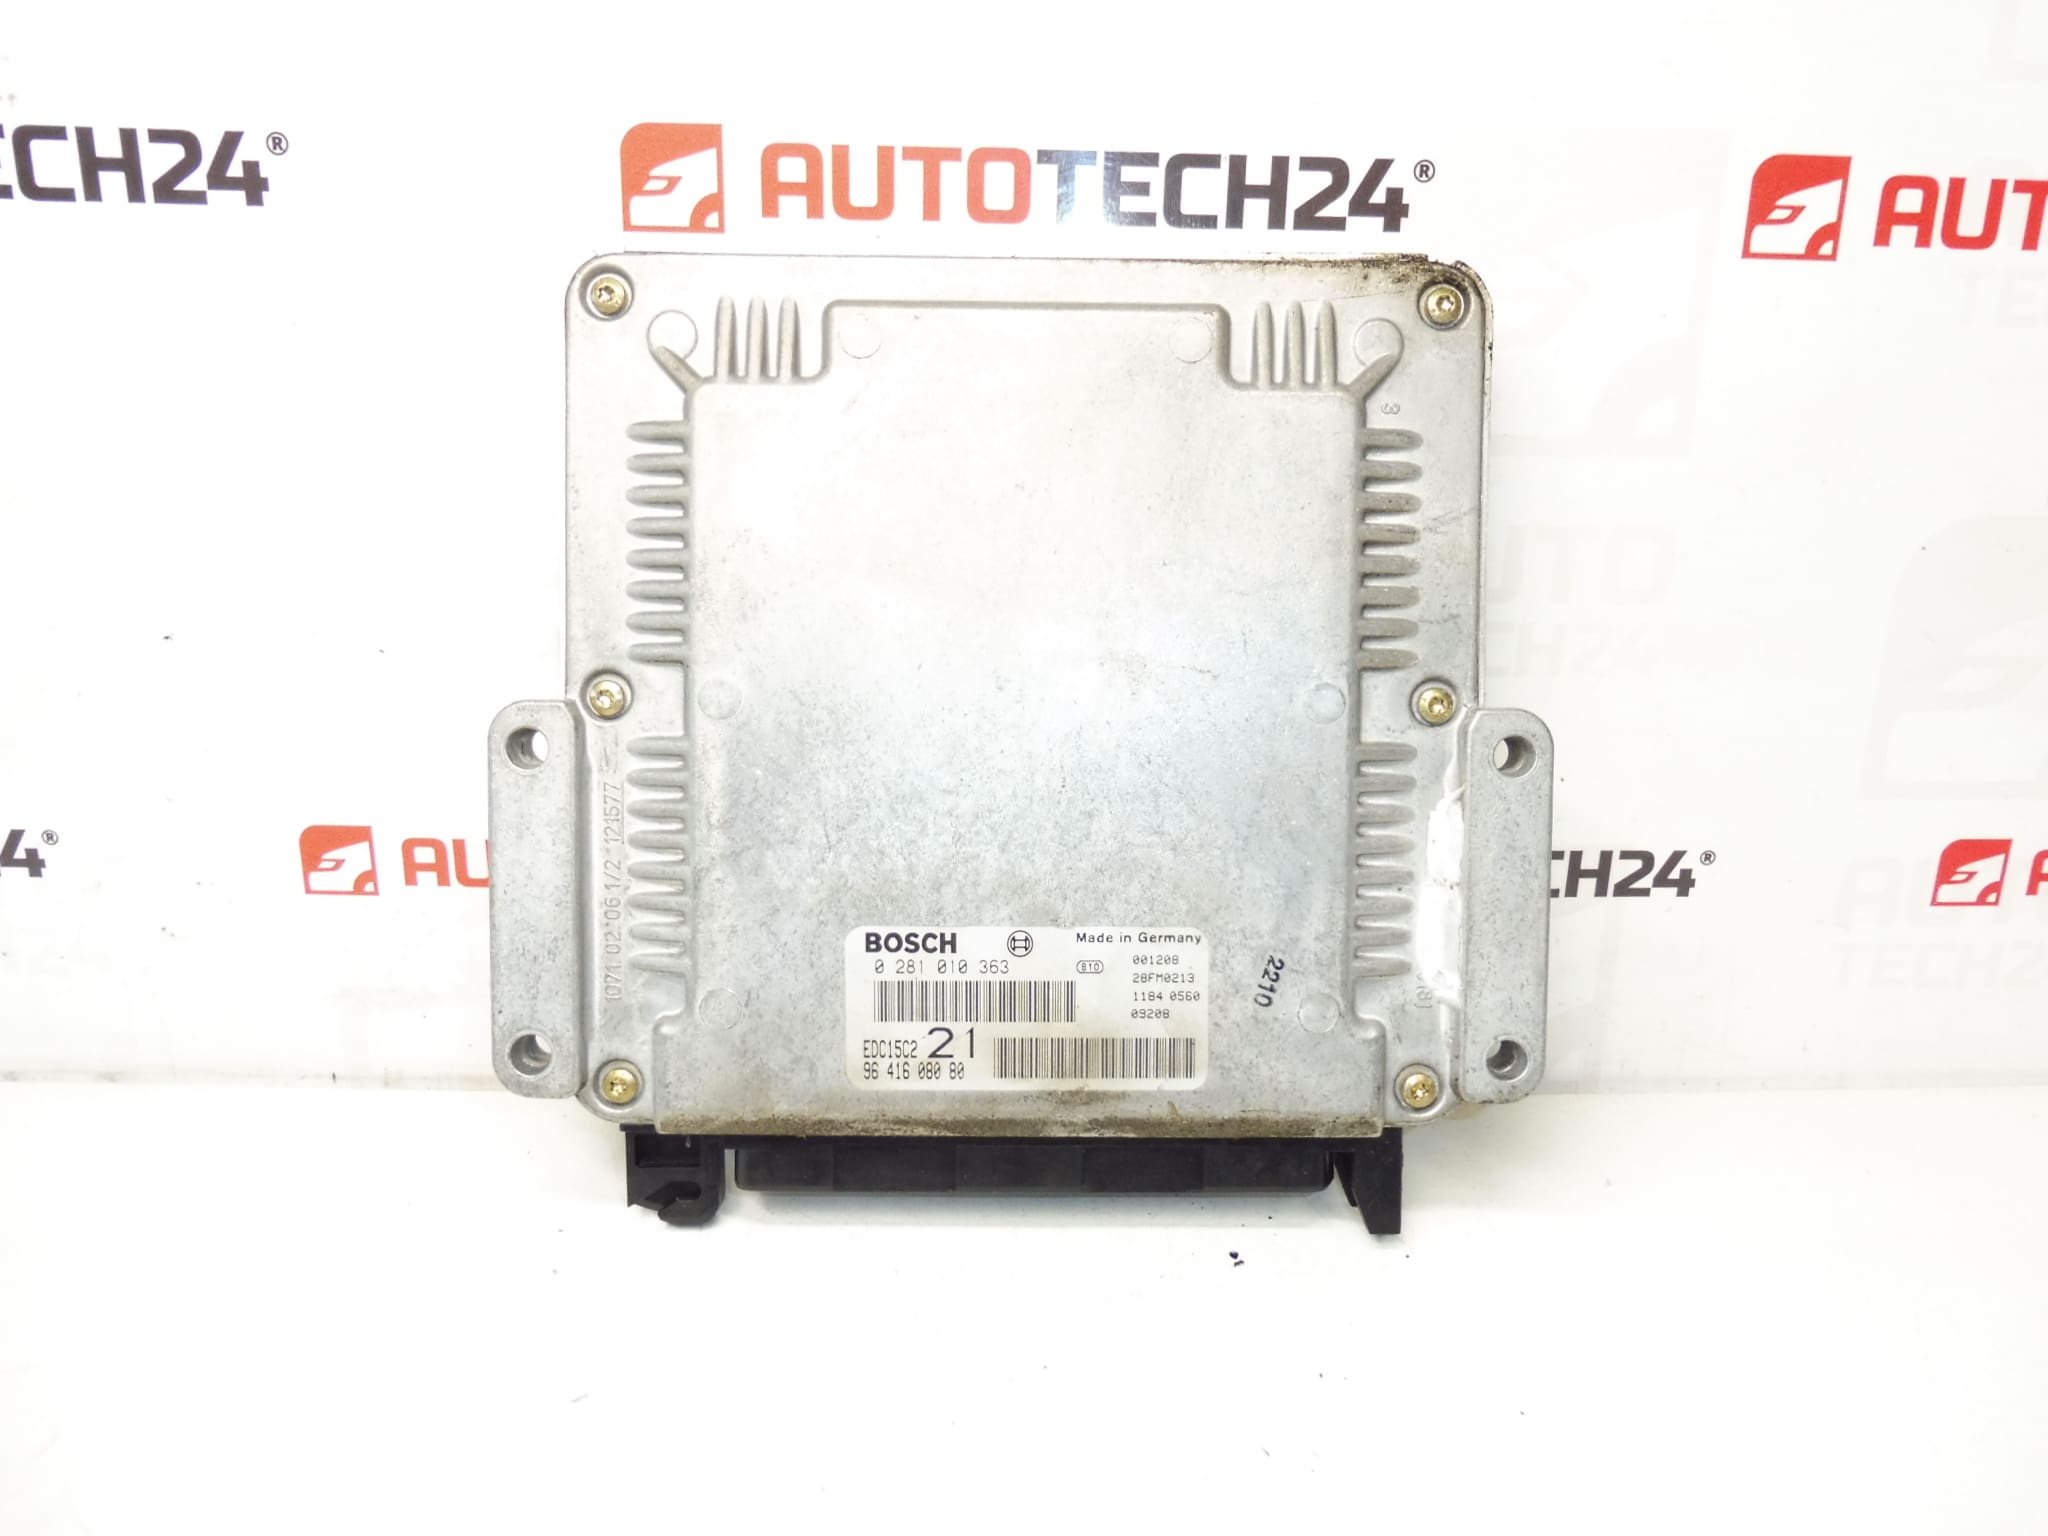
Control unit injected BOSCH EDC15C2 from PEUGEOT 406 2.0 HDI RHZ
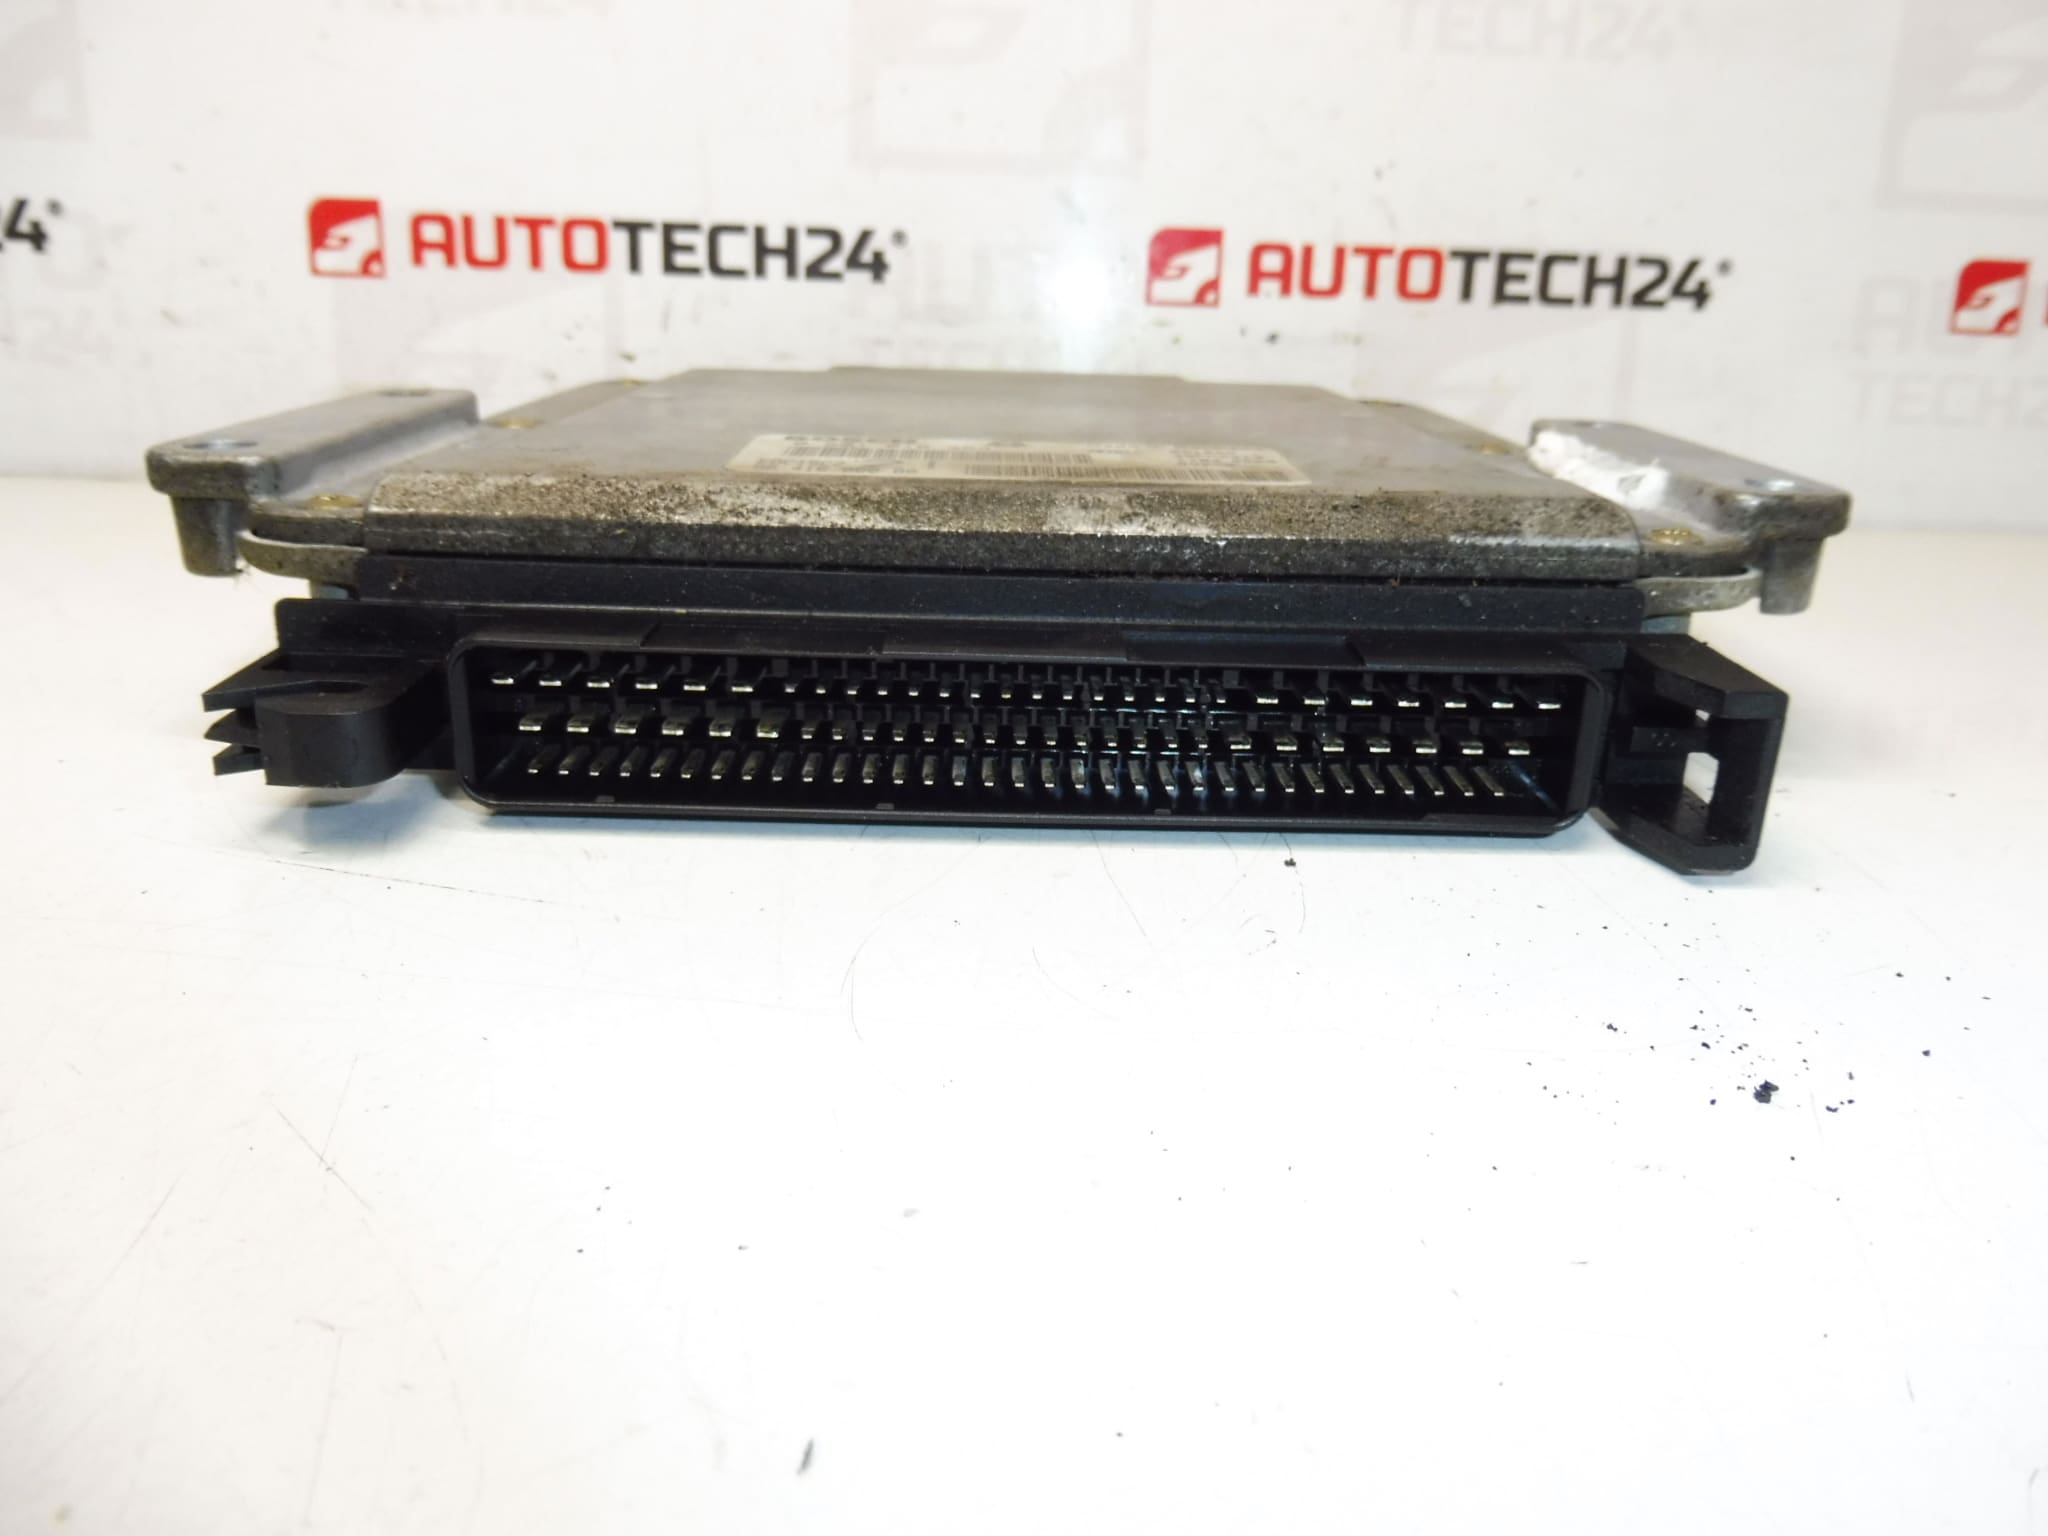
Part description
This Bosch EDC15C2 injection control unit is a used original car part intended for Citroën and Peugeot cars, and according to the documents supplied, it comes from a Peugeot 406 2.0 HDI RHZ car. It is an important electronic component of engine management, which ensures control of fuel injection and cooperation with other car systems.
The part is often searched by production and order numbers, so the codes 0281010363, 9641608080 and 1938S4 are especially important for easy tracking. In the range of used car parts, this type of ECU is an interesting choice for the repair of the original vehicle, if you are looking for a matching original unit with the same designation.
Technical information
- Manufacturer: Bosch
- Model: EDC15C2
- Other numbers: 0281010363, 9641608080, 1938S4, 1940N4, 1940N6, NFP
Product codes
- Product codes: 0281010363, 9641608080, 1938S4, 1940N4, 1940N6
- Models listed in the documents: Peugeot 406
Installation recommendations
This part is an injection control unit. The exact assembly procedure may vary according to the specific car design, so below we present a combination of information from the documents and general practice typical for this type of part.
1) Before assembly
- Check that all important markings on the original and new unit match, especially Bosch EDC15C2, 0281010363, 9641608080 and 1938S4.
- Check the condition of the connectors, pins and body of the unit. The absence of corrosion, cracks, traces of moisture or mechanical damage is important.
- Compare the mounting, type of connectors and overall design with the old piece.
- Before any handling, disconnect the vehicle battery and proceed with caution to protect the electronics.
2) Necessary tools and materials
- regular set of hand tools
- screwdrivers and socket wrenches according to the type of attachment
- cleaning agent for electrical contacts
- clean lint-free cloth
- diagnostic equipment suitable for PSA cars if initialization or other electronic operations are needed
3) Step-by-step assembly procedure
- Turn off the ignition, remove the key and leave the vehicle in idle mode.
- Disconnect the battery.
- Access the control unit according to the design of the specific car.
- Carefully disconnect the electrical connectors from the old unit without force and without damaging the latches.
- Remove the original unit from the bracket or mount.
- Compare the old and new part by label, connectors and attachment points.
- If necessary, gently clean the connectors and check that they are not oxidized or loose.
- Mount the used unit in place and seat it correctly in the holder.
- Connect the connectors so that they are fully seated and secured.
- Reconnect the battery.
- Perform a basic check of the unit’s communication with the vehicle using appropriate diagnostics.
- Verify engine function and complete any necessary car-specific customizations.
-
4) Post-assembly checks and test drive/function verification
- Check that the unit is communicating with diagnostics and that there are no obvious power or communication faults.
- Verify correct starting and basic engine operation.
- Watch for engine irregularities or communication failures.
- After a short test drive, visually check the connectors and fixings of the unit again.
5) The most common assembly mistakes + how to avoid them
- Unit replacement by incomplete number – always compare all available designations.
- Connecting or disconnecting with the battery connected – there is a risk of damage to the electronics, so always disconnect the battery first.
- Damage to connectors and latches – release connectors carefully and without brute force.
- Underestimation of the condition of the contacts – oxidation or dirt can cause poor communication or malfunctions.
- Omission of the diagnostic check after installation – after installation, it is advisable to check the correct functioning of the electronics and the engine.
Assembly and Coding – Important
- The unit is used and is “paired” with the original car (VIN/PIN/keys).
- Commissioning options:
- Cloning data from the old drive (EEPROM/Flash) – after the clone, the drive is plug and play.
- Virginization and subsequent initialization/telecoding via DiagBox (possibly online) + customization of keys.
- Recommended to be performed by an expert with PSA service equipment (DiagBox/Lexia/PP2000).
- Always disconnect the battery before disassembly/assembly and follow the manufacturer’s procedure to avoid damaging the unit.
Reasons why the part is damaged
- Moisture and corrosion – penetration of moisture into connectors or the unit can cause oxidation of contacts and communication failures.
- Surge in the electrical system – problems in the vehicle’s power supply can damage the sensitive electronics of the ECU.
- Mechanical damage – burst packaging, impacts or careless handling during disassembly and assembly.
- Damaged connectors and wiring – poor contact can cause an apparent failure of the unit itself.
- Incorrect assembly – connecting while the power is on or improper seating of the connectors can lead to the malfunction of the part.
- Age and operating load – older cars may show wear on electronic components and soldered connections.