Description
BSM R03 DELPHI for Citroën and Peugeot
This is a used part with a functionality guarantee
Damage to one of the holders is possible – it does not affect functionality
Part description
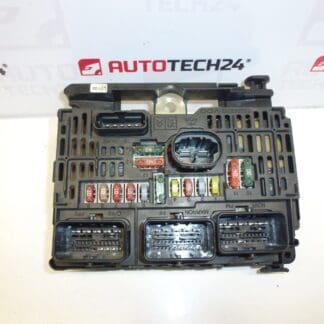
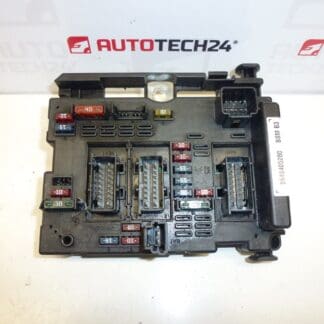
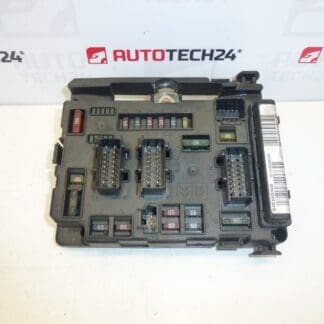
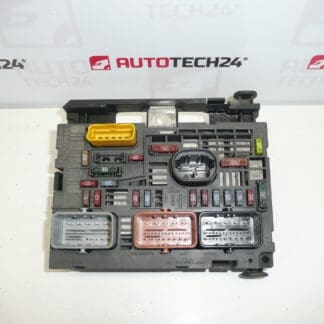
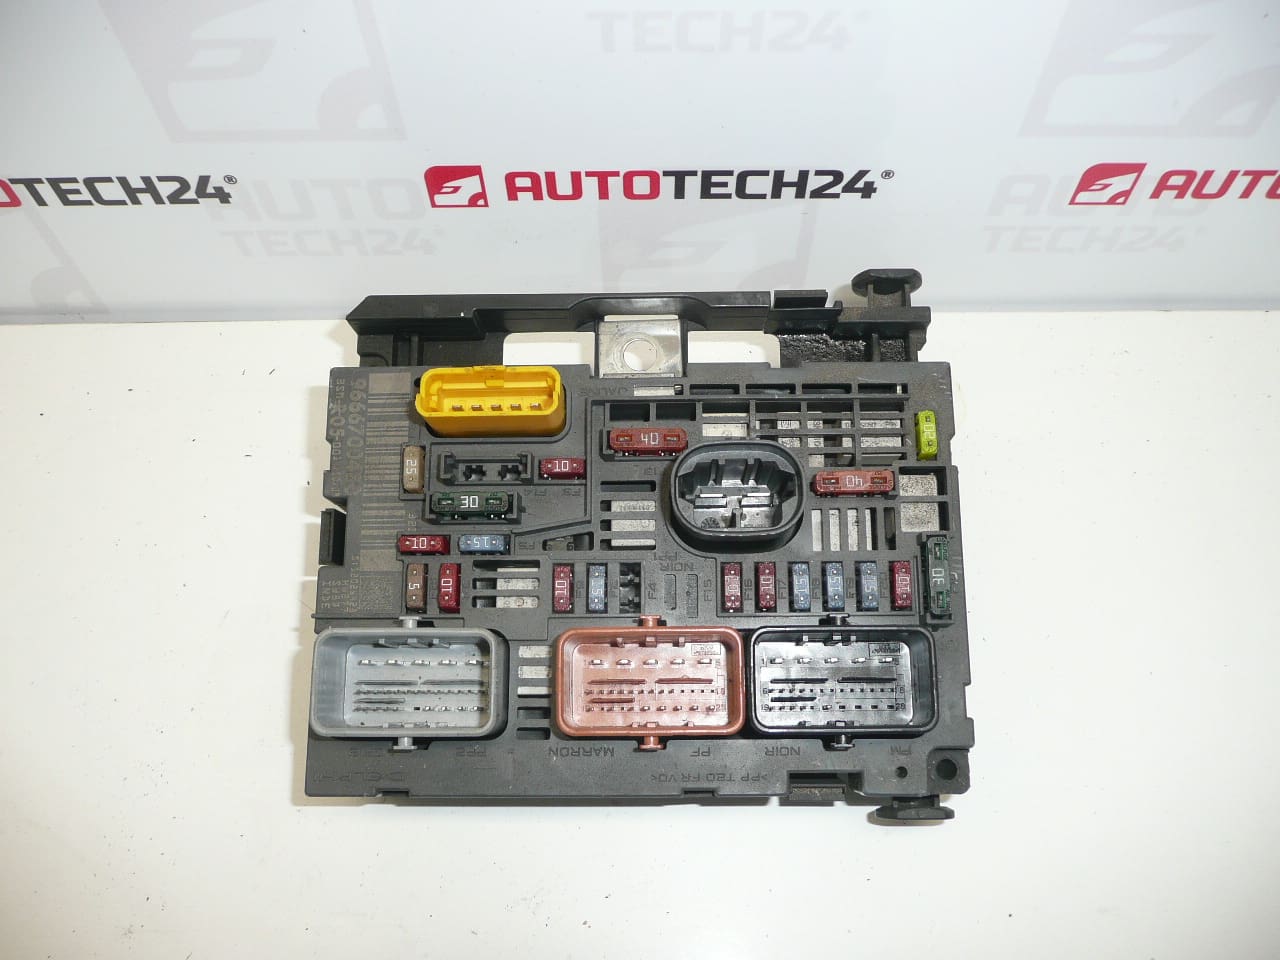
BSM R03 DELPHI is an electrical component designed for Citroën and Peugeot cars. This used car part is a suitable choice for repairs where a reasonable price and preservation of the original type of part are important. Thanks to the marking 9666700280, it can also be easily found by product number, which is especially appreciated by auto mechanics and experienced home repairmen.
The part falls into the category BSM – motor unit / electrical components / control unit. This piece states that it may have damage to one of the holders, but this does not affect functionality. When replacing, it is therefore advisable to focus not only on the correct marking, but also on the physical condition of the connectors, fuse positions and mounting.
Technical information
- Manufacturer: DELPHI
- Model: Citroën Berlingo B9, Citroën C8, Citroën Jumpy II, Peugeot 807, Peugeot Expert II, Peugeot Partner Tepee
- Other numbers: 9807028680, 9807028780
Product codes
Installation recommendations
Generally/typically for replacing a BSM unit, the exact procedure may vary depending on the specific model and make of the car. Below is a safe and practical general procedure for this type of electrical part.
1) Before assembly
- Check that the R03 designation and all available part numbers match the old piece.
- Compare the number and shape of connectors, the placement of sockets, fuses and relay positions.
- Check the condition of the contacts, whether they are oxidized, loose or mechanically damaged.
- Check the condition of the plastic body and brackets. With this part, some of the holders may be damaged, so it is advisable to check in advance whether the unit will hold firmly after seating.
- Before disassembling the original part, we recommend marking the connectors or taking photo documentation of their connection.
2) Necessary tools and materials
- regular set of hand tools
- screwdrivers and a small pry bar to carefully release the latches
- cleaning agent for electrical contacts
- protective gloves and work lighting
- or a measuring device for basic control of power supply and contacts
3) Step-by-step assembly procedure
- Park the vehicle in a safe place, turn off the ignition and wait for the electrical system to calm down.
- Disconnect the battery according to normal service practice for vehicle electrical work.
- Access the original BSM unit so that the connectors and mountings can be handled safely.
- Get an overview of the connectors, or mark them for error-free reassembly.
- Carefully disconnect the individual connectors. Do not use brute force and release the fuses or latches of the connectors first.
- Remove the original unit from its mount and inspect the surroundings for dirt, moisture or signs of overheating.
- Compare the old and new part side by side, especially the markings, connector layout and mechanical design.
- If the contact surfaces are dirty, gently clean them with a suitable preparation for electrical contacts and let them dry.
- Place the replacement BSM unit in place and check that it is properly seated in the holders or mounts.
- Plug all connectors back in the correct order, making sure they are fully seated and secure.
- Reconnect the battery.
- Perform a basic check of the powered circuits and verify that there are no obvious signs of failure.
-
4) Post-assembly checks and test drive/function verification
- Check that the unit is firmly seated and no connector is loose.
- Verify the basic functions of the electrical circuits that typically pass through the BSM.
- Watch for overheating odors, power outages, or erratic electrical behavior.
- After a short run, visually check the seat of the part and the connectors again.
5) The most common assembly mistakes + how to avoid them
- Exchanging a part by an incomplete number – always compare the full designation and other numbers.
- Damage to the connectors during disassembly – unlock the connectors first and do not pull on the wiring.
- Assembly without contact oxidation control – before installation, check and, if necessary, clean the contact points.
- Insufficient seating of the unit – after assembly, verify that the part is firmly held even in case of minor damage to one of the holders.
- Working under voltage – when handling an electrical part, always proceed with the battery disconnected.
Reasons why the part is damaged
- long-term thermal stress in the engine compartment
- moisture, oxidation of contacts and ingress of dirt
- voltage fluctuations or problems in the electrical installation of the vehicle
- mechanical damage during previous disassembly or assembly
- looseness or cracking of plastic holders due to the age of the material