Description
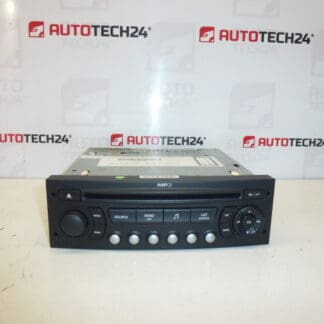
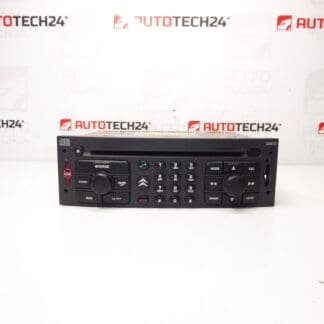
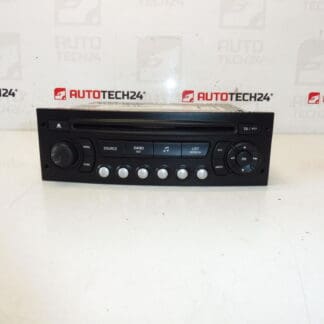
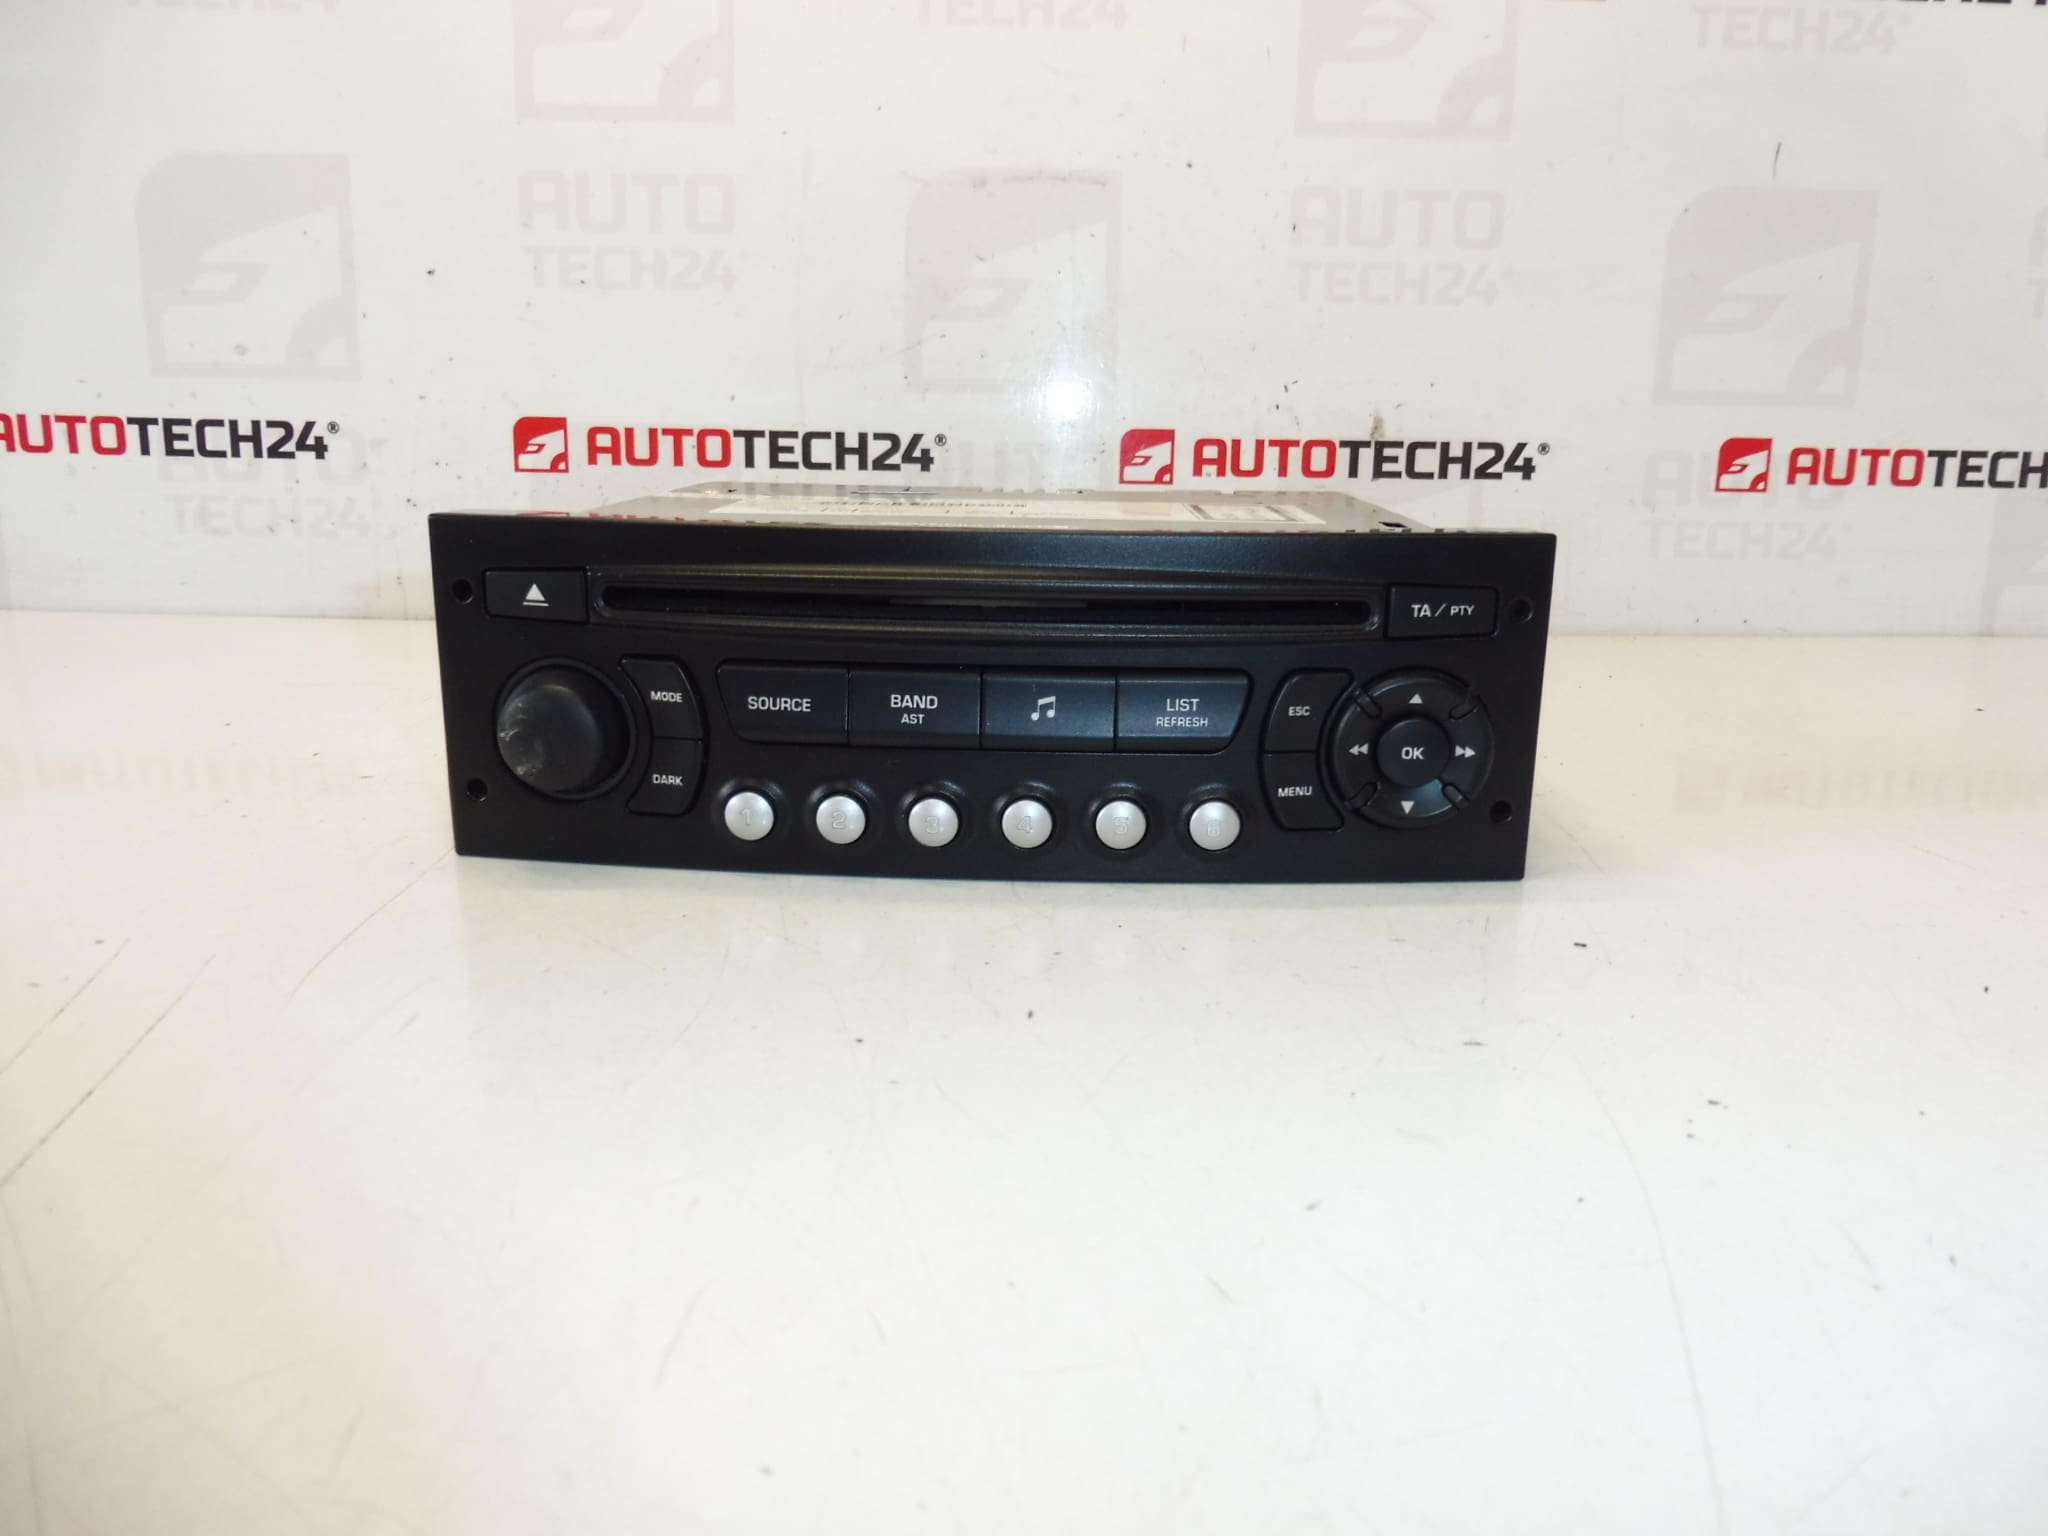
BLAUPUNKT RD4 CD Car Radio For Citroën And Peugeot Vehicles. The Radio Must Be Paired To The Vehicle Using Diagnostic Equipment.
Replace Your Vehicle’s Original RD4 Head Unit With A Direct-Fit Blaupunkt RD4 CD Radio (OE-Fit For Citroën/Peugeot). This unit Is A Robust Option For Workshops And Experienced DIYers Looking For An OEM-Style Replacement: It Provides Reliable Radio Reception And CD Playback In Vehicles Where The RD4 Standard Was Factory-Fitted. Ideal For Mechanics Searching By Part Number (9664769677, 657932, 6579PC, N1-02), The Unit Integrates With Original Wiring Harnesses And Preserves Factory Aesthetics When Properly Installed And Coded.
Technical Information
Manufacturer: Blaupunkt / Stellantis (Original Equipment)
Model: RD4 N1-02 (CD)
Product Codes: 9664769677
Other Numbers: 657932, 6579PC, N1-02
Compatible Models
Citroën Berlingo (B9), Citroën C2, Citroën C3, Citroën C3 Picasso, Citroën C3 Pluriel, Citroën C4, Citroën C8, Peugeot 207, Peugeot 307 II, Peugeot 807, Peugeot Partner Tepee.
Function And Typical Faults
The RD4 Head Unit Provides AM/FM Radio Reception And CD Playback With Integration Into The Vehicle’s Electrical System. Common Failure Modes Include Faulty CD Mechanism (Mechanical Wear Or Jamming), Display Or Button Malfunctions Due To Age, Power Loss From Blown Fuses Or Corroded Connectors, And Software/Immobiliser Locking That Requires Diagnostic Pairing To Restore Full Functionality. Electronic Components Such As Electrolytic Capacitors May Degrade Over Time, Causing Intermittent Power Or Audio Issues.
How Often Units Fail And Why
Failures Are Most Likely In Vehicles Older Than A Decade, Especially Where Units Have Been Exposed To High Humidity, Temperature Cycles, Or Frequent Use Of The CD Mechanism. Mechanical Wear On Moving Parts (Tray/Spindle/Laser) And Connector Corrosion Are The Most Frequent Causes. Electrical Faults Caused By Poor Grounding Or Aftermarket Modifications Can Also Lead To Unit Malfunction.
How To Replace
1. Disconnect The Negative Terminal Of The Battery Before Starting Work To Avoid Short Circuits Or Data Loss.
2. Remove Surrounding Trim Panels Carefully Using Plastic Trim Tools To Avoid Damage.
3. Unscrew The Factory Head Unit Fasteners And Slide The Unit Out Gently.
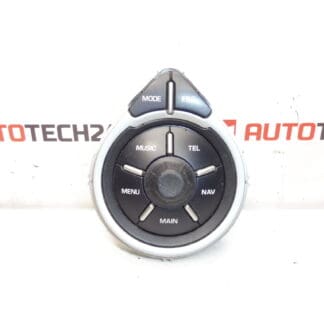
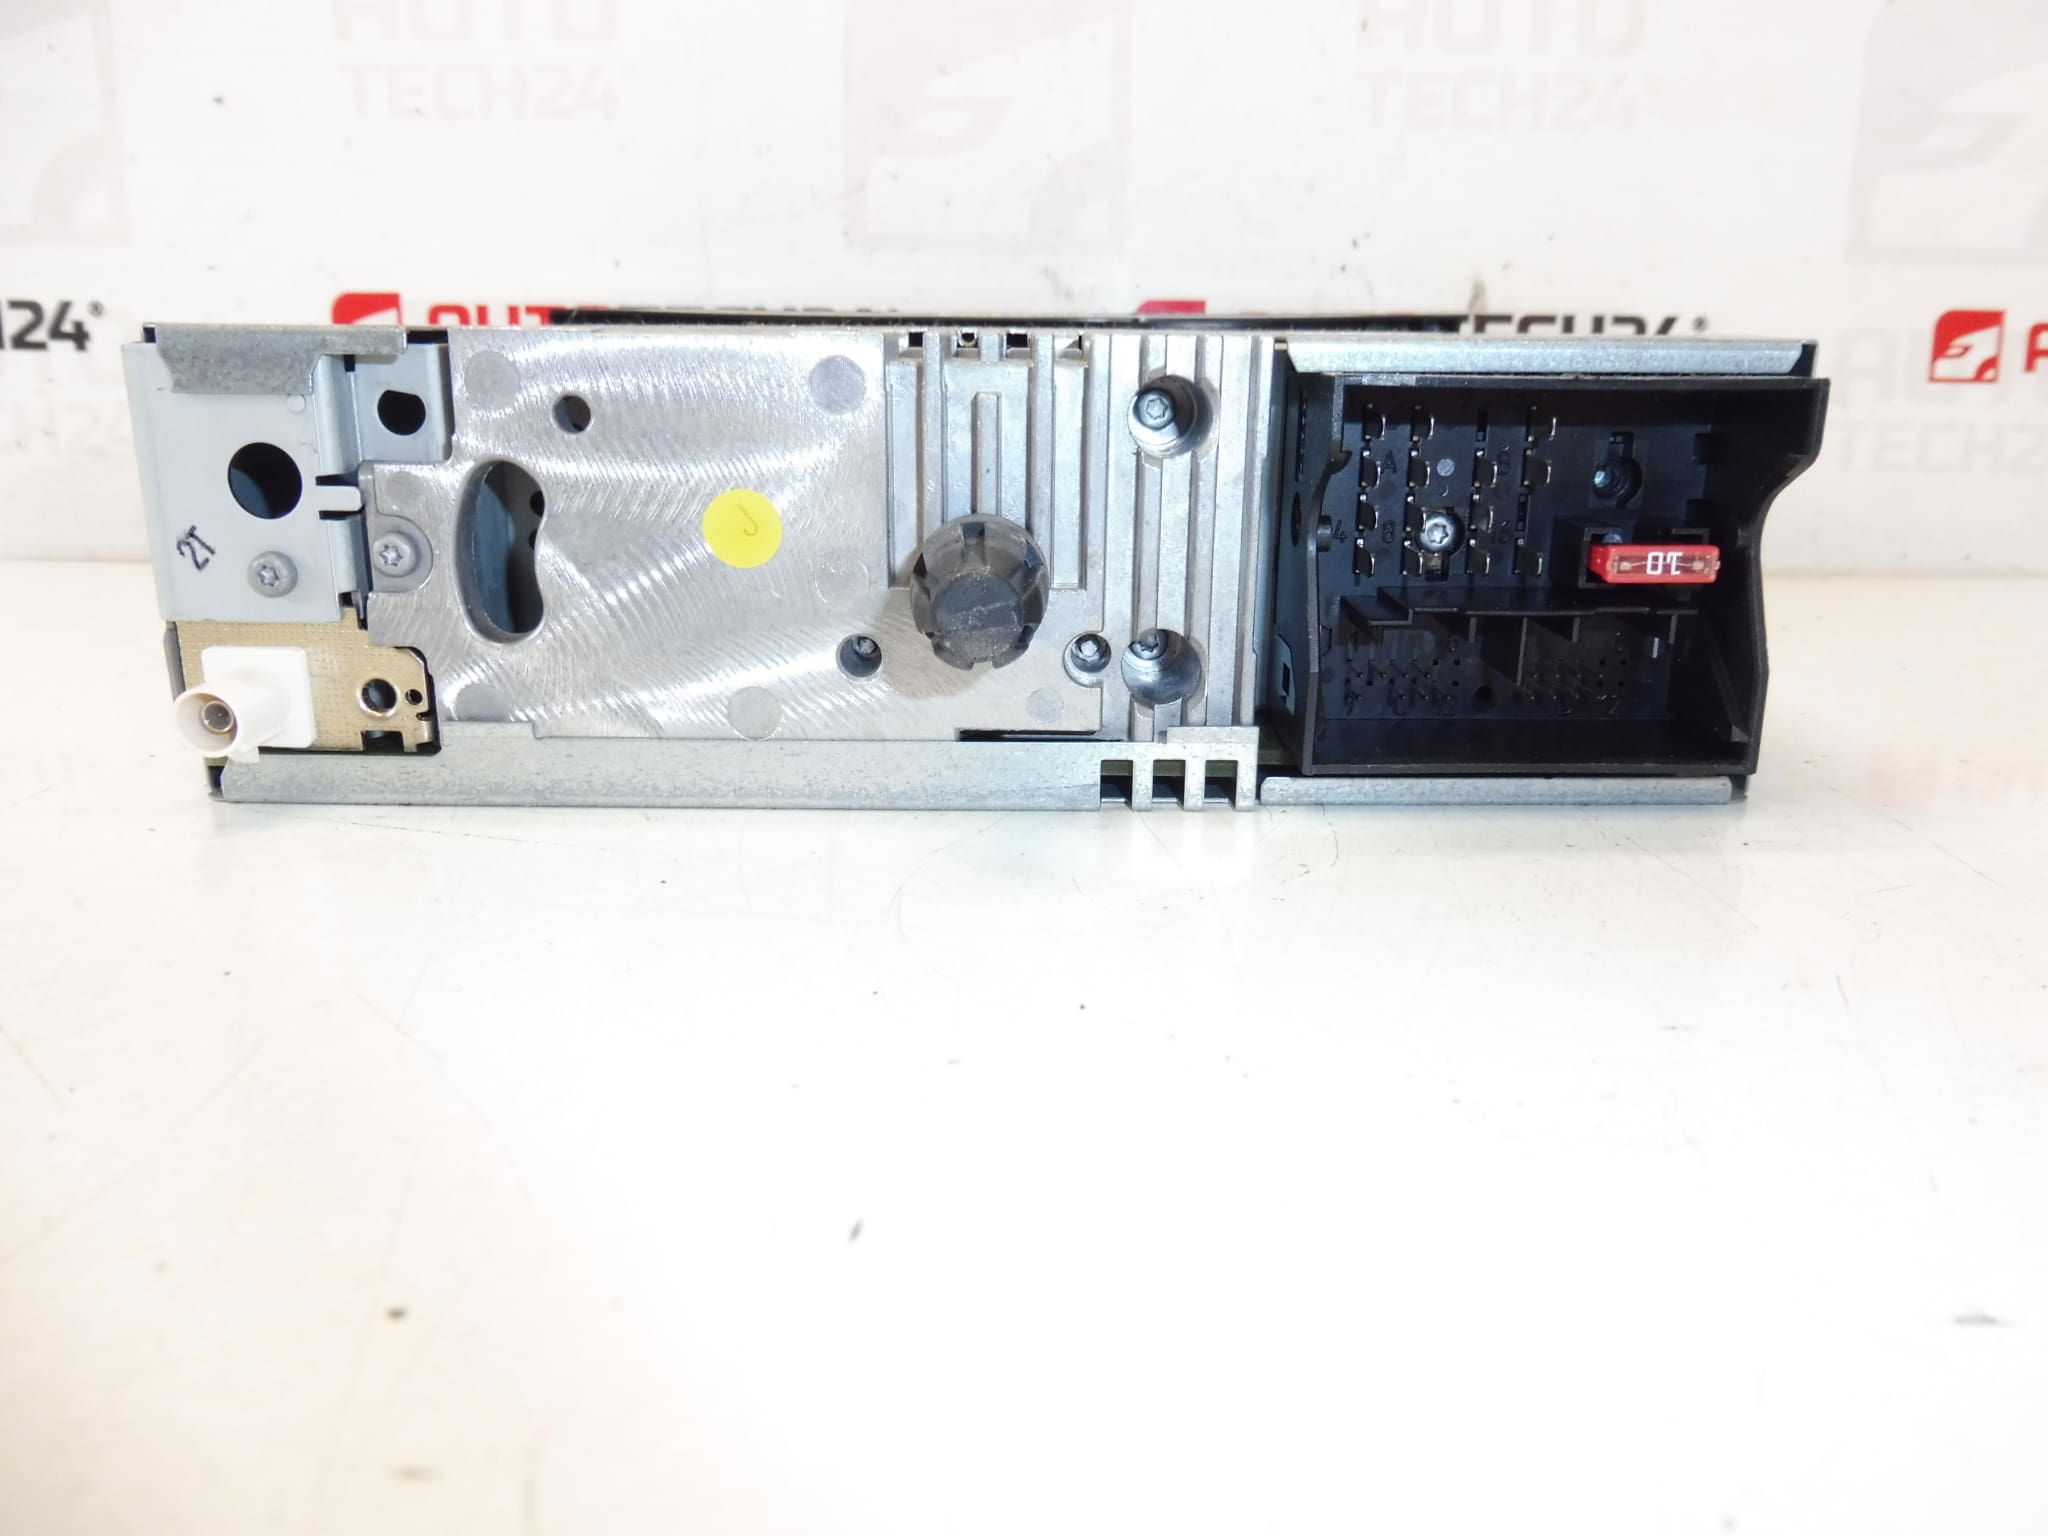
4. Disconnect The Antenna Cable, Wiring Harnesses, And Any Additional Connectors (Steering Wheel Control, Microphone If Present). Inspect Connectors For Corrosion Or Bent Pins.
5. Install The Replacement Unit By Reversing The Procedure: Connect Harnesses, Secure The Unit, Refit Trim.
Pairing And Coding
This Radio Requires Diagnostic Pairing/Coding To The Vehicle. Pairing Is Typically Performed With A Compatible PSA Diagnostic Tool (DiagBox/Lexia/PP2000) Or Equivalent Workshop Equipment To Unlock Features And Ensure Proper Communication With The Vehicle’s Bus Systems. If The Unit Is Not Coded, It May Remain Locked Or Exhibit Limited Functionality.
Installation Recommendations
Installations Should Be Performed By Experienced Technicians Or Skilled DIYers Familiar With PSA Electrical Systems. Check And Replace Any Blown Fuses Before Assuming The Radio Is Faulty. Ensure All Earth Connections Are Clean And Tight. If Retaining Steering Wheel Controls Or Other Vehicle Integrations, Verify That Adapters Or Interface Modules Are Compatible With The RD4 Standard. After Installation, Perform Diagnostic Pairing And Verify Radio, Antenna, And Control Functions.
Reason Why The Part Most Commonly Fails
The Most Common Reason For Failure Is Mechanical Wear Of The CD Mechanism And Connector Corrosion Leading To Power Or Signal Loss. Environmental Factors (Moisture, Heat), Age-Related Component Degradation, And Electrical Issues Caused By Poor Grounds Or Aftermarket Modifications Are Frequent Contributors.