Description
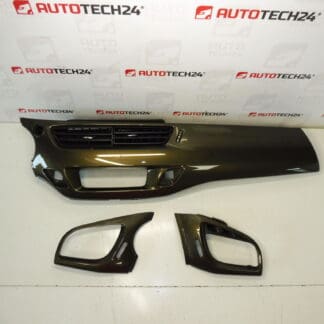
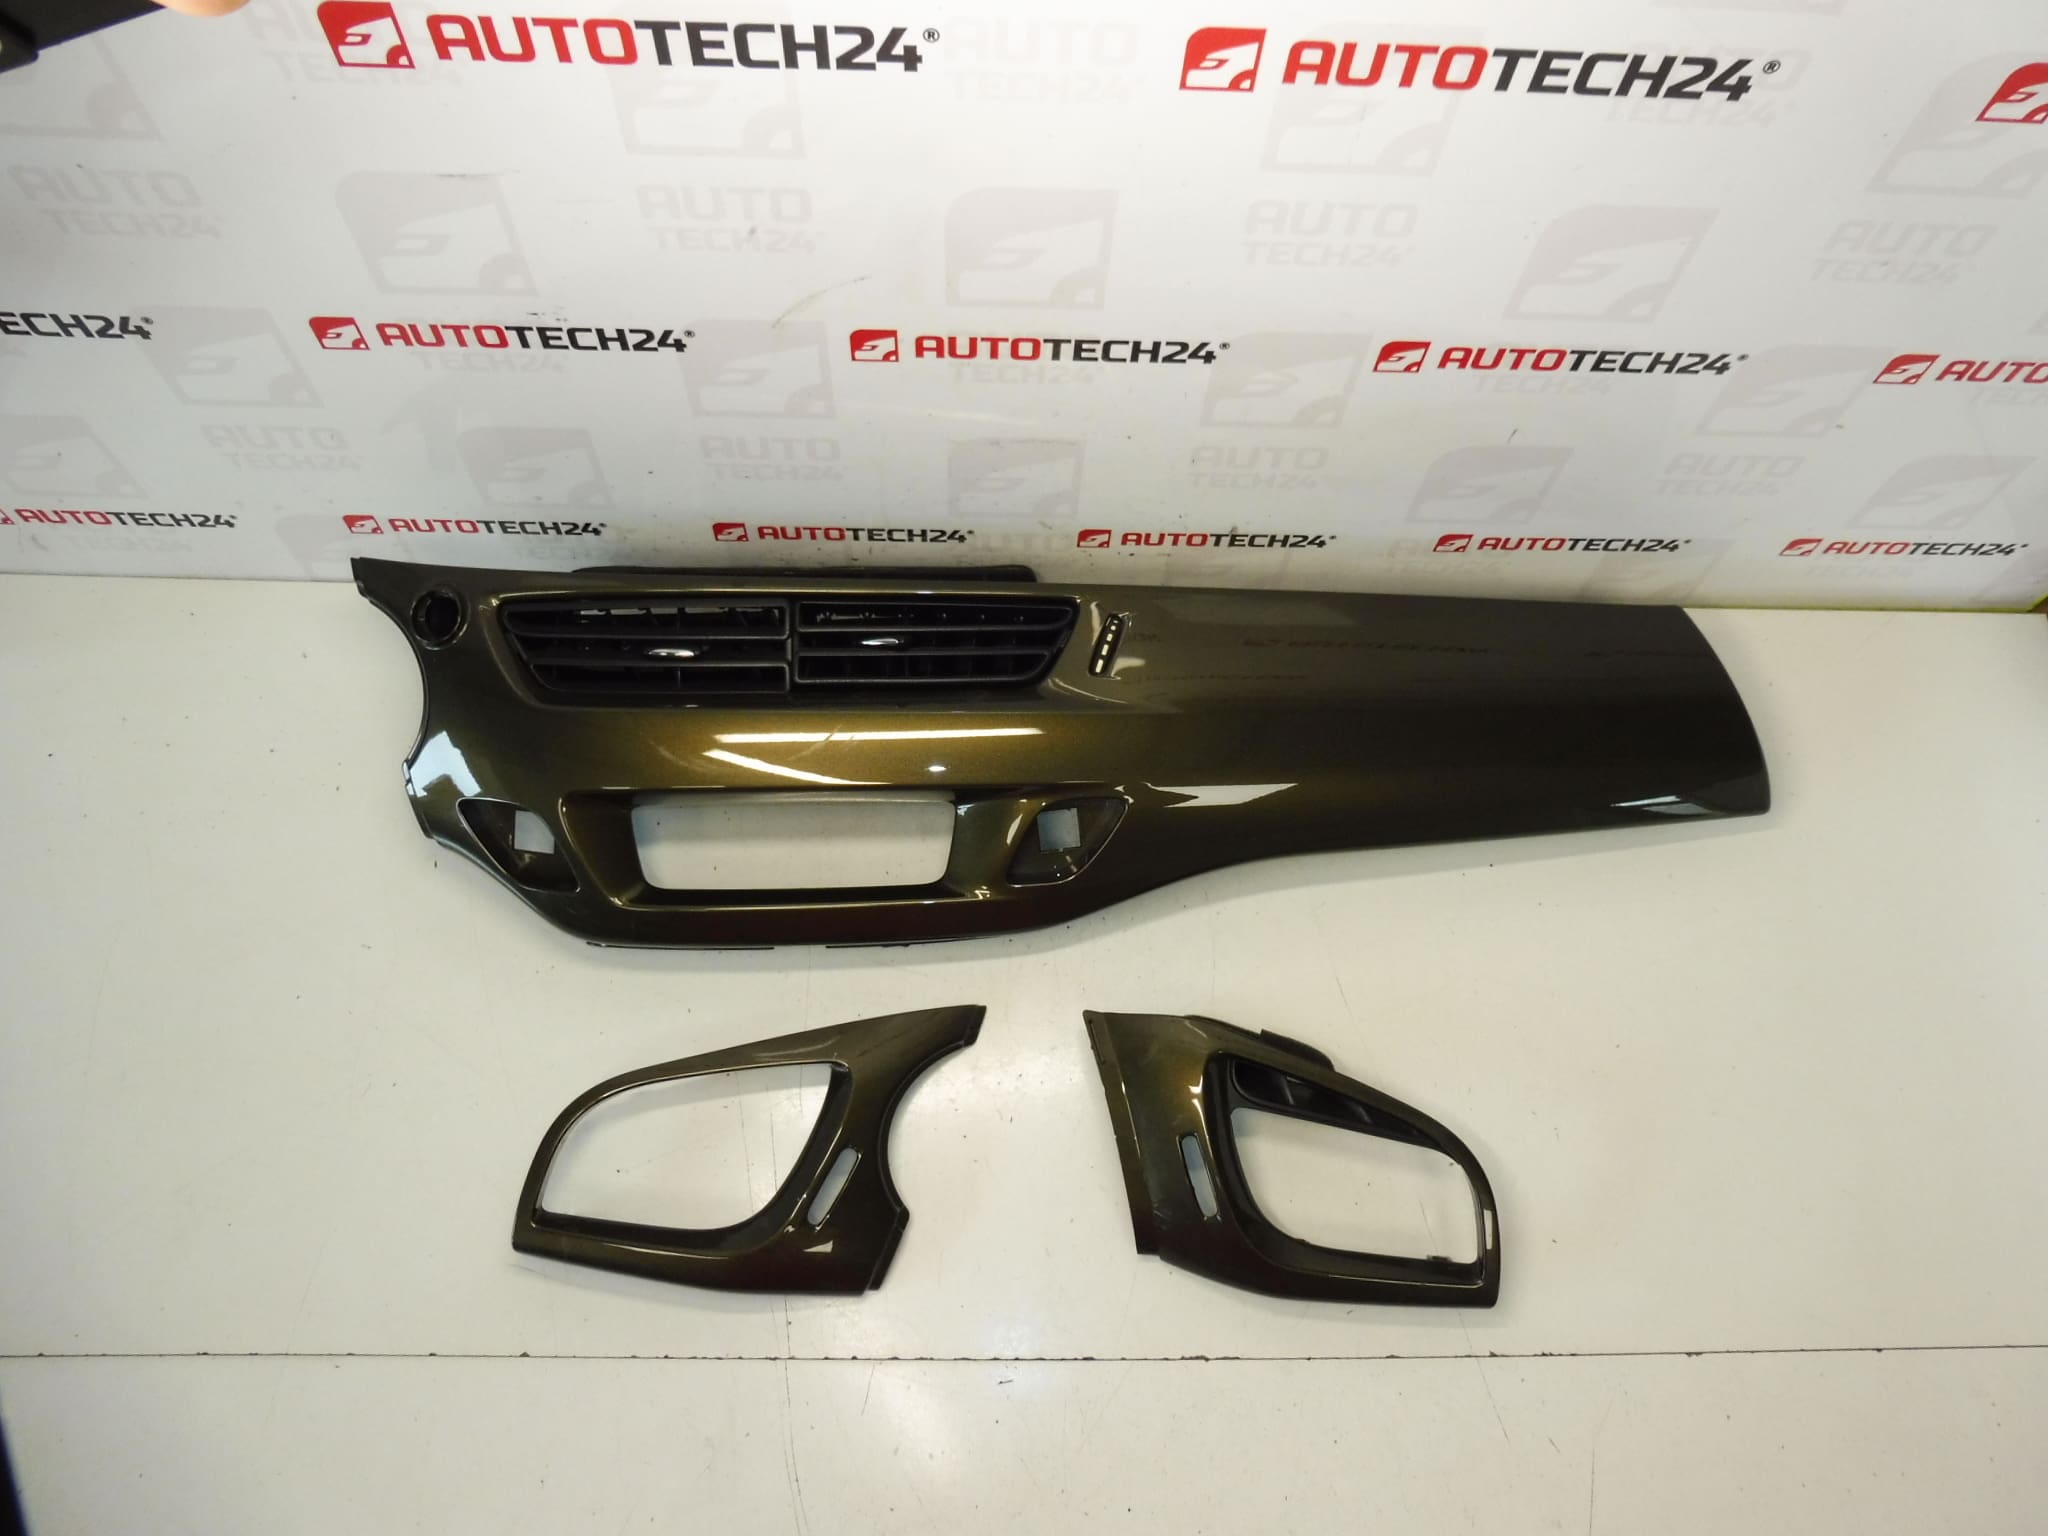
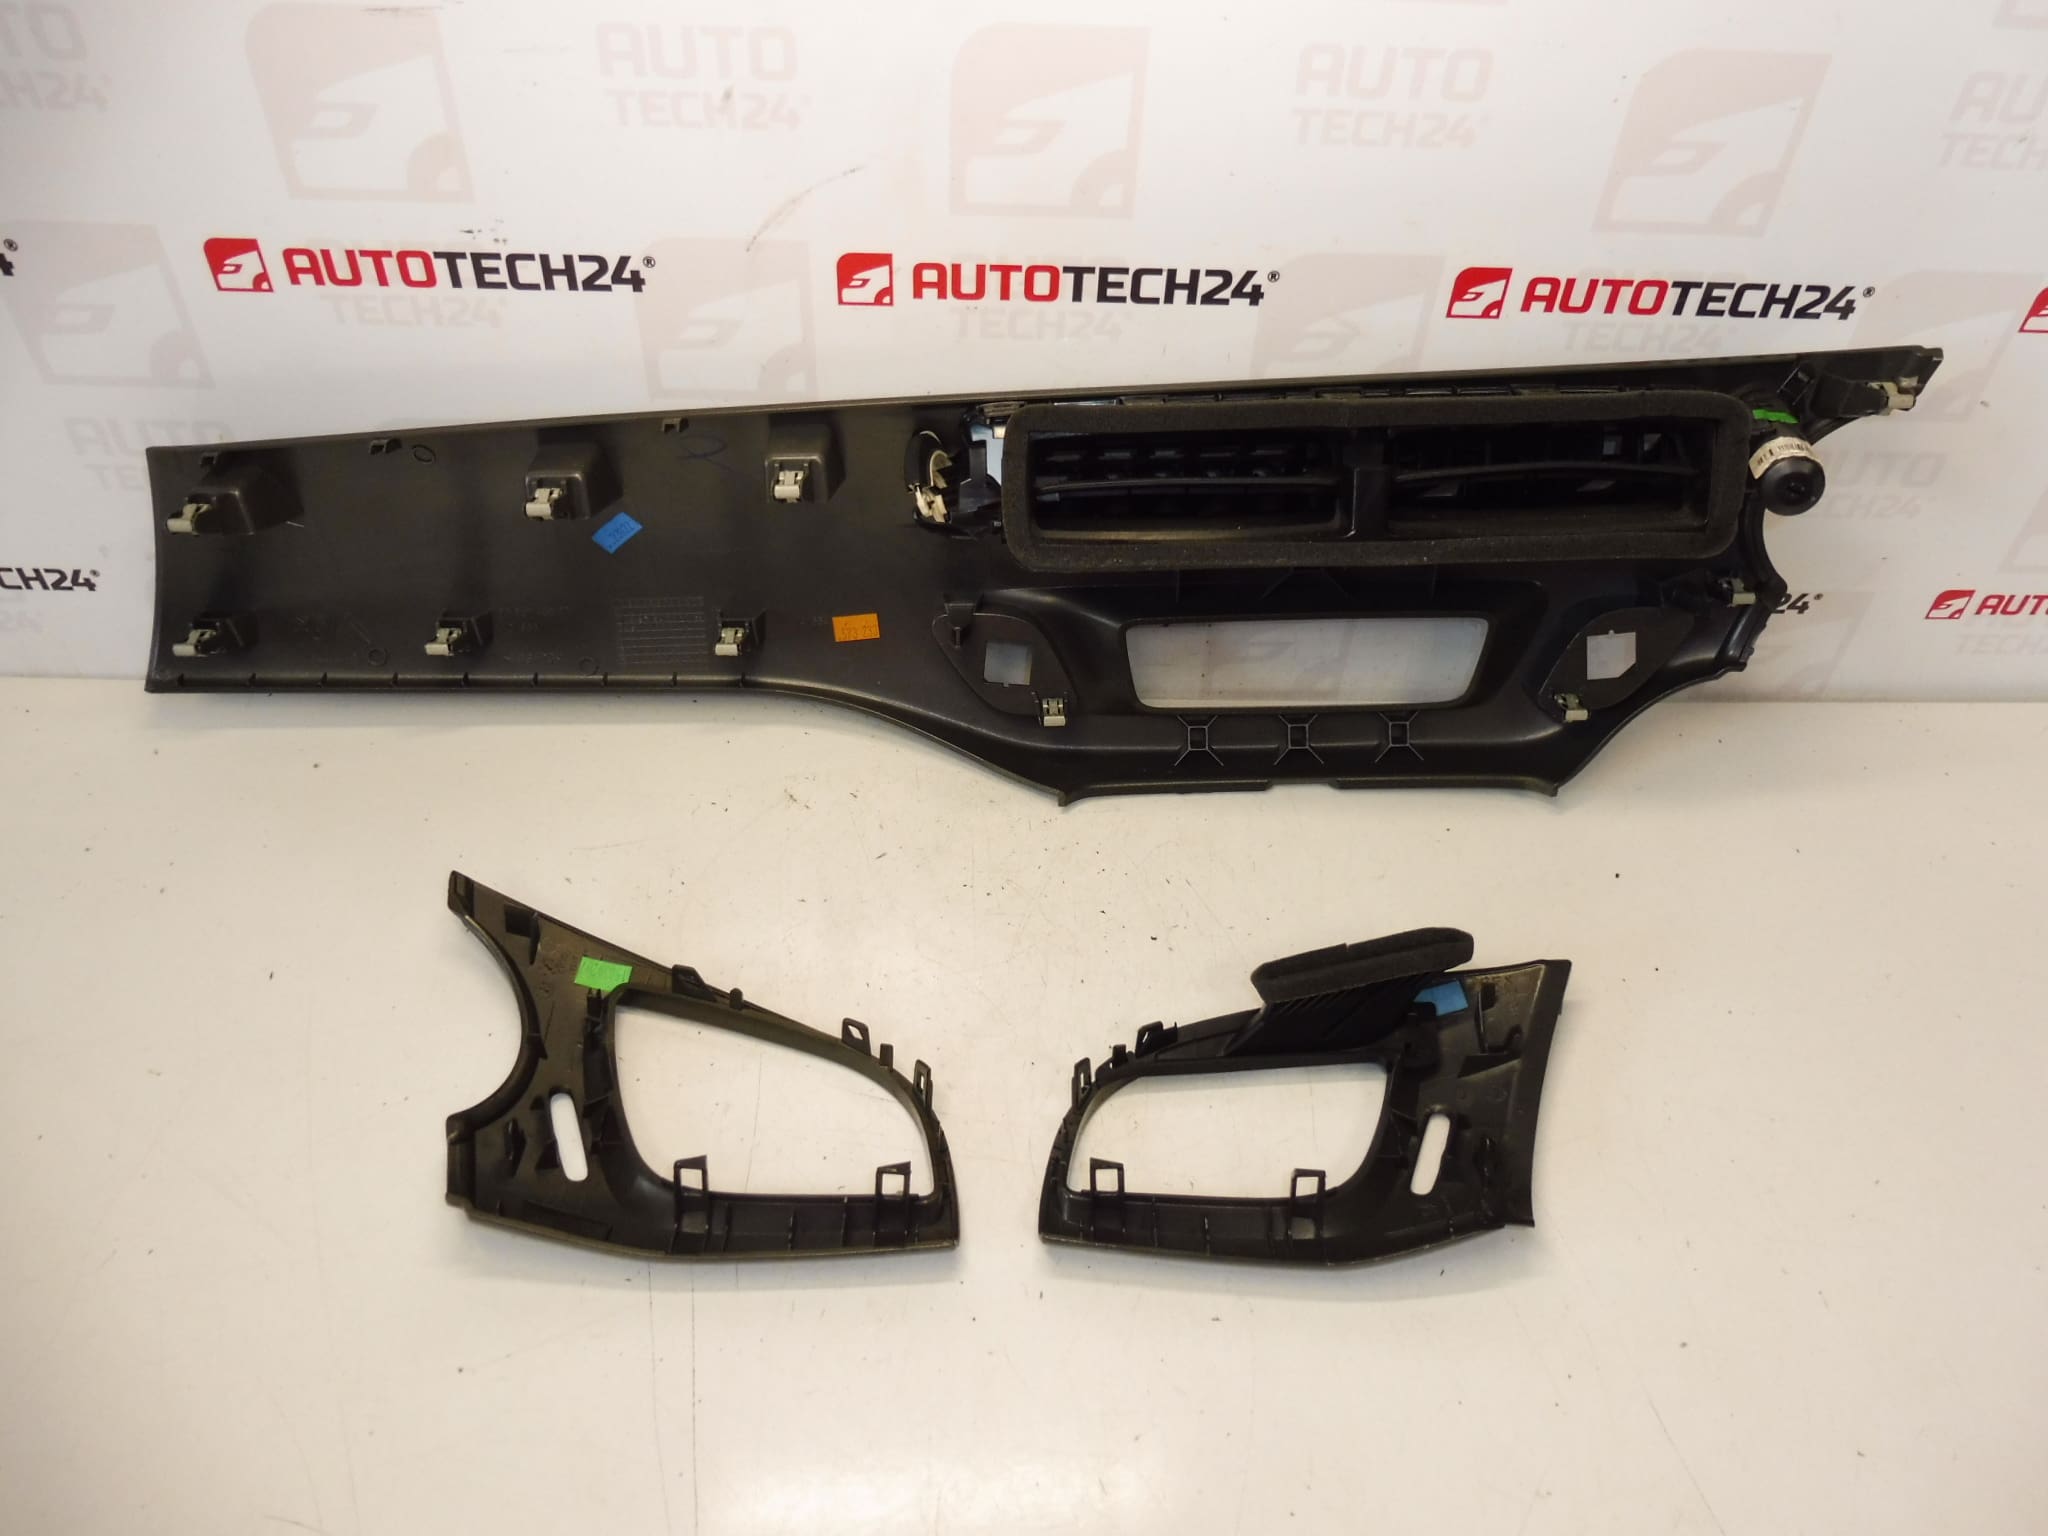
Dashboard trim kit for Citroen C3 II A51 cars
It includes the center strip of the dashboard, the decorative frames of the ventilation openings
Design KDK – HICKORY
Part description
This dashboard trim kit is designed for Citroën C3 II A51 cars and is a suitable solution for replacing damaged or worn interior parts. The set includes a central strip of the dashboard and decorative air vent frames, so it is suitable for repairing the appearance of the interior as well as for replacing cracked or worn decorative elements.
The KDK – HICKORY version matches the original style of the interior and will help preserve the original appearance of the car. Parts of this type are often searched not only by purpose, but also by serial numbers, which facilitates correct identification during repair or replacement.
Technical information
- Manufacturer: Stellantis Citroën Peugeot
- Model: Citroën C3 II A51
- Other numbers: 16070094K1, 16070095K1, 16070098K1
Product codes
- Product codes: 9685748677, 96857498ZD, 96857501ZD
- Model names: Citroën C3 II
Installation recommendations
Generally/typically, the exact disassembly and assembly procedure for dashboard interior trim parts depends on the specific design of the car and the way the individual parts are attached. Below is a practical general procedure for replacing this category of part.
1) Before assembly
- Check that the kit includes all supplied parts: dashboard center strip and decorative air vent bezels.
- Compare the new and original part by shape, color and attachment points.
- Inspect the brackets, latches, or viewing surfaces for cracks, chips, or excessive wear.
- Before assembly itself, we recommend cleaning the contact surfaces from dust and dirt.
2) Necessary tools and materials
- plastic pry bar for removing interior tiles
- ordinary hand tools according to the attachment method
- clean microfiber cloth
- gentle cleaning agent suitable for interior
- work gloves to limit scratching visible parts
3) Step-by-step assembly procedure
- Turn off the ignition and prepare a clean work space in the interior of the car.
- Carefully remove the original dashboard trim so as not to damage the surrounding plastics.
- Release the individual parts gradually and without excessive force, especially at the locations of the latches.
- After removing the original parts, check the condition of the fastening points and surrounding connected parts of the dashboard.
- Clean the mating surfaces and remove dirt that could prevent the new parts from fitting properly.
- Compare the individual parts with the disassembled pieces and verify the correct orientation during assembly.
- First place the part on a clean surface without applying force and check that all edges and grips are properly connected.
- Then place the part gradually into the individual fastening points with even pressure.
- Mount the decorative frames of the ventilation holes in the same way.
- After seating, check for gaps, misalignment, or loose part.
-
4) Post-assembly checks and function verification
- Check the tightness of all parts by pressing lightly with your hands.
- Verify that the cladding does not restrict the normal use of the surrounding interior elements.
- Check the appearance of the connections on the surrounding parts of the dashboard and the evenness of the joints.
- When driving, watch for any creaking or knocking noises coming from the area of the newly installed parts.
5) The most common assembly mistakes + how to avoid them
- Using excessive force – may cause snaps or sight parts to break. Gradual and patient assembly helps.
- Assembly without comparison with the old part – always check the shape and orientation of the individual parts before fitting.
- Impurities on the mating surfaces – can cause poor alignment or creaking. Clean the surfaces before assembly.
- Damage to decor during handling – it is recommended to work with gloves and use plastic tools instead of metal ones.
Reasons why the part is damaged