Description
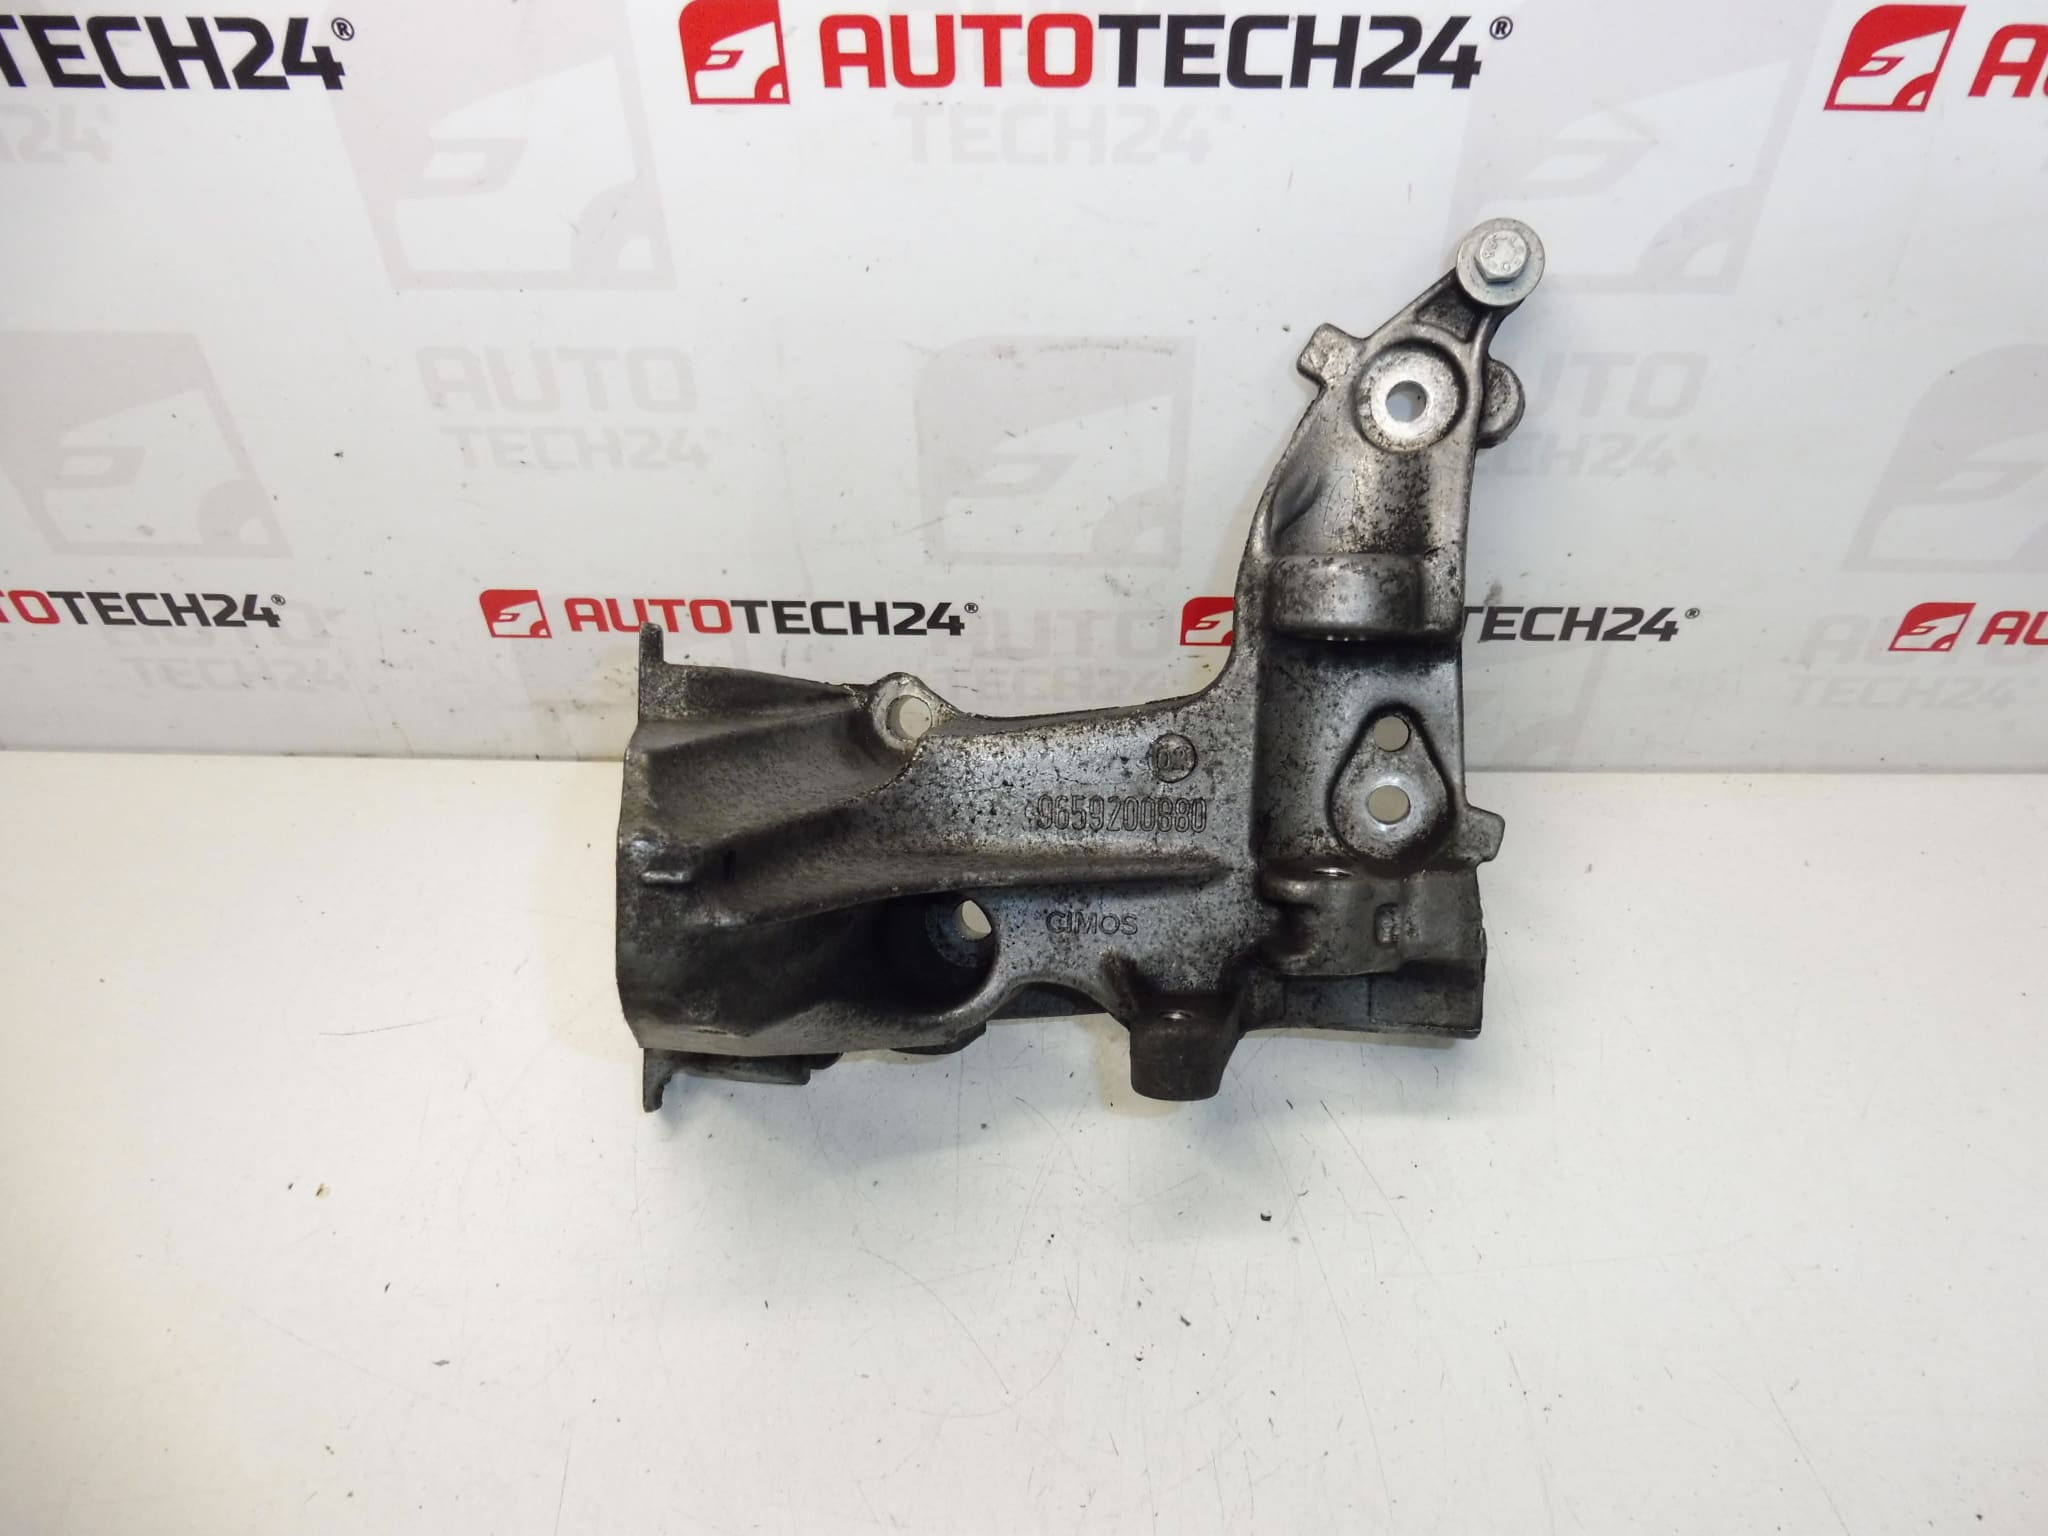
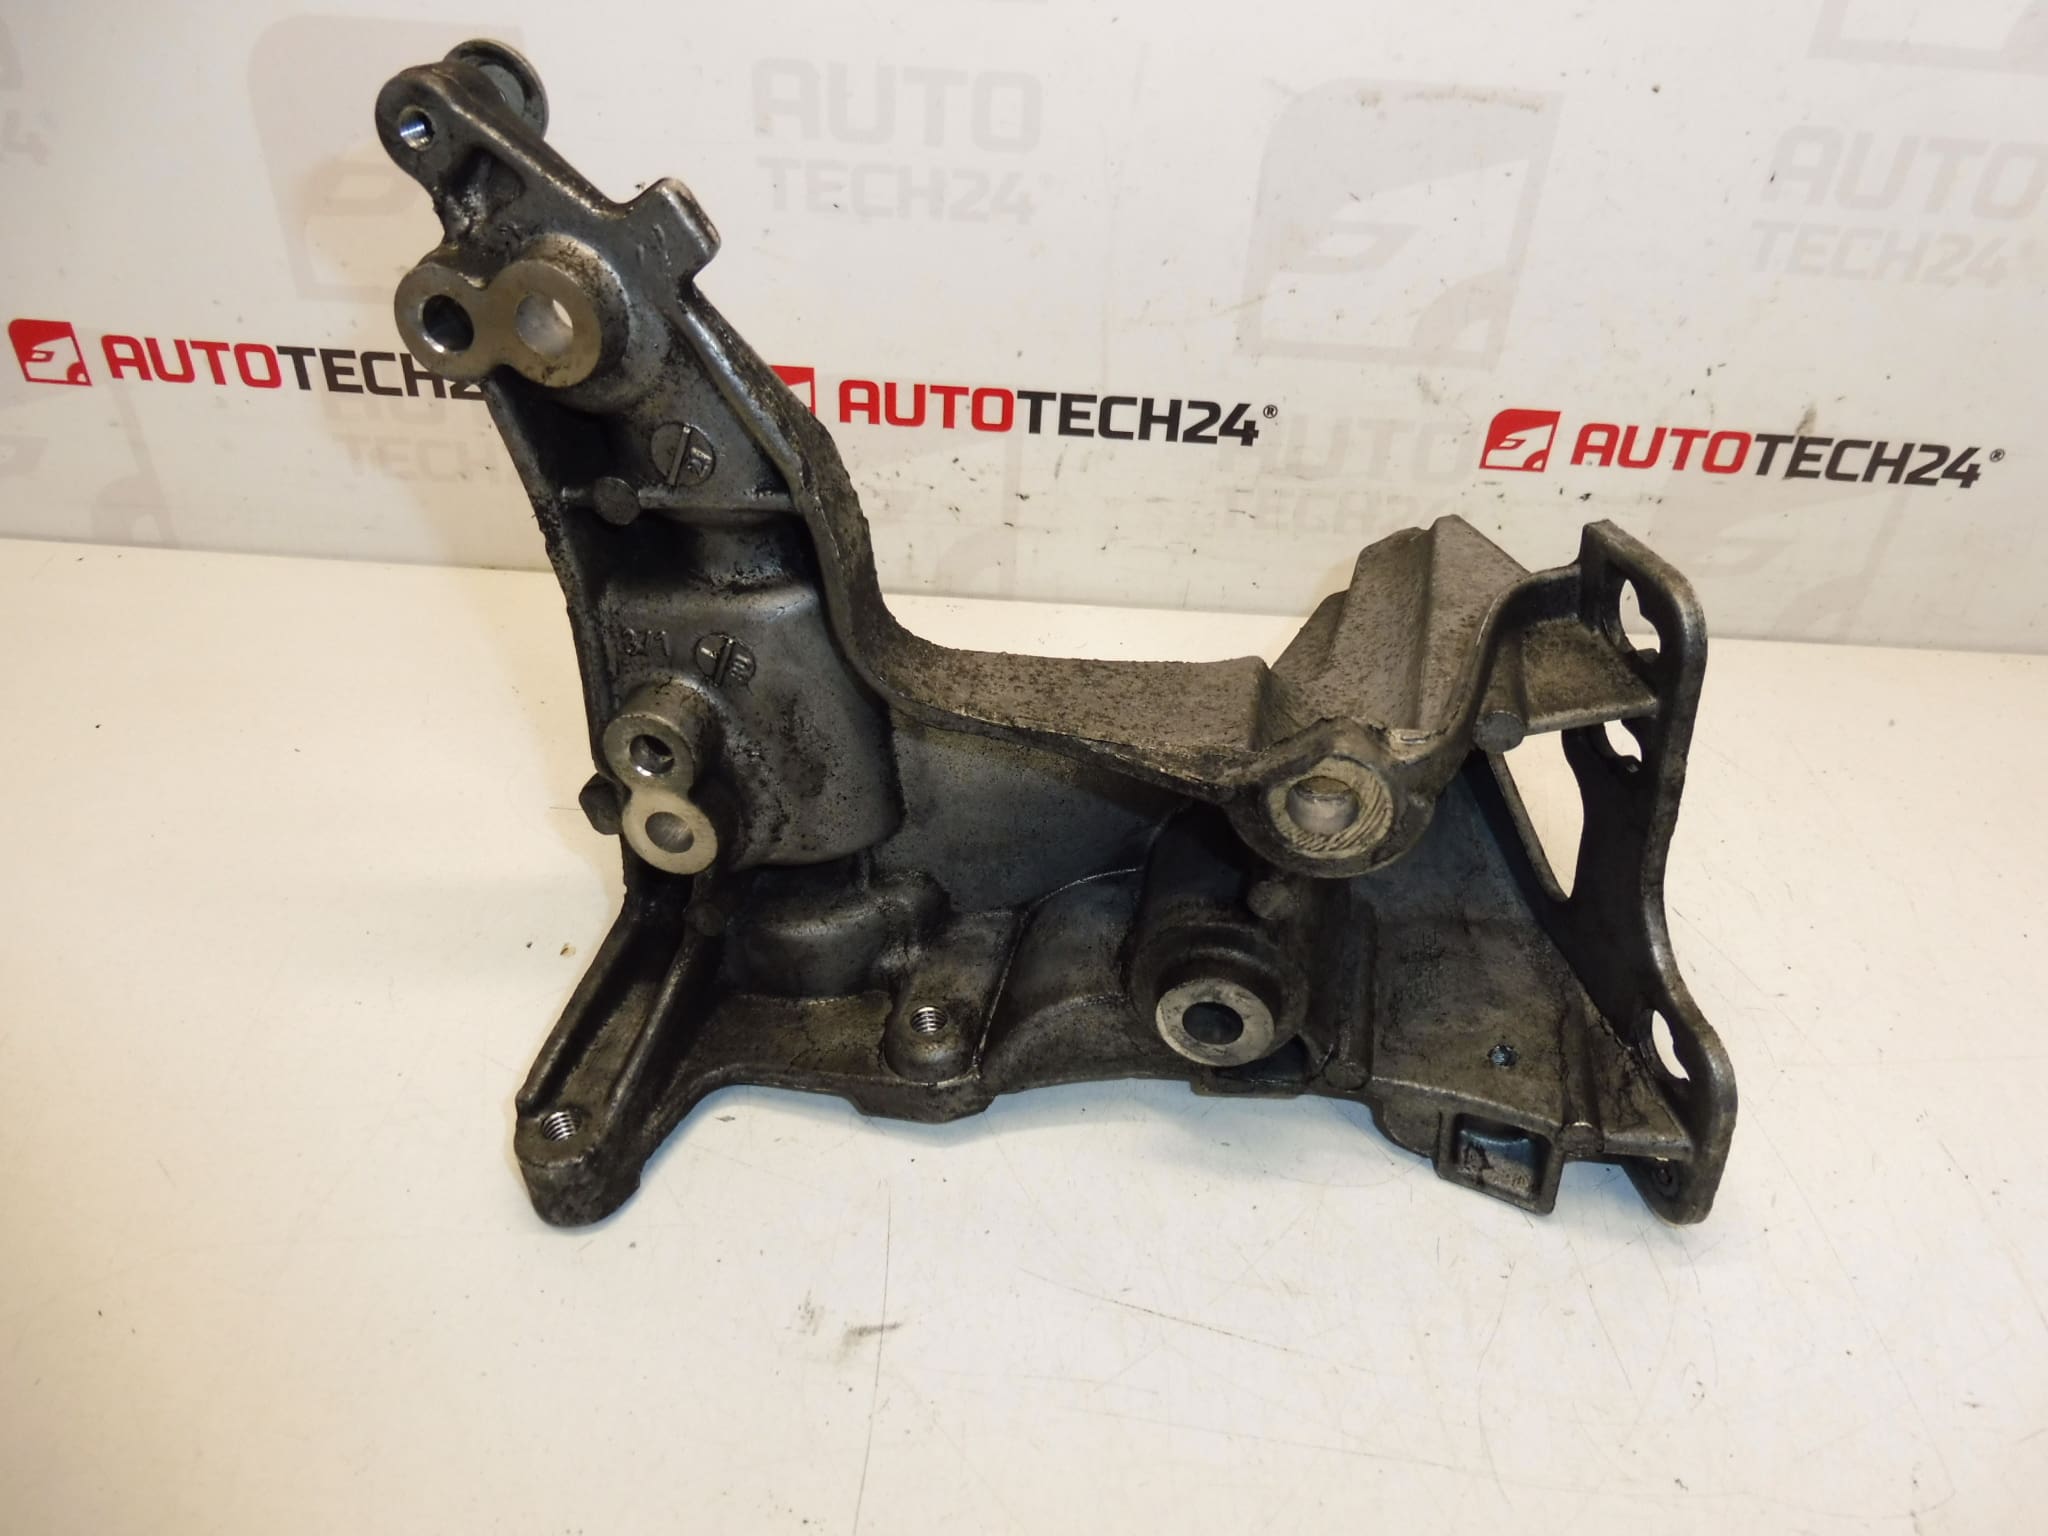
Alternator Bracket 1.6 HDi 16V For Citroën And Peugeot Vehicles
This alternator bracket is a direct-fit replacement designed for 1.6 HDi 16V engines used in various Citroën and Peugeot models. Supplied with OE references 9659200880 and 5706N6, the bracket restores correct alternator position and belt alignment, helping to eliminate belt squeal, premature belt wear and charging irregularities. Built for professional workshops and experienced DIY mechanics, this part is a practical solution when the original mounting point is corroded, cracked or otherwise damaged.
Technical Information
- Manufacturer: Stellantis (Citroën / Peugeot)
- Model: 1.6 HDi 16V – Citroën C4, Citroën C4 Picasso, Citroën C5, Citroën C5 X7, Peugeot 207, Peugeot 3008 I, Peugeot 307, Peugeot 407
- Product Codes: 9659200880, 5706N6
- Additional Numbers: NFP
Function And Benefits
The alternator bracket secures the alternator to the engine block, maintaining correct alignment with the drive belt and tensioner. A rigid, correctly positioned bracket ensures even belt tension, reduces bearing loads on the alternator and prevents vibration-related wear. Replacing a worn or damaged bracket restores optimal belt routing and charging system reliability.
How To Replace (Overview)
Replacement requires moderate mechanical skill and basic tools. Typical procedure:
- Park vehicle on level ground, engage handbrake and disconnect the negative battery terminal.
- Release belt tension via the tensioner and remove the drive belt from the alternator pulley.
- Support the alternator (jack or strap), disconnect electrical connections and the main power cable.
- Remove alternator mounting bolts and the old bracket. Transfer any spacers or bushings if present.
- Fit the new bracket, loosely install mounting bolts, align the alternator, then torque bolts to the manufacturer’s specification.
- Reinstall the drive belt, set correct belt tension, reconnect electricals and the battery, then verify charging system operation at idle and under load.
Installation Recommendation
Always follow safety procedures: disconnect the negative battery terminal before starting work and support the alternator to avoid strain on electrical connections. Inspect related components (belt, tensioner, alternator mounting bolts, electrical terminals) and replace any worn parts at the same time. Use proper torque values from the vehicle repair manual when tightening mounting bolts to avoid distortion or future loosening.
Most Common Reasons For Failure
- Corrosion And Rust: Long-term exposure to moisture and road salt can weaken mounting points and cause cracks.
- Mechanical Damage: Impacts, engine knocks or improper lifting/support during repairs can bend or fracture the bracket.
- Fatigue And Vibration: Repeated engine vibration or a misaligned belt places extra stress on the bracket and bushings.
- Worn Bushings Or Fasteners: Deteriorated rubber mounts or loose/overstressed bolts lead to movement and accelerated wear.
- Related Component Failure: Failing alternator bearings or seized pulleys transfer additional loads to the bracket, causing damage over time.
When To Replace
There is no fixed interval for replacement. Inspect the bracket whenever you replace the alternator or if you observe symptoms such as belt noise, uneven belt wear, visible cracks or movement at the mounting point, or charging system faults. Proactive replacement is recommended when corrosion or physical damage is evident.
Compatibility And Notes
Compatible with 1.6 HDi 16V engine variants in the listed Citroën and Peugeot models. Always ensure the OE numbers 9659200880 and 5706N6 match the part required for your application. This bracket is intended as a mechanical replacement part; inspect and service the belt and tensioner together for a reliable repair.