Description
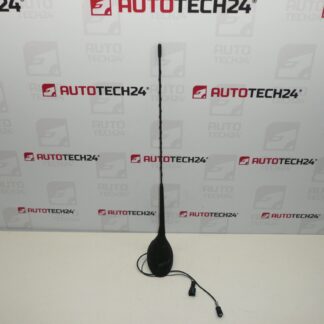
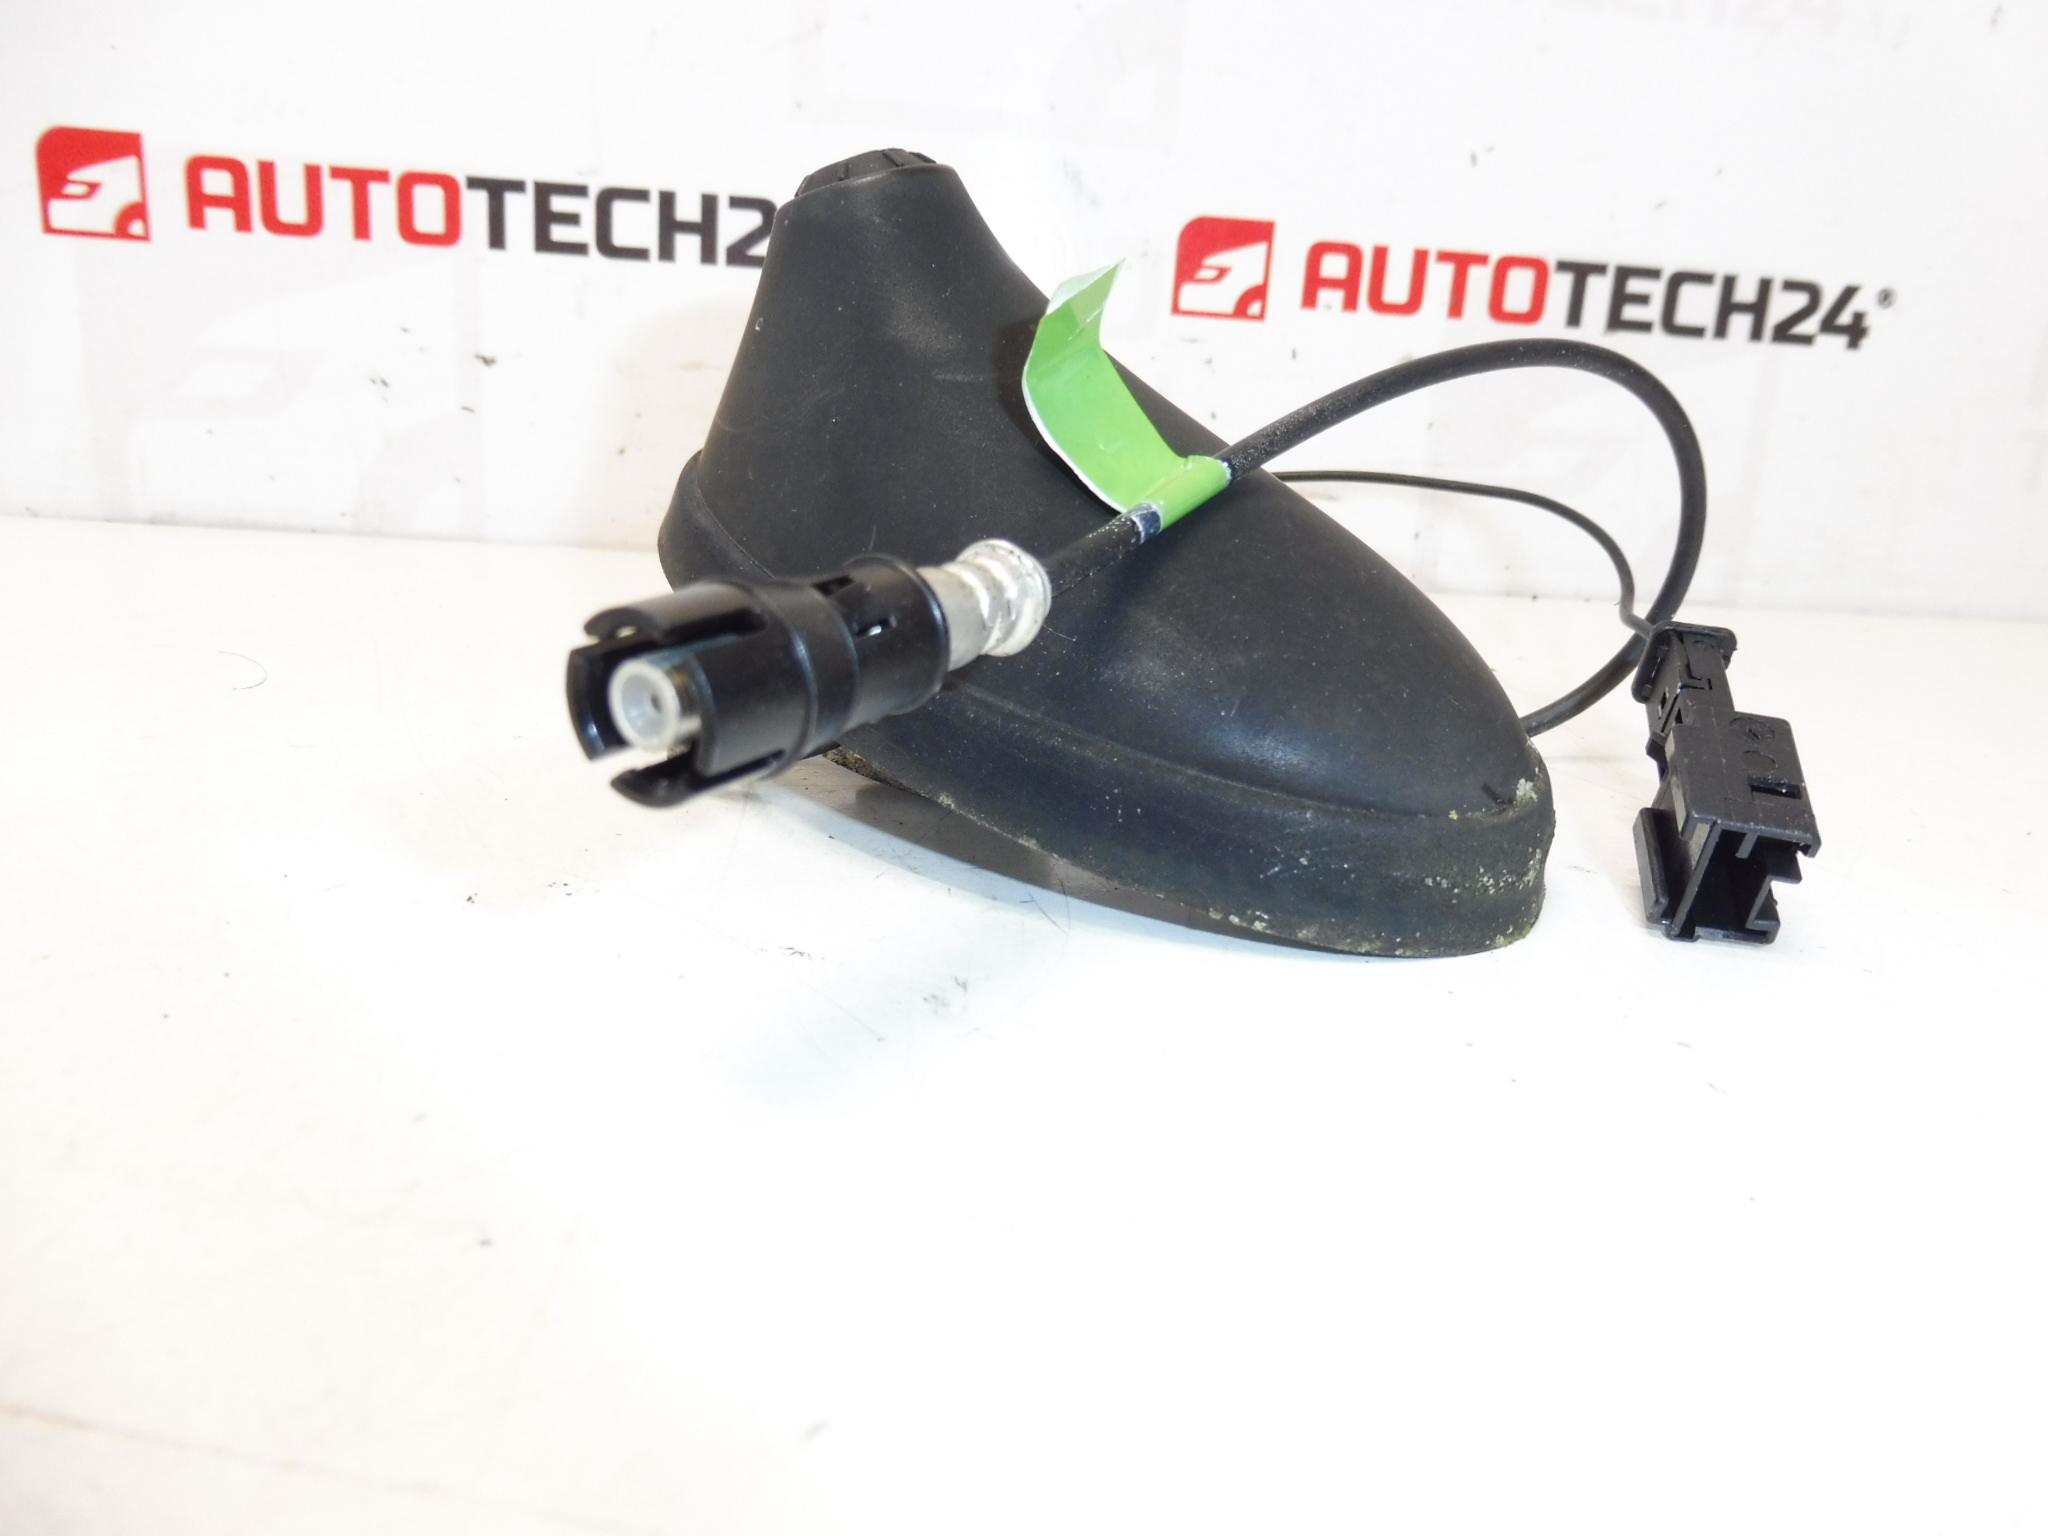
Antenna for Citroën C2 and C3 vehicles
This replacement roof antenna is a direct-fit solution for Citroën C2 and C3 owners and professional workshops looking to restore reliable AM/FM reception. Supplied with the commonly referenced OEM codes, the unit is designed for straightforward installation and provides stable reception for factory and aftermarket head units. Ideal for mechanics and DIY enthusiasts who search by part number (e.g. 9653389980, 6567W7, 6561W5), this antenna brings back clear radio performance lost to physical damage, corrosion, or connector failure.
Technical Information
- Manufacturer: Stellantis (Citroën / Peugeot)
- Model: Citroën C2, Citroën C3
- Product Codes: 9653389980, 6567W7, 6561W5
- Other Numbers: NFP
Function
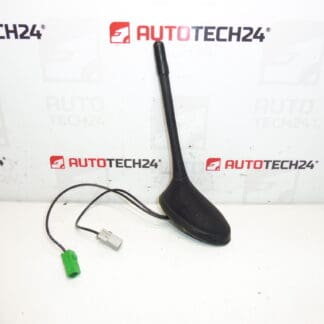
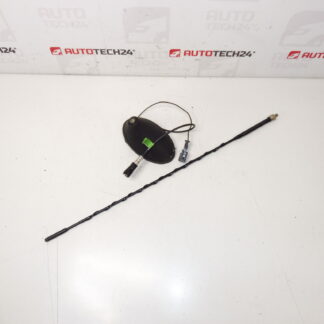
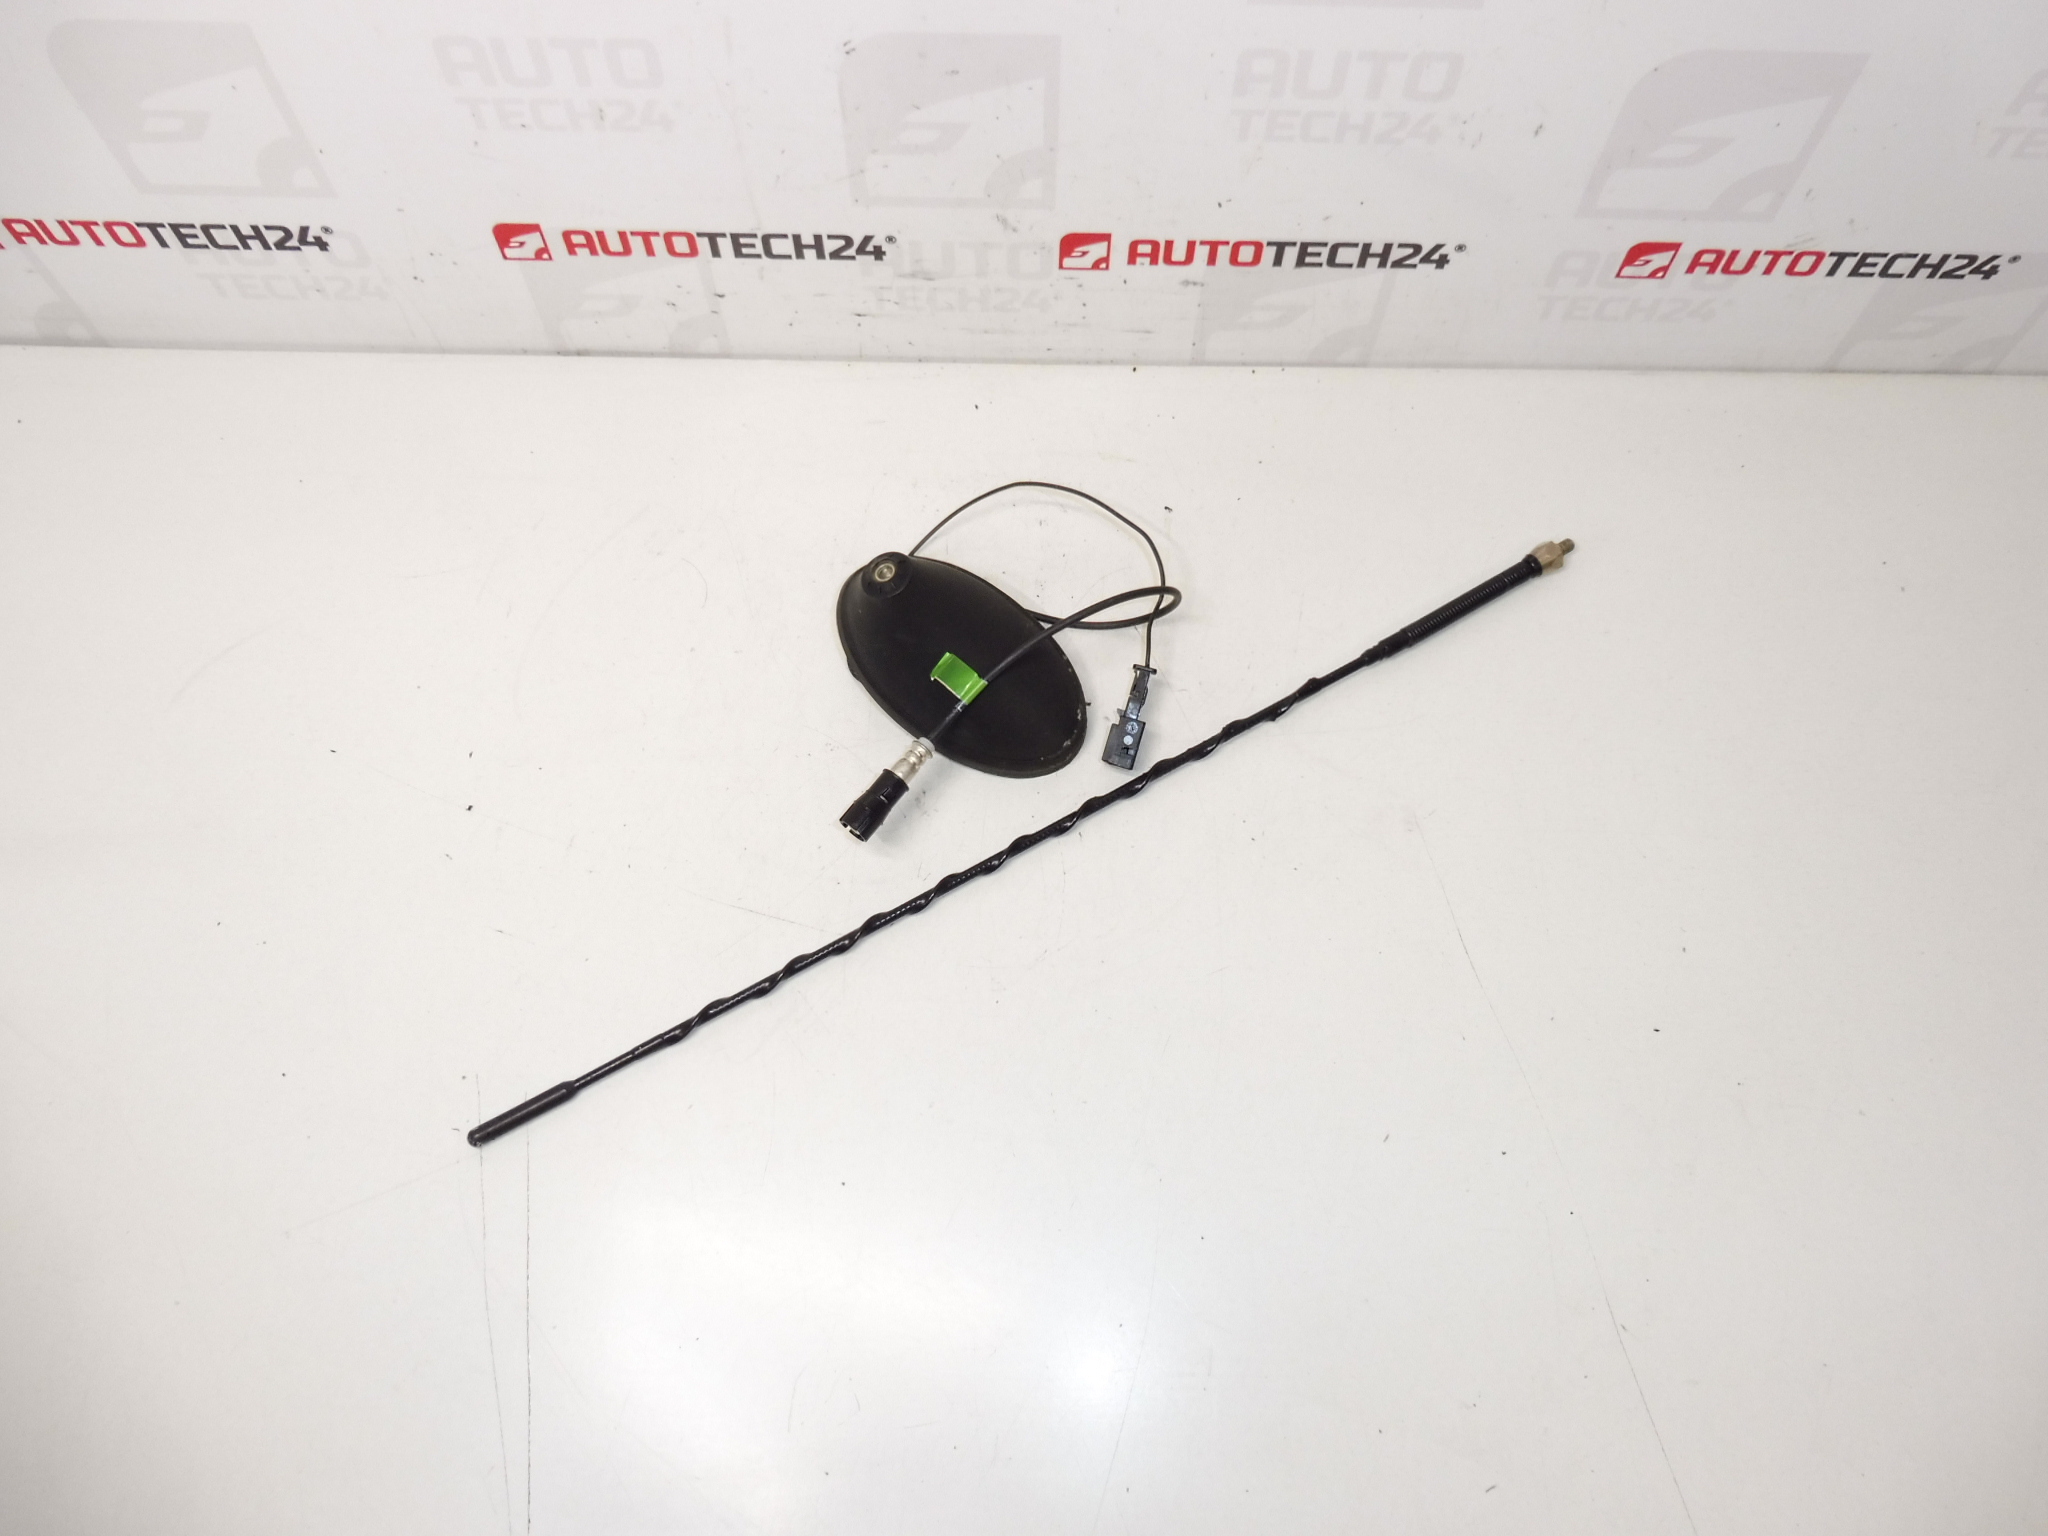
The antenna receives terrestrial AM and FM radio signals and transmits them to the vehicle’s radio via a coaxial lead. On some vehicle configurations the antenna assembly may include a mast only; on others it can contain an amplifier module or sealed connector inside the base. Proper grounding and a tight weather seal are essential for noise‑free reception.
Common Failure Modes And Why It Fails
The antenna typically has a long service life but can fail for a few recurring reasons: corrosion at the base or connector due to water ingress, mechanical damage to the mast from car washes or impacts, broken internal cable or connector fatigue, and degraded seals that allow moisture to reach contacts. Symptoms include weak or intermittent reception, static, loss of stations, or visible damage to the antenna mast or base.
Installation Recommendations
Installation is straightforward for experienced technicians and competent DIYers. Typical steps:
- Remove The Antenna Mast By Unscrewing The External Whip Or Remove The Interior Retaining Nut Under The Headliner If Applicable.
- Protect The Headliner And Trim When Accessing The Nut; Carefully Lower The Headliner Section If Required To Reach The Fastener.
- Disconnect The Coaxial Connector From The Antenna Base; Inspect The Connector And Cable For Corrosion Or Damage.
- Fit The New Antenna, Ensure The Rubber Gasket/Seal Sits Correctly, And Tighten The Retaining Fastener Securely But Without Over‑Tightening.
- Apply A Small Amount Of Dielectric Grease To The Electrical Connector To Help Prevent Future Corrosion; Reinstall Interior Trim And Test Radio Reception.
Follow Manufacturer Repair Manual Access Procedures For Interior Trim Removal To Avoid Damage. After Replacement, Verify Reception Across Multiple Frequencies And Check For Water Tightness Around The Base.
Notes For Buyers
Many customers search using OEM part numbers, so the codes listed above are useful when confirming fitment. This antenna is aimed at Citroën C2 and C3 models; confirm model fitment by matching the referenced part numbers with the vehicle’s original equipment documentation before ordering.