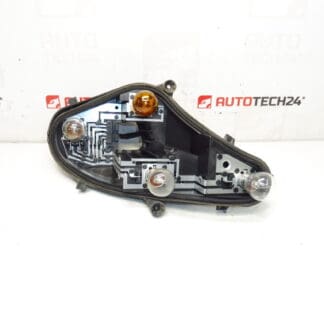

Description
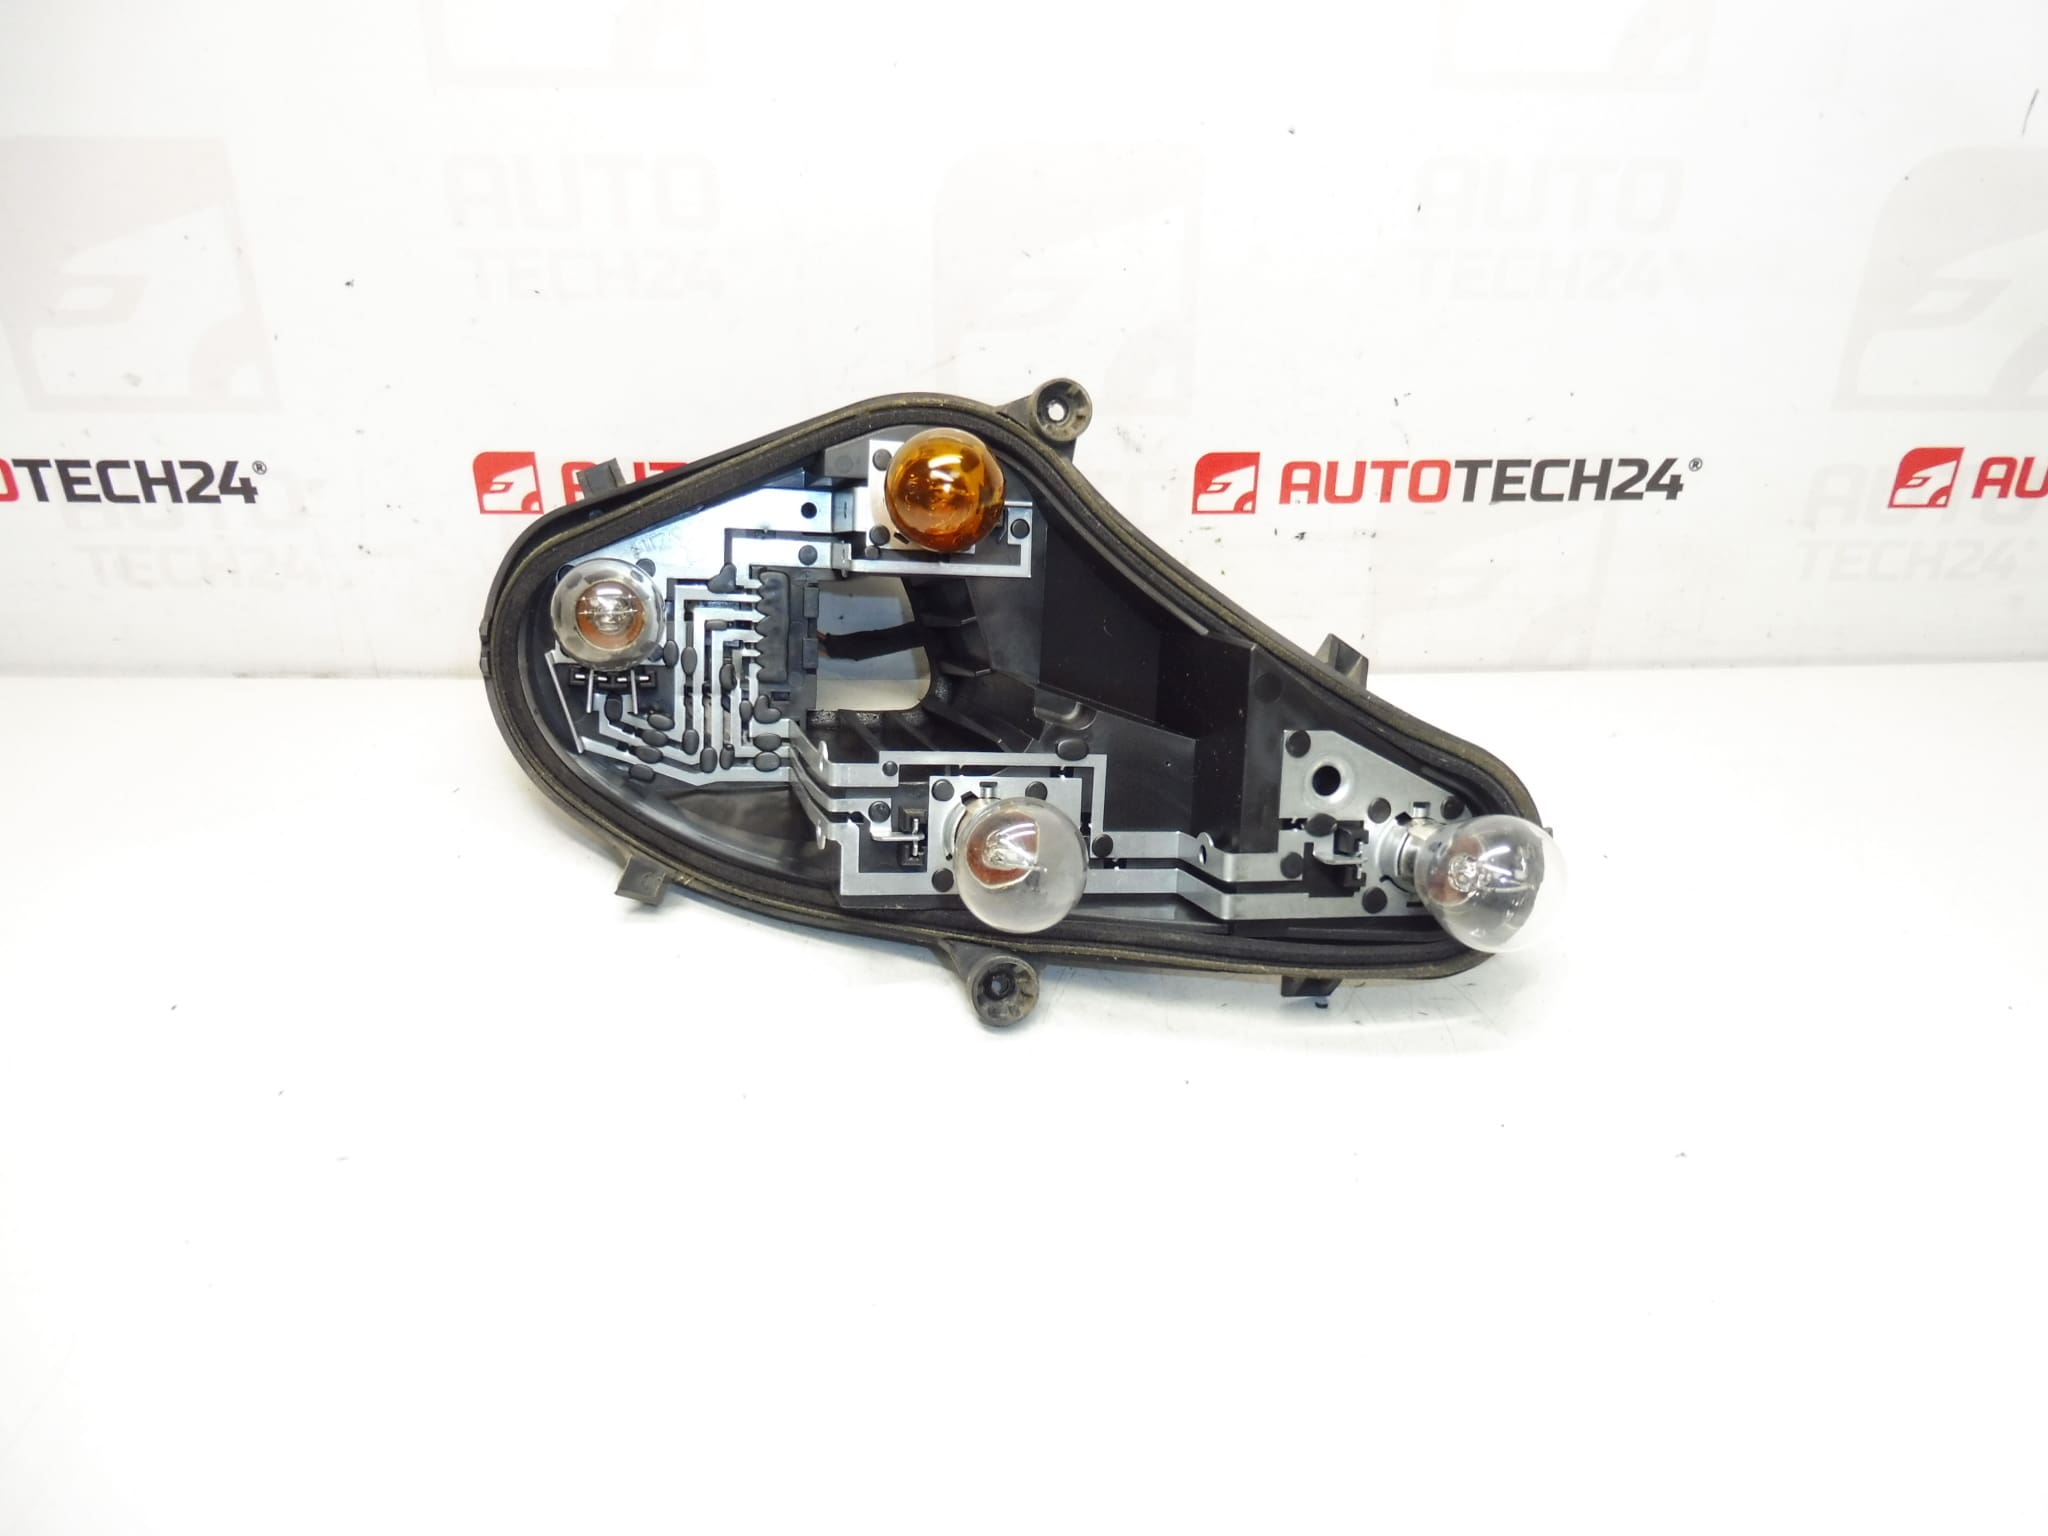
Socket with bulbs for the right rear outer lamp Citroën C4 B7 second generation. With a piece of wiring.
This replacement bulb socket assembly is intended for the right outer rear lamp of the Citroën C4 II (B7) second generation. Designed for professional mechanics and competent DIYers, the part restores reliable electrical contact for tail, brake and turn signal functions and is frequently searched by part number 6351KS. The unit includes the bulb holders and a short length of wiring for straightforward plug-in replacement.
Technical Information
- Manufacturer: Stellantis / Citroën / Peugeot
- Model: Citroën C4 II (B7) Second Generation
- Product Codes: 6351KS
- Other Numbers: None Provided
Function And Benefits
The socket assembly secures the rear lamp bulbs in the right outer tail lamp cluster and provides the electrical connections for lighting circuits (tail, brake, indicator and possibly reverse depending on lamp configuration). A healthy socket ensures solid contact, correct lamp operation and minimises intermittent faults caused by loose or corroded contacts. Installing a fresh socket reduces the risk of flickering lights, poor lamp contact and heat-related failures.
Installation Recommendations
- Safety First: Disconnect the negative battery terminal before working on the rear lighting harness to avoid short circuits.
- Access: Open the boot and remove any trim panels or covers to reach the rear lamp cluster. Remove lamp cluster fasteners and carefully extract the lamp unit from the body aperture.
- Disconnect: Unplug the original wiring connector from the lamp and remove the old bulb socket by releasing its retaining tabs or clips.
- Fit New Socket: Insert the new socket into the lamp body until it clicks into place. Ensure the wiring is routed the same way as factory to avoid pinching.
- Test: Reconnect the battery, test all lamp functions (tail, brake, indicator and reverse if applicable) before reassembling trims.
- Reassembly: Secure the lamp cluster back into the vehicle, reinstall trim and confirm watertight seating of the lamp to prevent ingress.
Most Common Failure Reasons
- Corrosion And Water Ingress: Moisture and road salt lead to oxidised contacts and poor conductivity.
- Heat And Thermal Cycling: Repeated heating of bulbs and cooling causes plastic to become brittle and contact points to loosen.
- Vibration And Mechanical Stress: Road vibration and repeated removal/installation can break retaining tabs or damage wiring.
- Poor Contact Or Loose Connections: Worn contacts create intermittent operation, flicker or increased resistance and local heating.
Signs that this socket needs replacing include intermittent lamp operation, one lamp function not working while others do, visible corrosion at contacts or melted/deformed plastic around the socket. In everyday use, sockets often fail after many years—commonly observed on vehicles older than 8–12 years or in regions with heavy road salt or frequent moisture exposure.
This part is intended for direct replacement of the right outer rear lamp socket on compatible Citroën C4 II vehicles. Customers commonly search using the part code 6351KS when looking for this exact component.