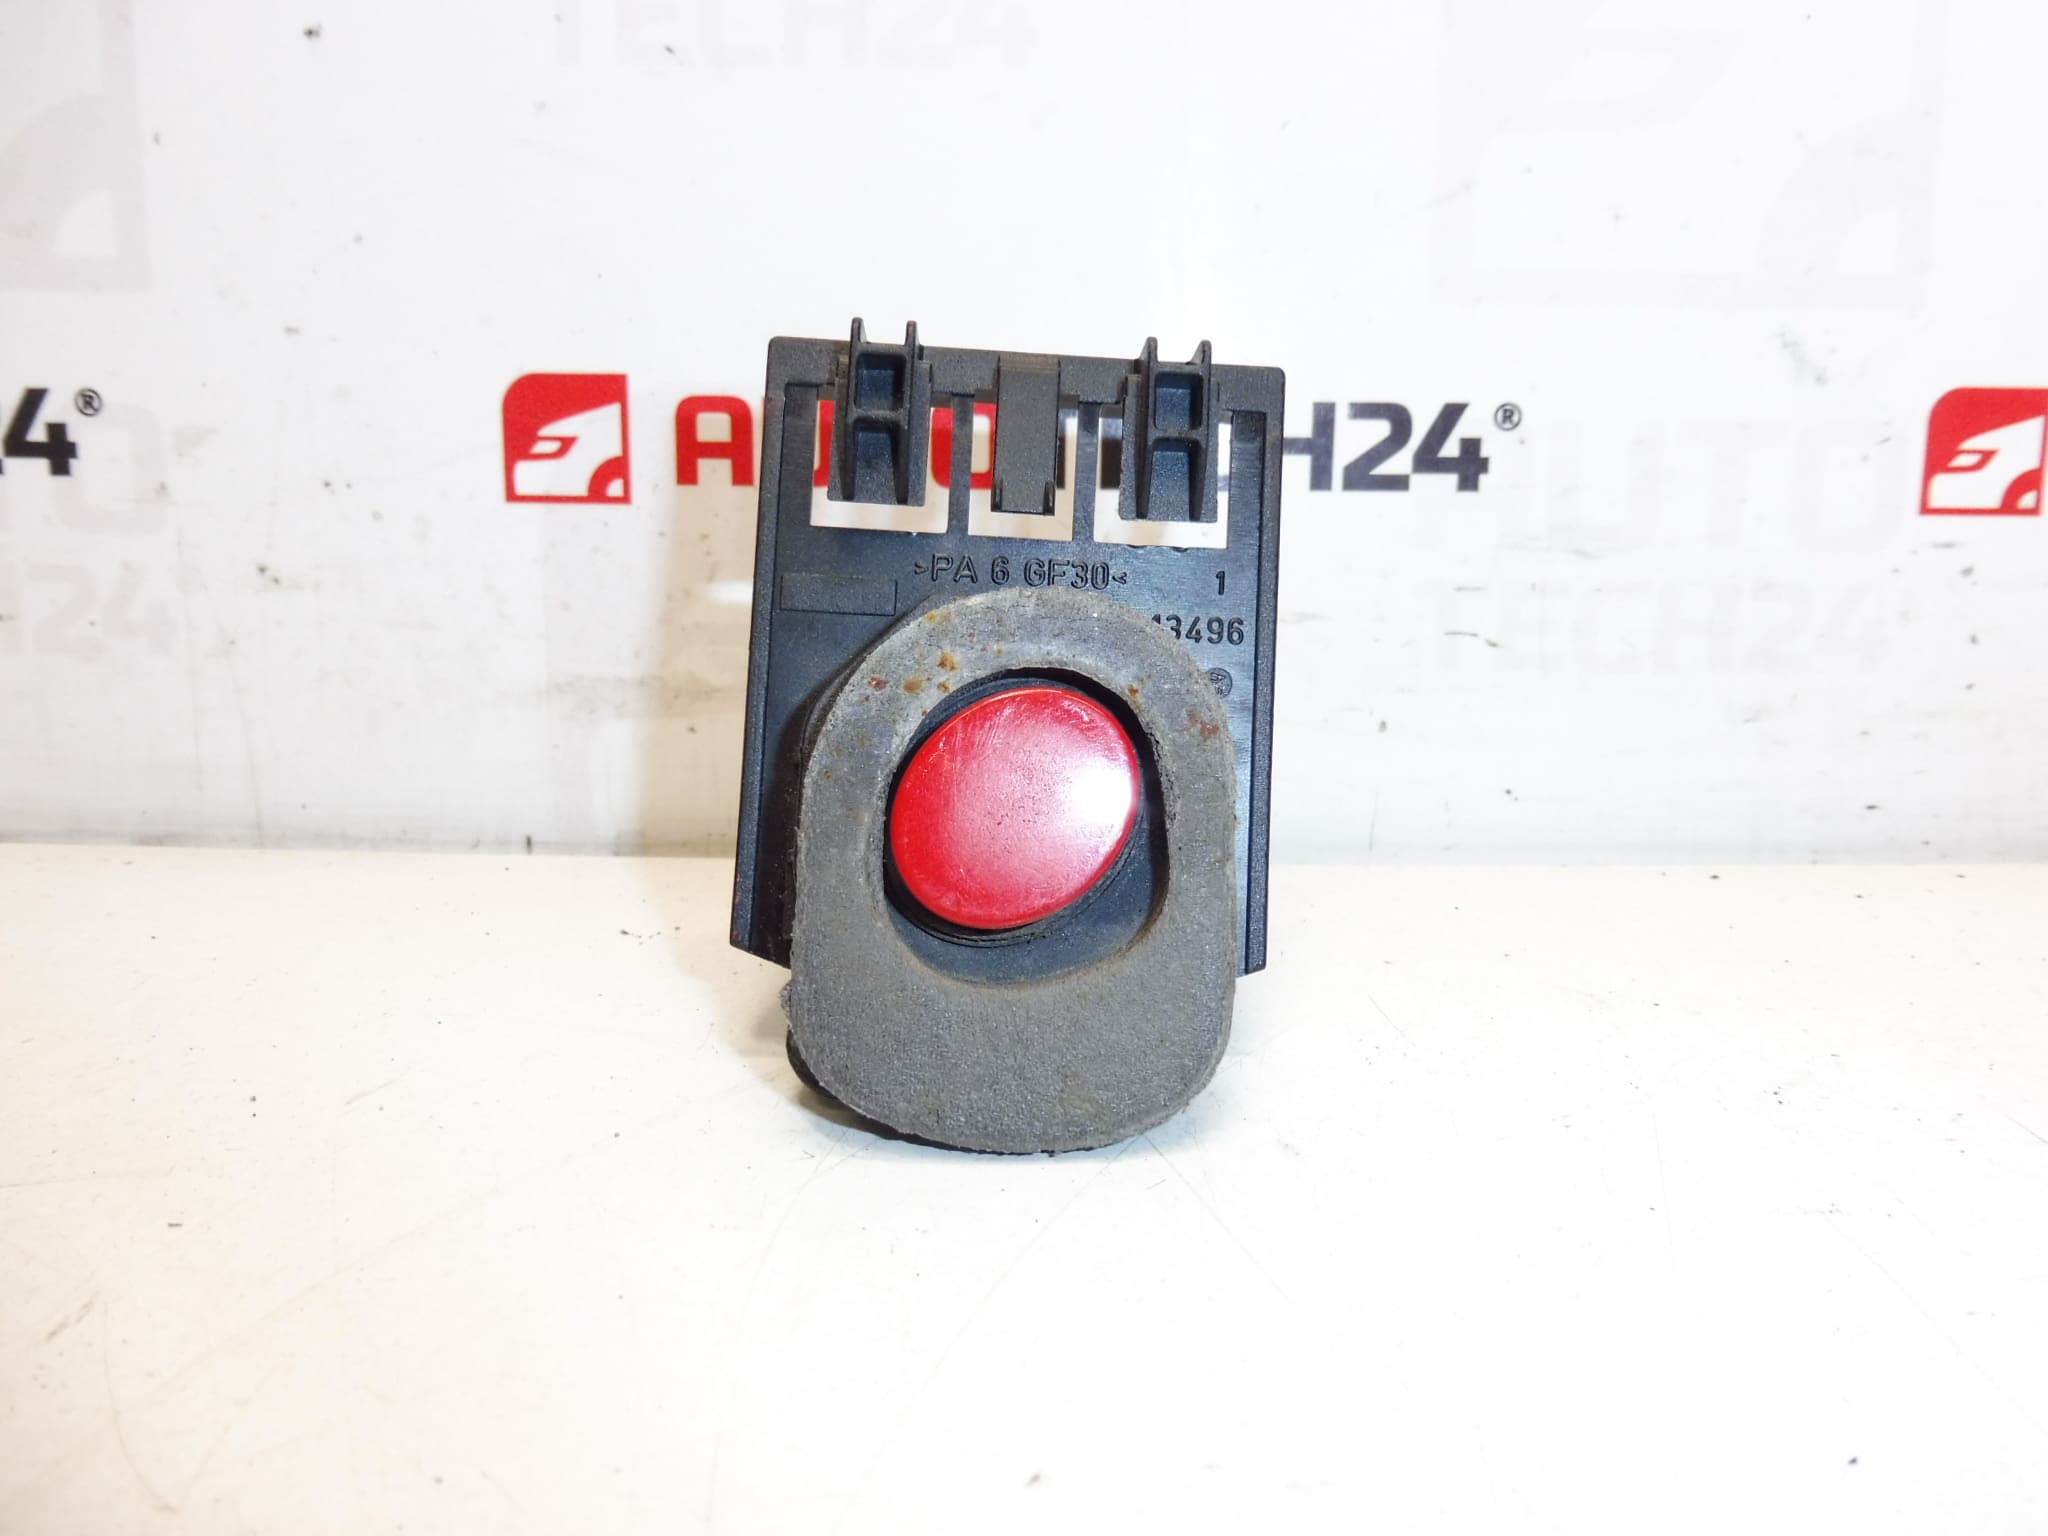
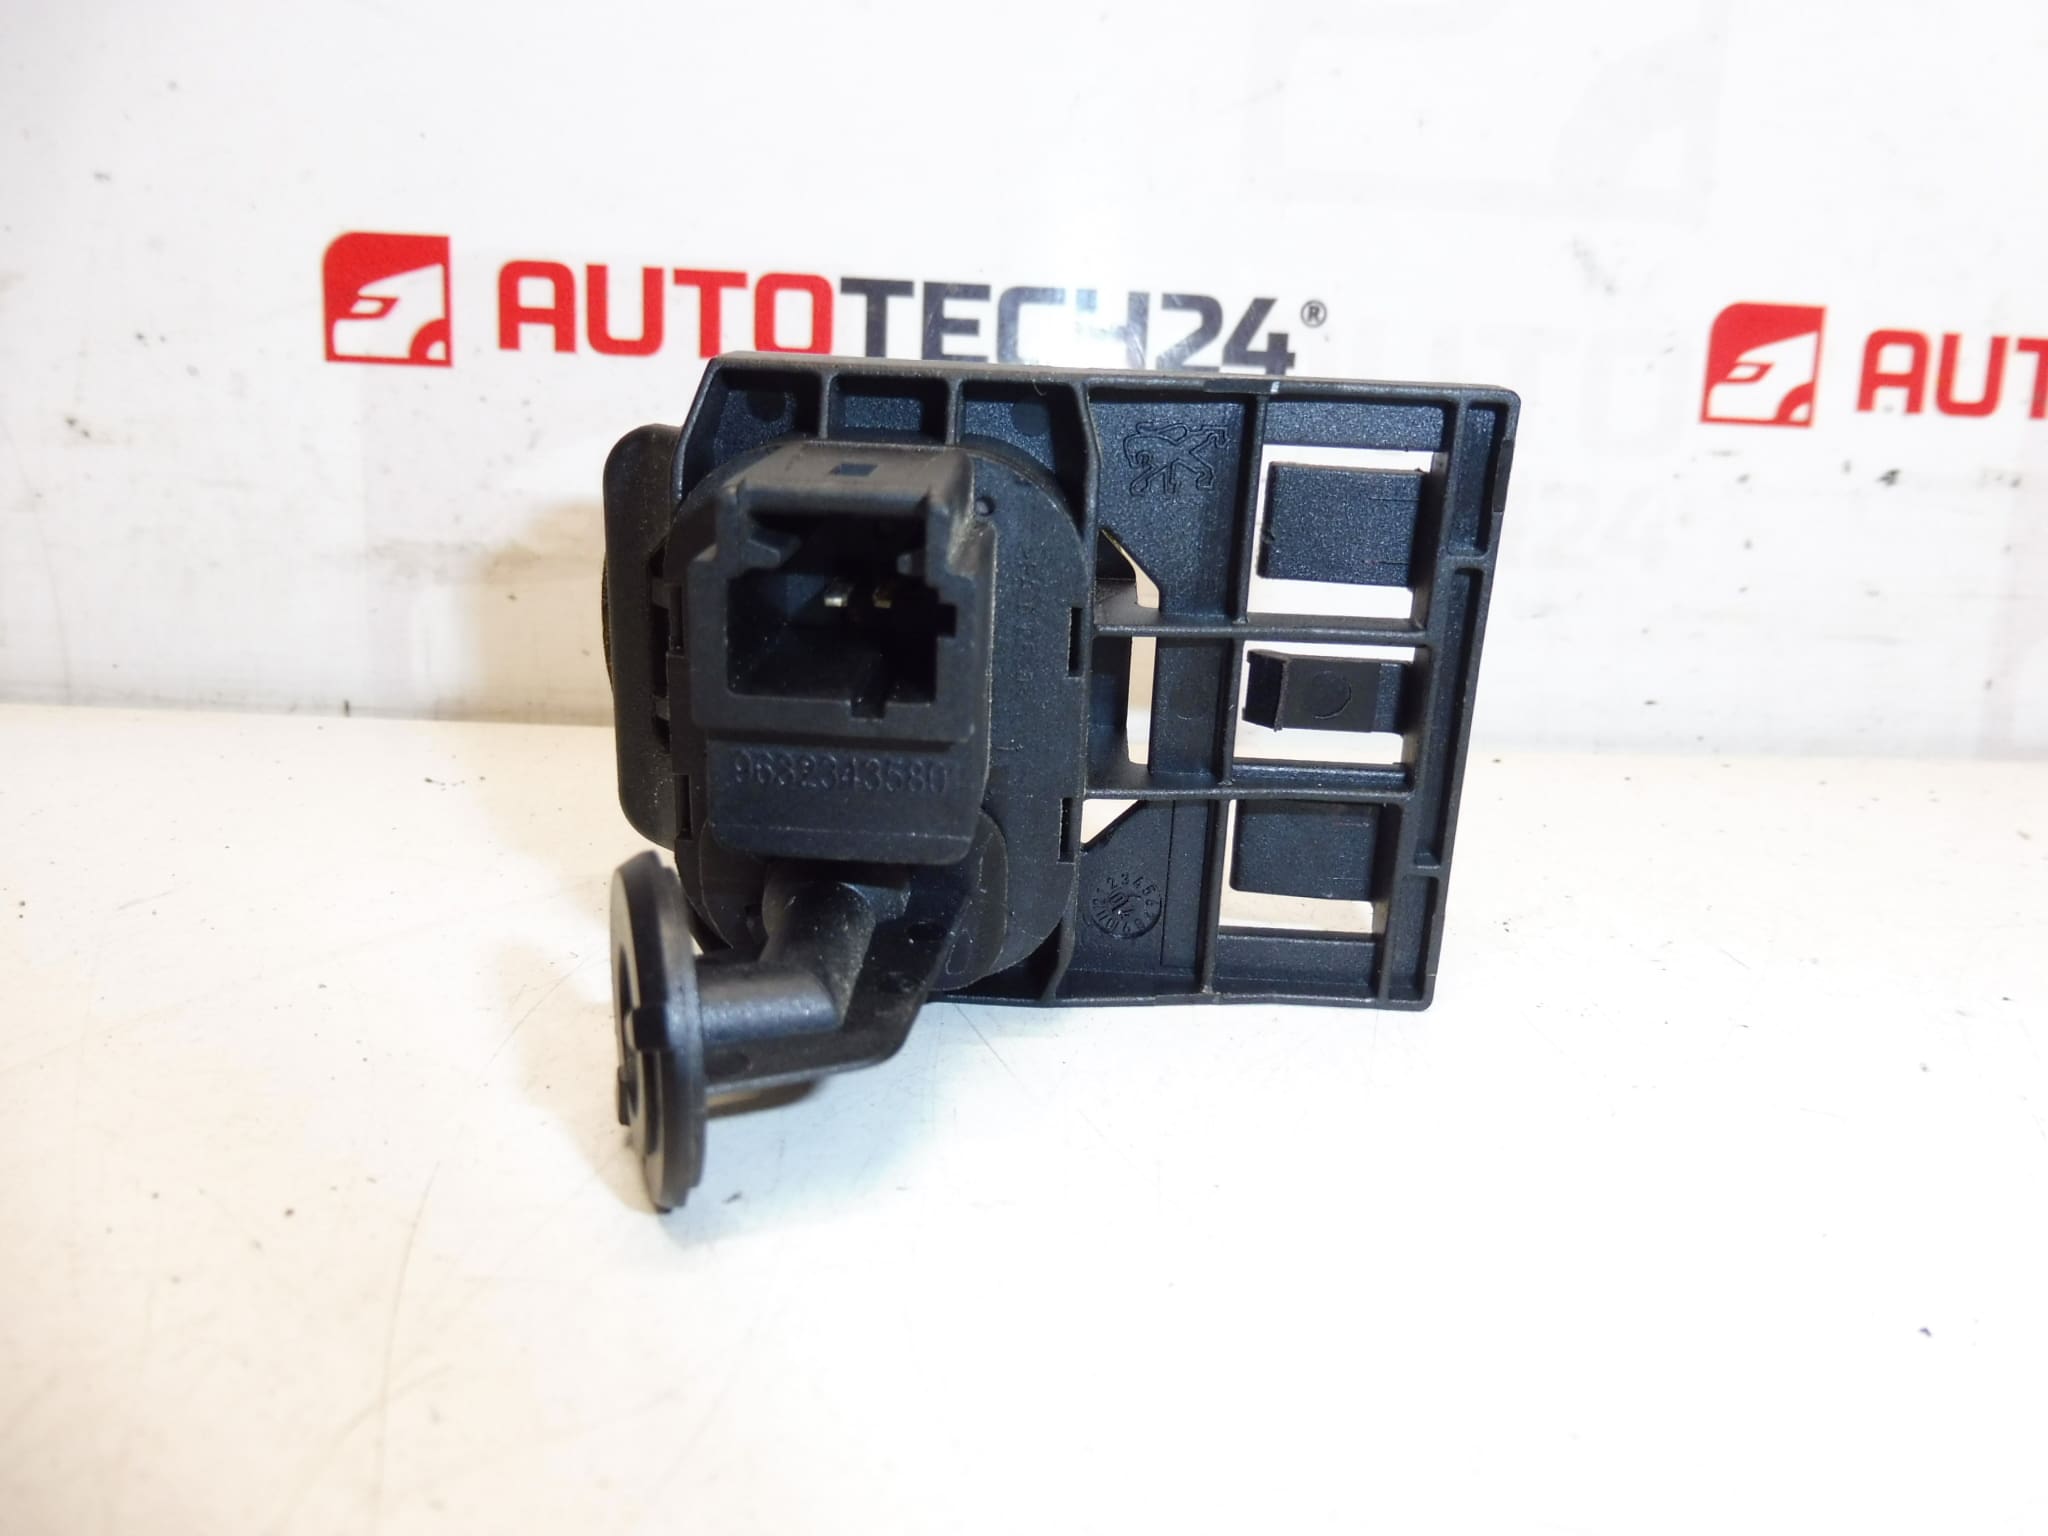
Description
Button for opening the rear trunk lid for Peugeot 307 CC vehicles.
This rear trunk lid release button is a direct-fit replacement designed for Peugeot 307 CC models. It restores reliable boot opening from the tailgate and is suitable for professional workshops and DIY enthusiasts. The compact switch assembly connects to the original wiring harness and sits flush in the tailgate trim. Ideal for replacing a worn, sticking or non-responsive release button to regain convenient access to the luggage compartment.
Technical Information
- Manufacturer: Stellantis / Peugeot / Citroën
- Model: Peugeot 307 CC
- Product Codes: 9632343580, 872559
- Additional Numbers: NFP
Fitment
Fits: Peugeot 307 CC (Tailgate/Convertible Coupe models). Always check the part numbers shown above against the vehicle’s existing part to confirm visual and connector match before installation.
Function
The button operates the tailgate latch release via an electrical microswitch. When pressed, it sends a signal to the central locking/tailgate latch actuator to unlatch and allow the trunk to open. It is a small but critical component for everyday access to the boot.
Common Failure Causes
Typical reasons for failure include mechanical wear of the microswitch, plastic housing fatigue or cracking, and water ingress leading to corrosion of contacts. Repeated use over many years and exposure to moisture and road salts accelerate deterioration. Symptoms of a failing unit are intermittent operation, sticky or hard-to-press button, or complete lack of response when pressing the button.
Installation Recommendations
Recommended for installation by experienced technicians or competent DIY mechanics. Basic steps:
- Remove the interior tailgate trim panel using plastic trim tools to avoid damage to clips.
- Locate the release button assembly on the tailgate inner panel and disconnect the electrical connector.
- Release the retaining clips or screws holding the button, remove the old unit and fit the new button in the original position.
- Reconnect the electrical plug, test operation before reassembling the trim, then refit the trim panel ensuring all clips are fully engaged.
Useful tools: plastic trim removal kit, Phillips/flat screwdrivers, gloves, and a torch. For electrical safety and to avoid short circuits, isolate the vehicle’s negative battery terminal if you are working near other live circuits; however, this is not always mandatory for a simple plug-and-play switch replacement. Always handle trim and clips carefully to prevent breakage.
Notes For Buyers
When replacing the release button, inspect the surrounding trim clips, wiring connector, and tailgate latch for signs of wear or corrosion. Replacing the button alone often solves access problems, but damaged wiring or latch mechanisms may require additional attention.