
Description
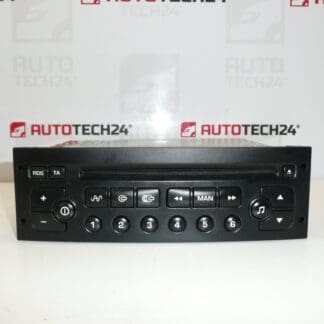
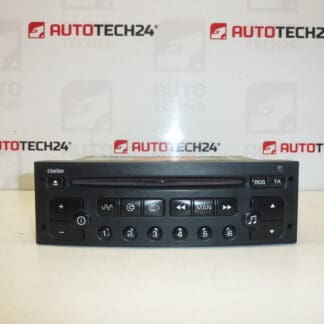
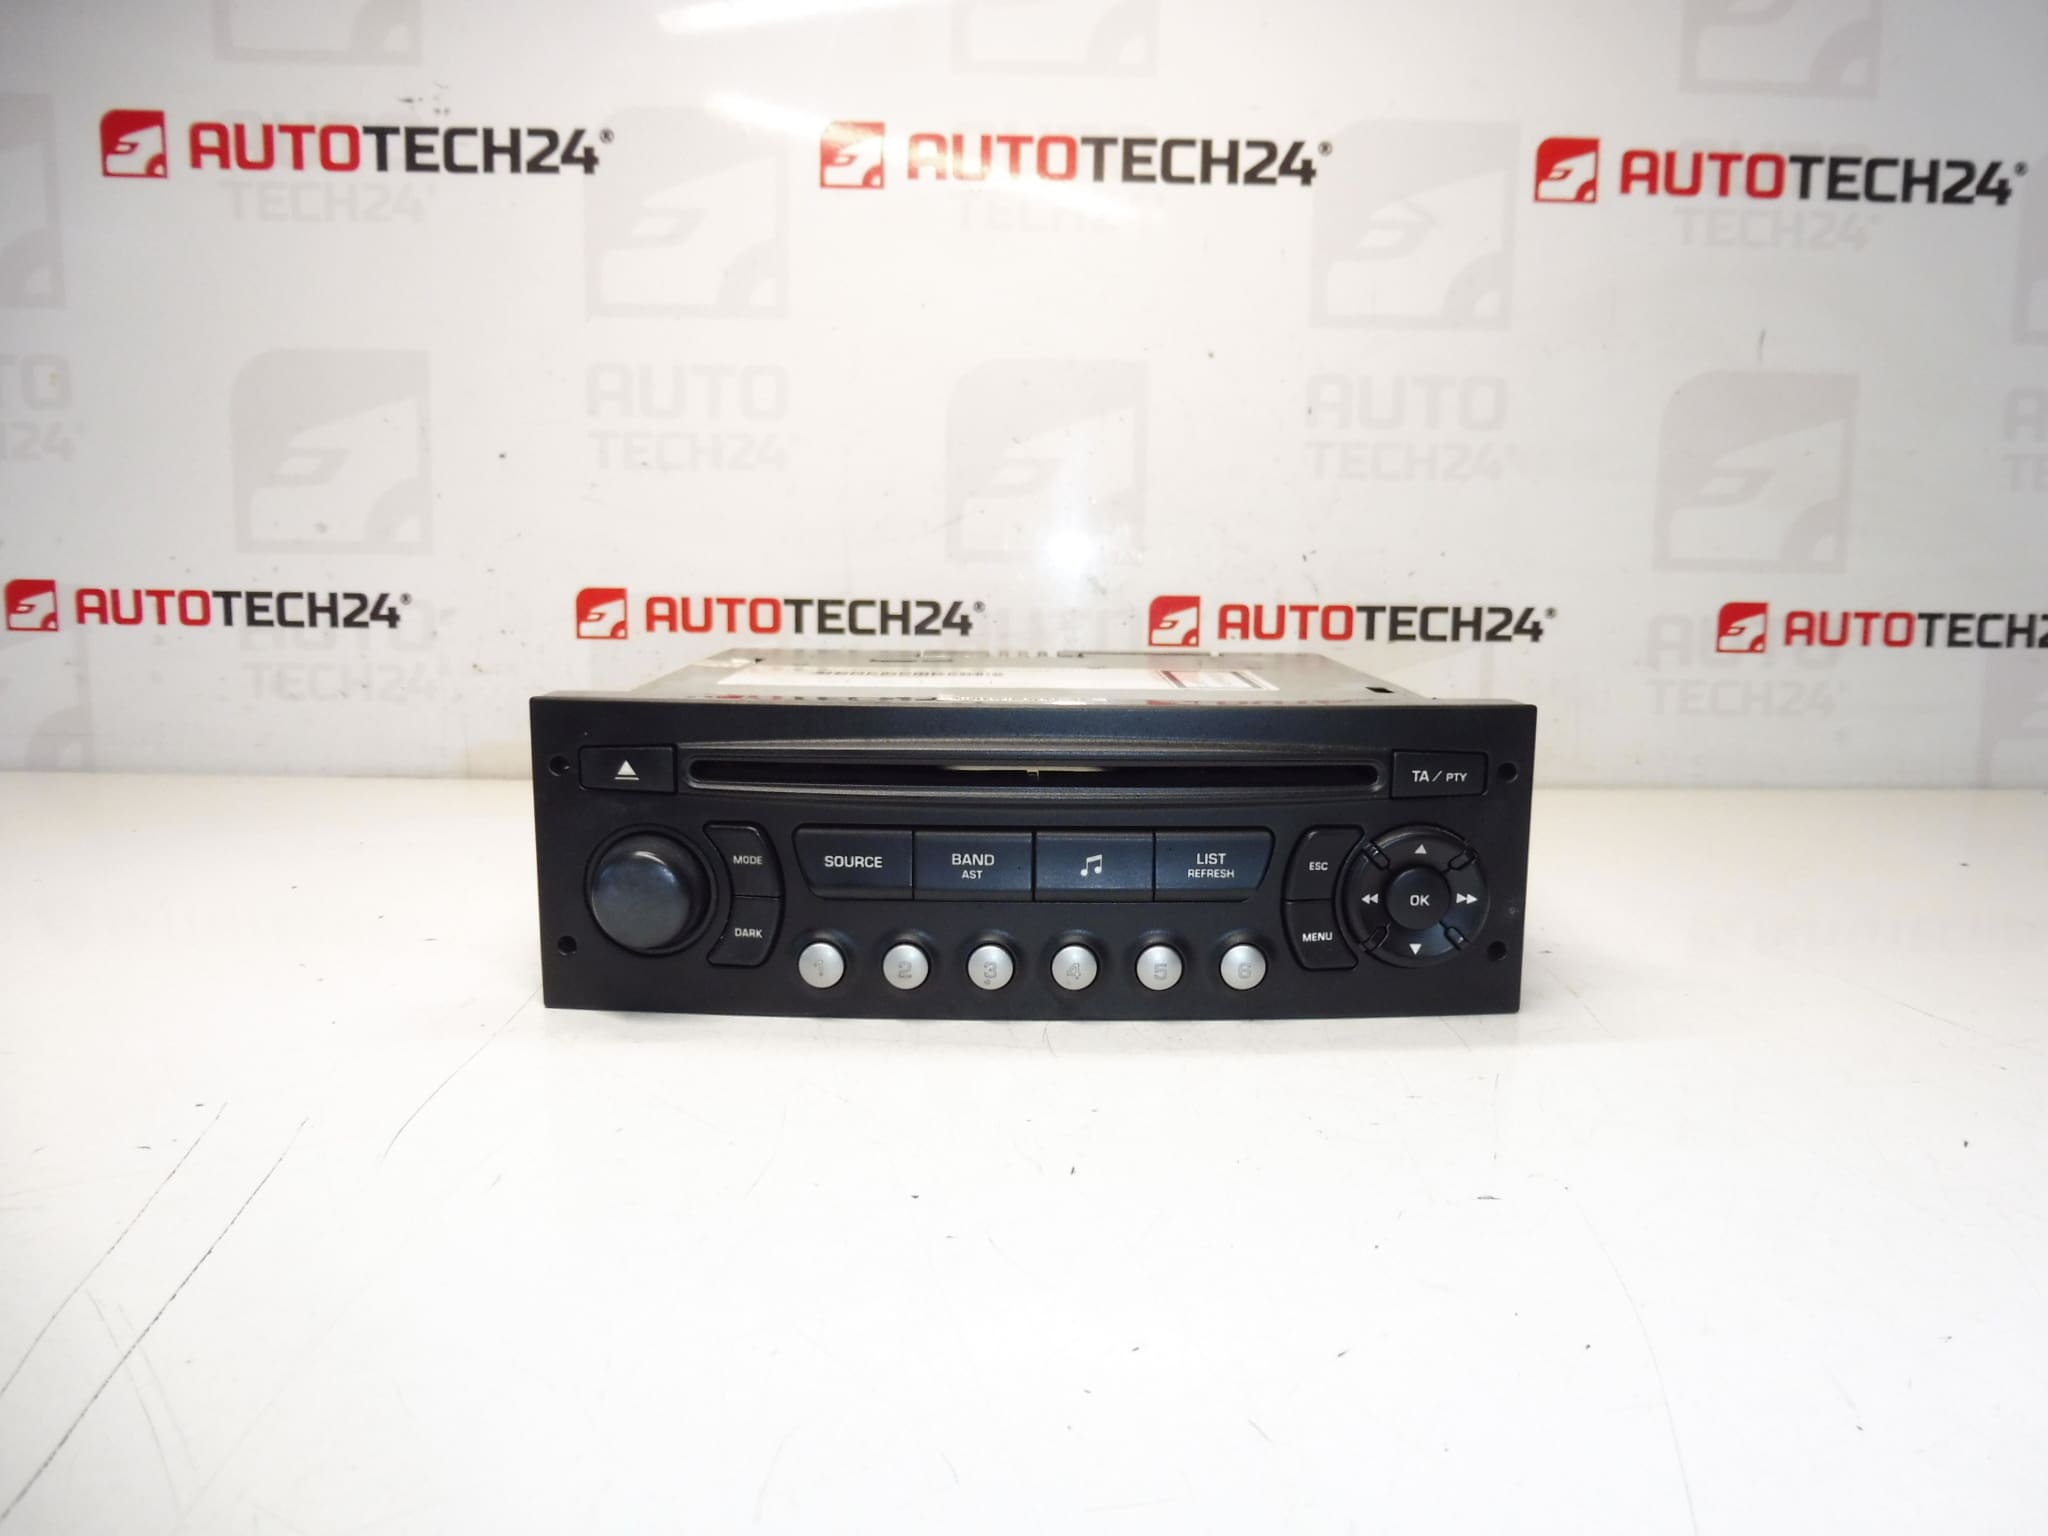
CD Car Radio Blaupunkt RD4 T5 N2. The radio must be coded to the vehicle using diagnostic equipment. It has 2 antenna inputs.
Blaupunkt RD4 T5 N2 is a direct-fit OEM-style head unit commonly found in Stellantis vehicles such as Citroën C8 and Peugeot 807. This radio offers a compact single-DIN body with CD playback and factory integration features. If you are searching by part number, use identifiers 9660646577, 6564QT, 6564QV or 6579PS to quickly find compatible replacements. The unit’s OEM mounting and connector layout make it suitable for professional workshops and experienced DIY mechanics who perform radio swaps and vehicle coding.
Technical Information
Manufacturer: Blaupunkt
Model: RD4 T5 N2
Product Codes: 9660646577, 6564QT
Additional Numbers: 6564QV, 6579PS
Function and Features
This is a CD car radio designed for factory integration in Citroën and Peugeot models. Key functional points: CD playback, FM/AM radio reception, and two antenna inputs to support diversity reception or a separate amplified antenna feed. The unit communicates with the vehicle’s electrical system and may require software pairing (coding) to restore full functionality after replacement.
Compatibility
Commonly fitted to Citroën C8 and Peugeot 807 models equipped with the RD4 head unit. When searching for this part, customers and technicians often use the part numbers listed above for fast identification.
Replacement Procedure (How To Replace)
- Disconnect the vehicle battery or ensure ignition is off to avoid short circuits during removal.
- Carefully remove the trim surrounding the head unit using plastic trim tools to avoid damage to panels.
- Release the radio using the appropriate removal keys or undo the retaining screws, then slide the unit out of the dash.
- Disconnect all electrical connectors, antenna plugs (note there are two), and any external amplifier leads.
- Install the replacement unit by connecting harnesses and antenna leads in the correct positions, slide the radio into the bracket and secure it.
- Perform vehicle coding/registration with a diagnostic tool so the radio is recognized by the vehicle’s systems and steering wheel controls (if fitted).
- Verify radio, CD playback and antenna reception, then reassemble trim panels and reconnect the battery if disconnected.
Installation Recommendations
Always use the correct removal keys or service tools to prevent damage to the radio and dash trim. Label connectors during removal if uncertain about their locations. Ensure both antenna plugs are fully seated; poor antenna connections are a frequent cause of weak reception. After mechanical installation, use a dealer-level or professional diagnostic tool to code the radio to the vehicle—without coding some functions (e.g., vehicle integration, steering wheel controls) may not work. Check and, if necessary, replace retention screws or mounting brackets that are corroded or damaged to ensure secure fitment.
Common Causes Of Failure
Typical reasons these head units fail include mechanical wear of the CD mechanism from heavy use, moisture ingress or condensation causing corrosion on connectors or internal components, electrical surges or poor grounding, and intermittent faults due to damaged antenna connectors. Faulty wiring or blown fuses in the vehicle’s audio circuit can also render the unit inoperative. Regular diagnostics of antenna continuity and power/ground feeds helps pinpoint issues before they cause permanent damage.
Why This Part Is Searched By Part Number
Technicians and DIYers frequently search by OEM numbers (9660646577, 6564QT, 6564QV, 6579PS) because they guarantee compatibility with the vehicle’s dashboard and connector layout. Including these codes in your search improves the chance of finding the exact fitment and saves time during replacement.
This description is aimed at professionals and experienced DIY mechanics who need clear technical data, installation guidance and compatibility references when replacing an OEM Blaupunkt RD4 T5 N2 radio in Citroën and Peugeot vehicles.