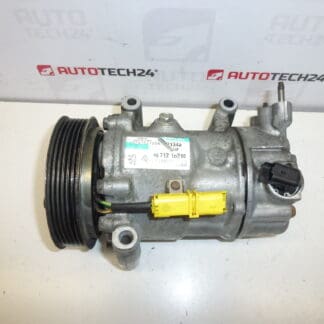
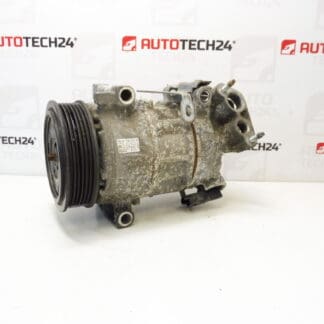
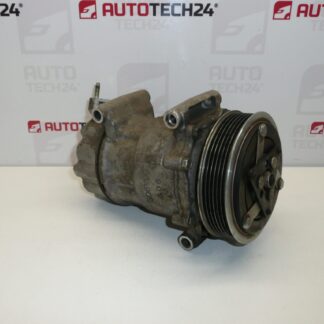
Description
Air Conditioning Compressor SANDEN SD6C12 1367 for Citroën and Peugeot vehicles. Removed from a vehicle with 64,000 km.
Product Overview
The Sanden SD6C12 1367 air conditioning compressor is a direct-fit cooling compressor commonly used on a range of Citroën and Peugeot models. Designed to compress refrigerant and circulate it through the HVAC system, the unit is belt driven and engages via an electromagnetic clutch when the A/C is commanded on. This used unit offers a cost-effective replacement option for workshops and skilled DIYers who verify compatibility by product number.
Key Benefits
- Direct Fit For Multiple Models: Often interchangeable on a variety of PSA platforms when matching the product codes.
- Robust Sanden Design: Proven architecture with a wet lubrication system compatible with standard A/C oils used on these vehicles.
- Cost Effective Replacement: Salvaged unit with relatively low mileage source can reduce downtime and cost compared with new aftermarket options.
Technical Information
- Manufacturer: Sanden
- Model: SD6C12 1367
- Product Codes: 9678656080, 9822826880
- Additional Numbers: 6453ZZ, 648708, 648709, 648701, 1671553680
- Mileage: Removed From Vehicle With 64,000 Km
- Typical Refrigerant: Systems On These Models Commonly Use R134a
Recommended For Models
- Citroën Berlingo B9
- Citroën Berlingo III
- Citroën C3
- Citroën C3 Picasso
- Citroën C3 Pluriel
- Citroën C4
- Citroën C4 II
- Citroën C5
- Citroën C5 X7
- Peugeot 207
- Peugeot 308
- Peugeot Partner
- Peugeot Partner III
- Peugeot Partner Tepee
- Peugeot 508
Installation Recommendations
- Always Disconnect The Battery Before Starting Work To Avoid Electrical Damage.
- Recover Refrigerant Using Certified Recovery Equipment Or Have A Qualified Workshop Perform Recovery And Recharge.
- Remove Drive Belt, Disconnect Electrical Connector And Remove Mounting Bolts To Replace Compressor.
- Replace All A/C System O-Rings And The Receiver/Drier Or Accumulator When Replacing The Compressor To Prevent Contamination And Moisture Issues.
- Flush The System If There Is Evidence Of Contamination. Refill With Correct Type And Quantity Of Refrigerant Oil Specified For The Vehicle.
- Perform Vacuum And Leak Test Before Recharging The System. Verify Clutch Engagement And System Pressures During Initial Run.
Most Common Failure Reasons
- Clutch Wear Or Failure Causing Inability To Engage The Compressor.
- Bearing Wear Leading To Noise Or Seizure.
- Internal Leakage Or Loss Of Compression Due To Worn Seals.
- System Contamination From Metal Debris Or Moisture Leading To Rapid Compressor Damage.
- Insufficient Lubrication Or Incorrect Oil Causing Premature Wear.
- Drive Belt Or Tensioner Issues Affecting Compressor Drive.
Practical Notes
Because failures in A/C systems are frequently caused by contamination, it is best practice to inspect and, if necessary, service the expansion valve/orifice tube, dryer/accumulator and other A/C components when fitting a replacement compressor. Matching the exact product codes listed in the Technical Information increases the chance of a correct fit and reliable operation.