Description
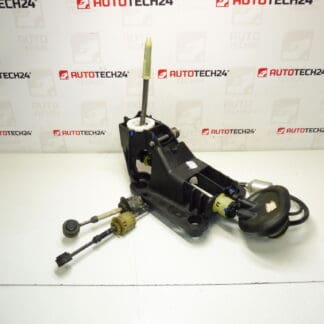
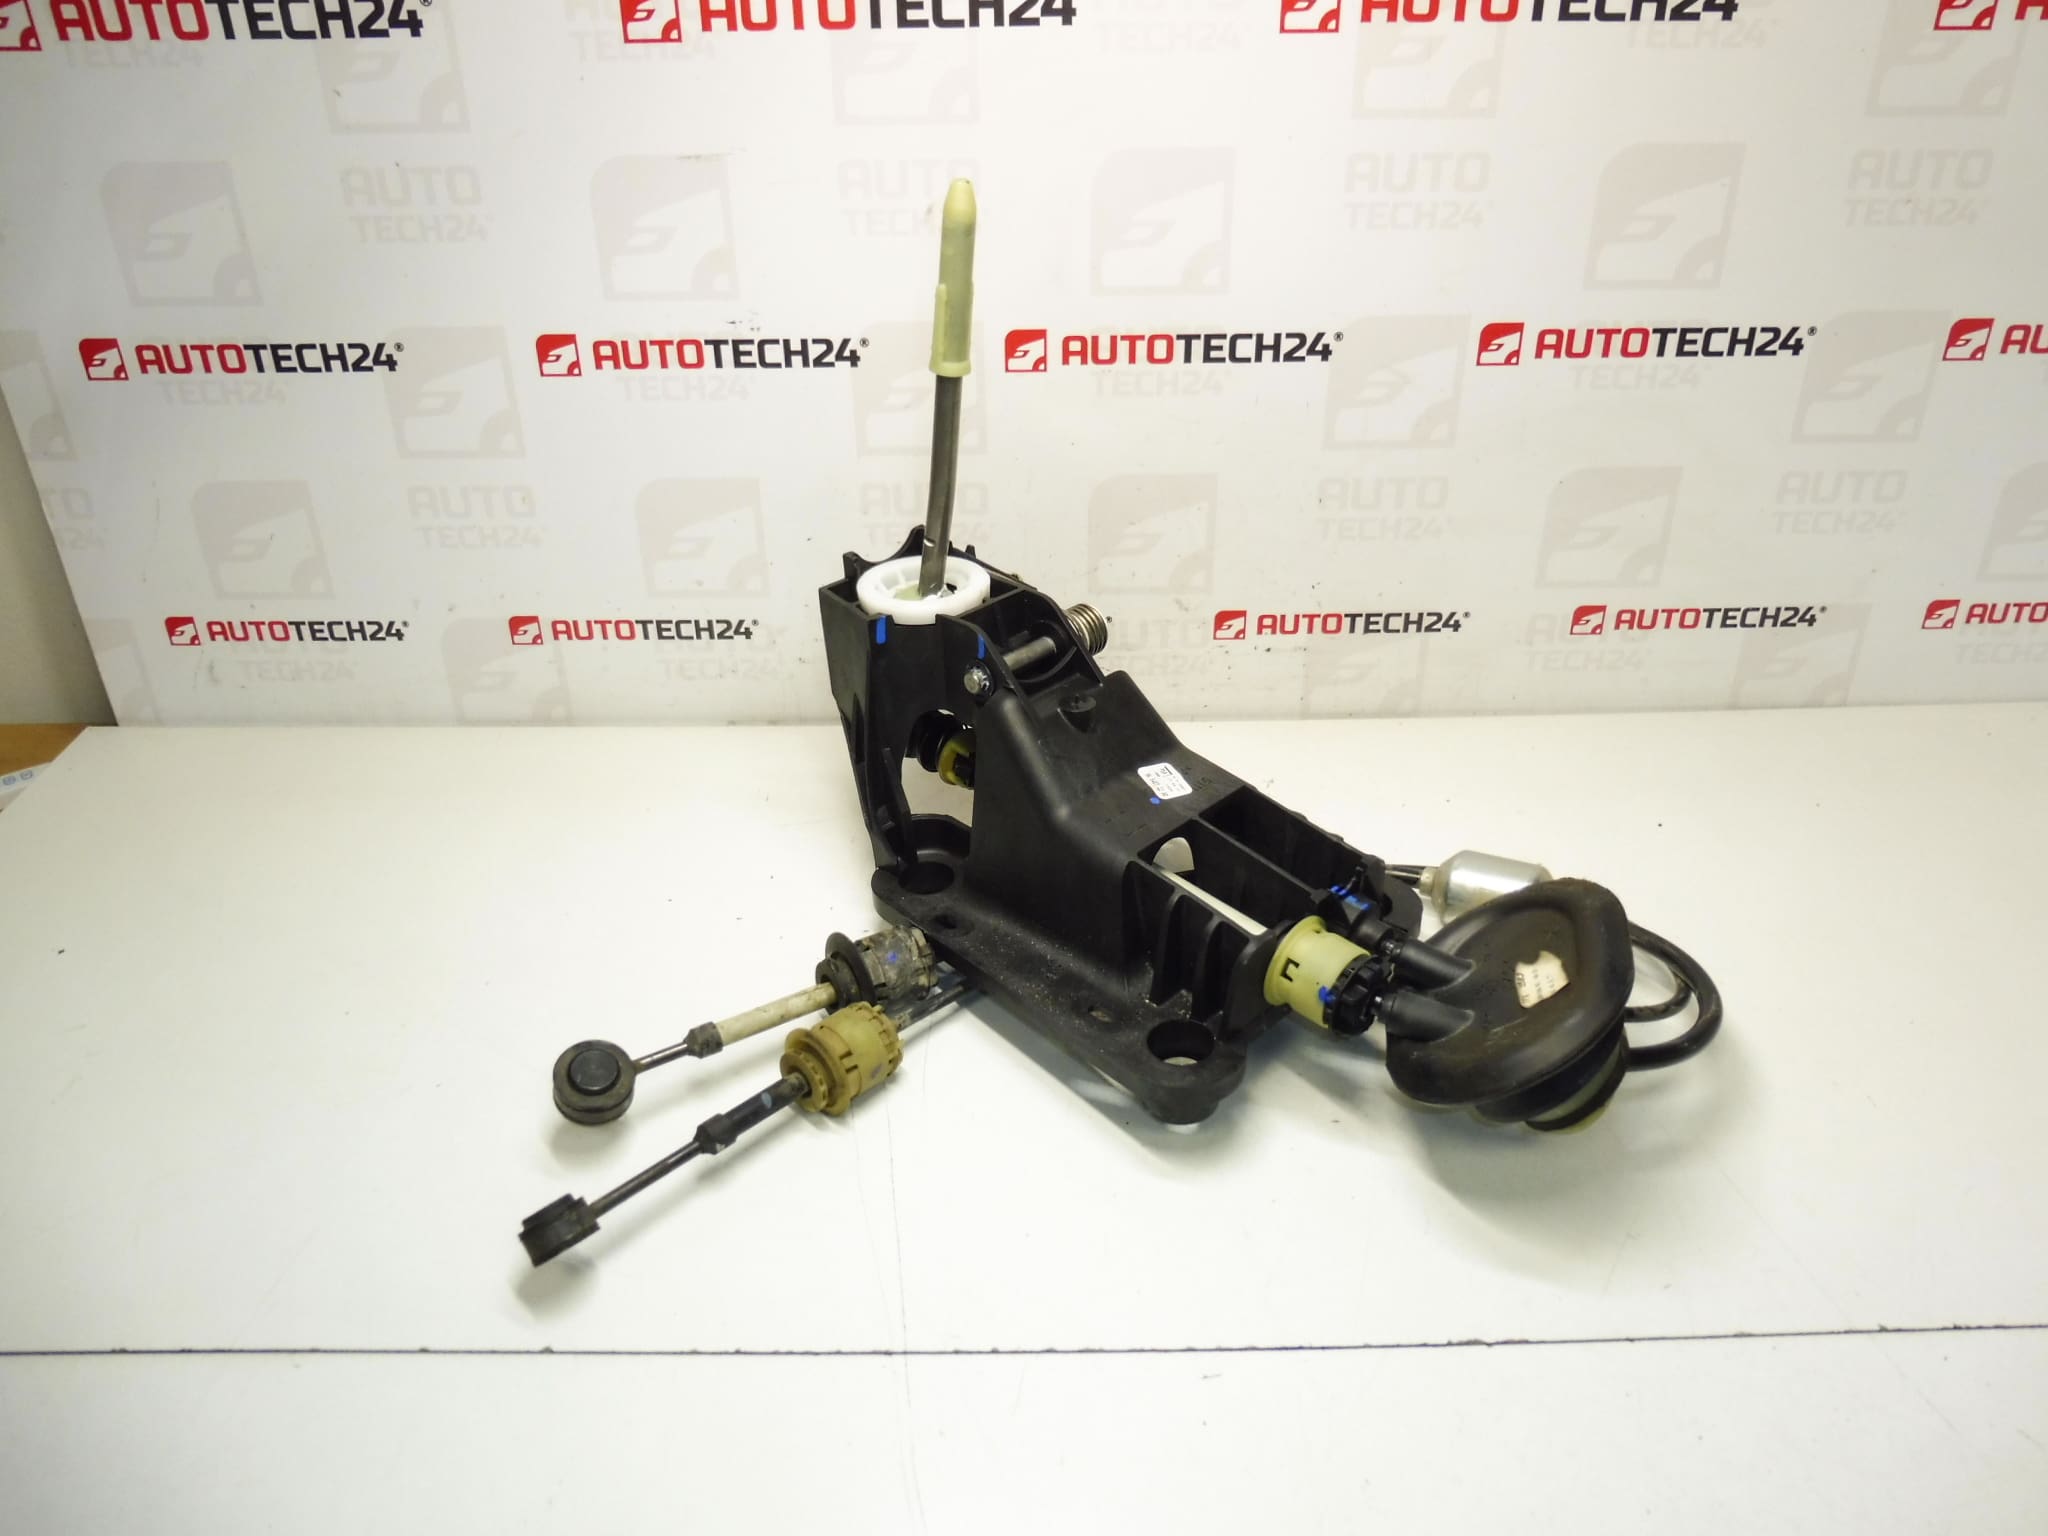
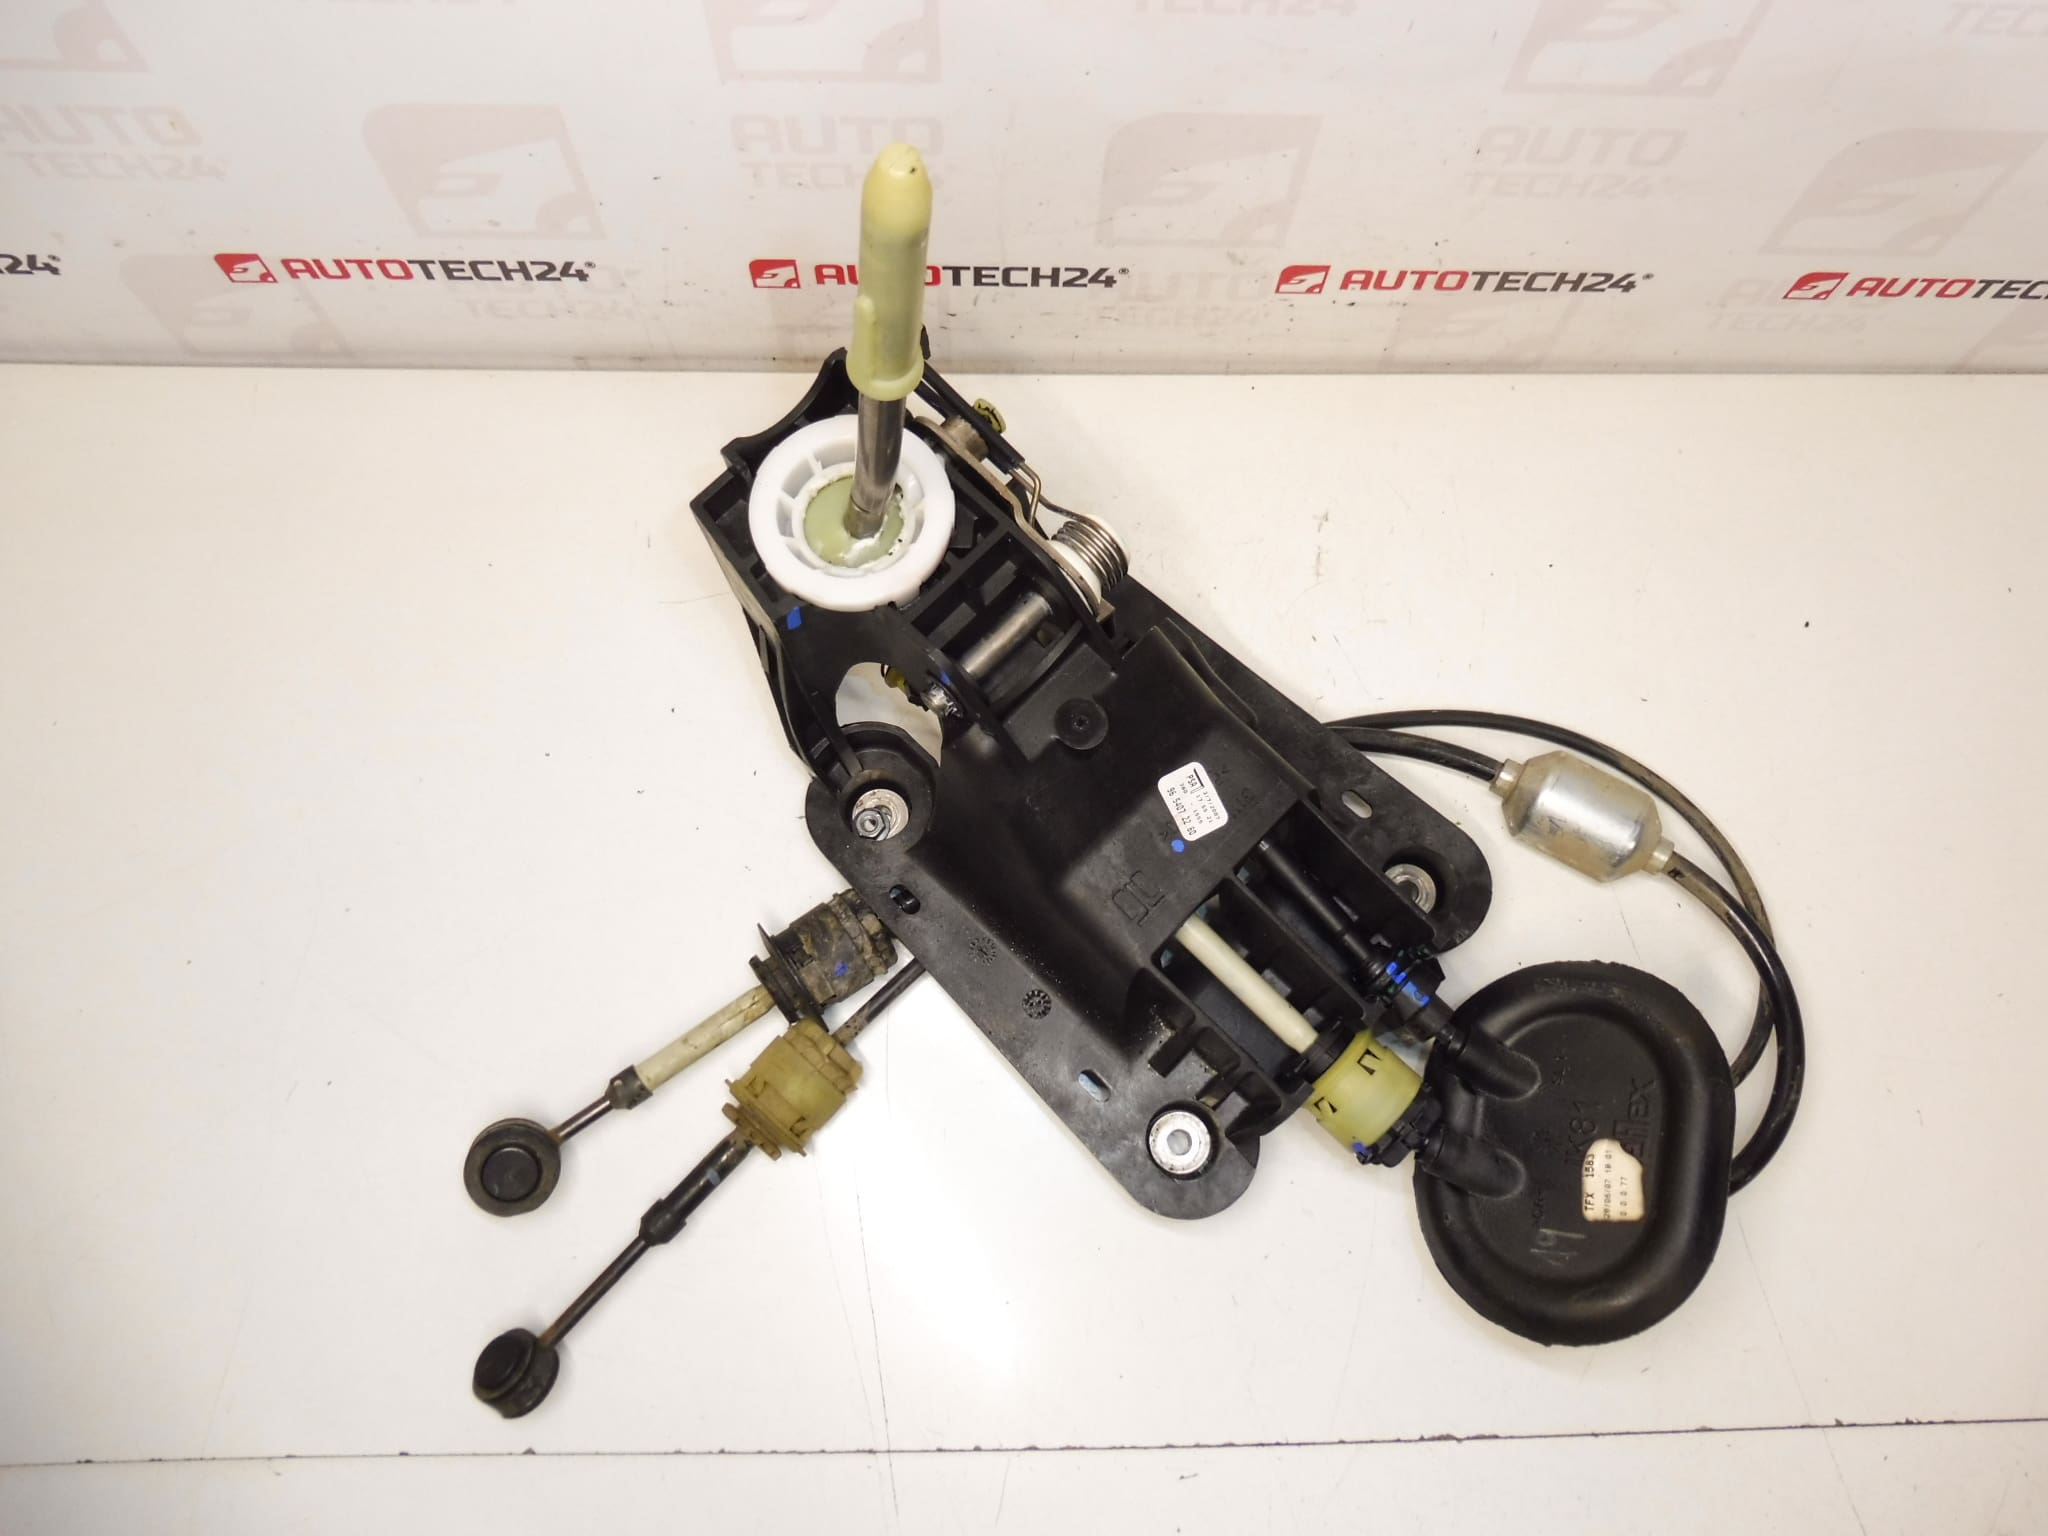
Shift lever and transmission control cables for PEUGEOT 207 cars
From a car with 46,000 km
Part description
A complete set of shift lever with shift cables designed for Peugeot 207. This part is used to accurately transfer movement from the shift lever to the transmission mechanism – in good condition, it will manifest itself in more reliable shifting, smaller clearances and better readability of individual steps.
This is a used original part from the Stellantis group (Citroën/Peugeot), dismantled from a car with 46,000 km mileage, which is often a good prerequisite for the well-preserved operation of the mechanics and cable guides.
Technical information
Product codes
- Product codes: 9654072280, 2400CP, 2444CZ
Installation recommendations
Generally/typically for a shifter with cables, the exact procedure may vary depending on the specific car design and transmission type. Below is a handy one-size-fits-all procedure for replacing this assembly.
1) Before assembly
- Carefully compare the old and new part: matching codes (9654072280, 2400CP, 2444CZ), lengths and routing of cables, types of terminations and grips.
- Check the condition of the cables: cracked/broken ends, stiff running, damaged bowdens, play in the pins.
- Check the shift mechanism in the lever: smooth movement, without rubbing and excessive play.
2) Necessary tools and materials
- Normal set of hand tools (ratchet and bits, socket wrenches, screwdrivers)
- Pliers (suitable for clips/fuses), or a small pry bar for plastic handles
- Cleaning agent for degreasing and rags
- Tie straps for temporarily securing the line (as needed)
3) Step-by-step assembly procedure
- Secure the vehicle against movement and prepare a work area (typically dismantling parts of the interior around the gear lever according to the design).
- Document the original cable routing (photos) – this will help with proper storage and attachment.
- Disconnect the ends of the cable guides from the shift lever (depending on the type of attachment, usually a pin/joint + fuse).
- Relax the cable guides in the holders/grommets so that they can be pulled out without force.
- Dismantle the shift lever from its housing (progressively loosen the fasteners and remove the assembly).
- Remove the cables from the line so as not to damage the surrounding parts and insulation.
- Install the shifter from the new kit into the housing and tighten the fasteners adequately and evenly (without over-tightening the threads).
- Run the cables along the same route as originally – make sure they are not broken at sharp bends or run over edges.
- Snap/fasten the cables into the brackets and grommets so they don’t move around the entire bowden when shifting.
- Connect cable ends to shifter in correct position and check that locks/clips are fully engaged.
- Perform a basic check of the shift operation at rest (engine off) – all positions should shift smoothly.
- Reinstall the removed covers/interior parts and double check that nothing is restricting the movement of the lever.
-
4) Post-assembly checks and test drive/function verification
- Check that the cables do not rub anywhere and rub the line when shifting.
- Verify smooth engagement of all gears including reverse (without excessive force).
- During a test drive, observe whether the gear shift does not jump, is inaccurate or worsens when warmed up.
5) The most common assembly mistakes + how to avoid them
- Not engaged locks and clips → after assembly, manually check each lock and joint play.
- Swapping cable guides (if different) → mark everything before disassembly and compare with the old piece.
- Transmission of vibrations/noises due to poor seating in the holders → make sure the bowdens are fully seated in the housing.
- Wear of joints and pins in the shifting mechanism (backlash formation, inaccurate shifting).
- Aging and stiffening of cable guides (difficult lever movement, rubbing when shifting).
- Damage to the bowden or terminals (cracks, torn out handles, binding).
- Incorrect installation in the past – kinked wiring, poorly snapped brackets, insufficient securing.
- Intrusion of dirt and moisture into the mechanism and joints (increased friction, corrosion).