Description
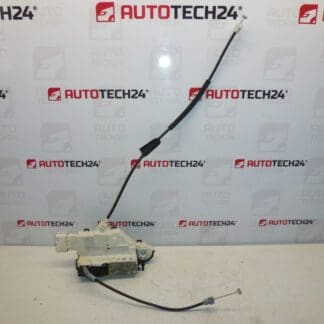
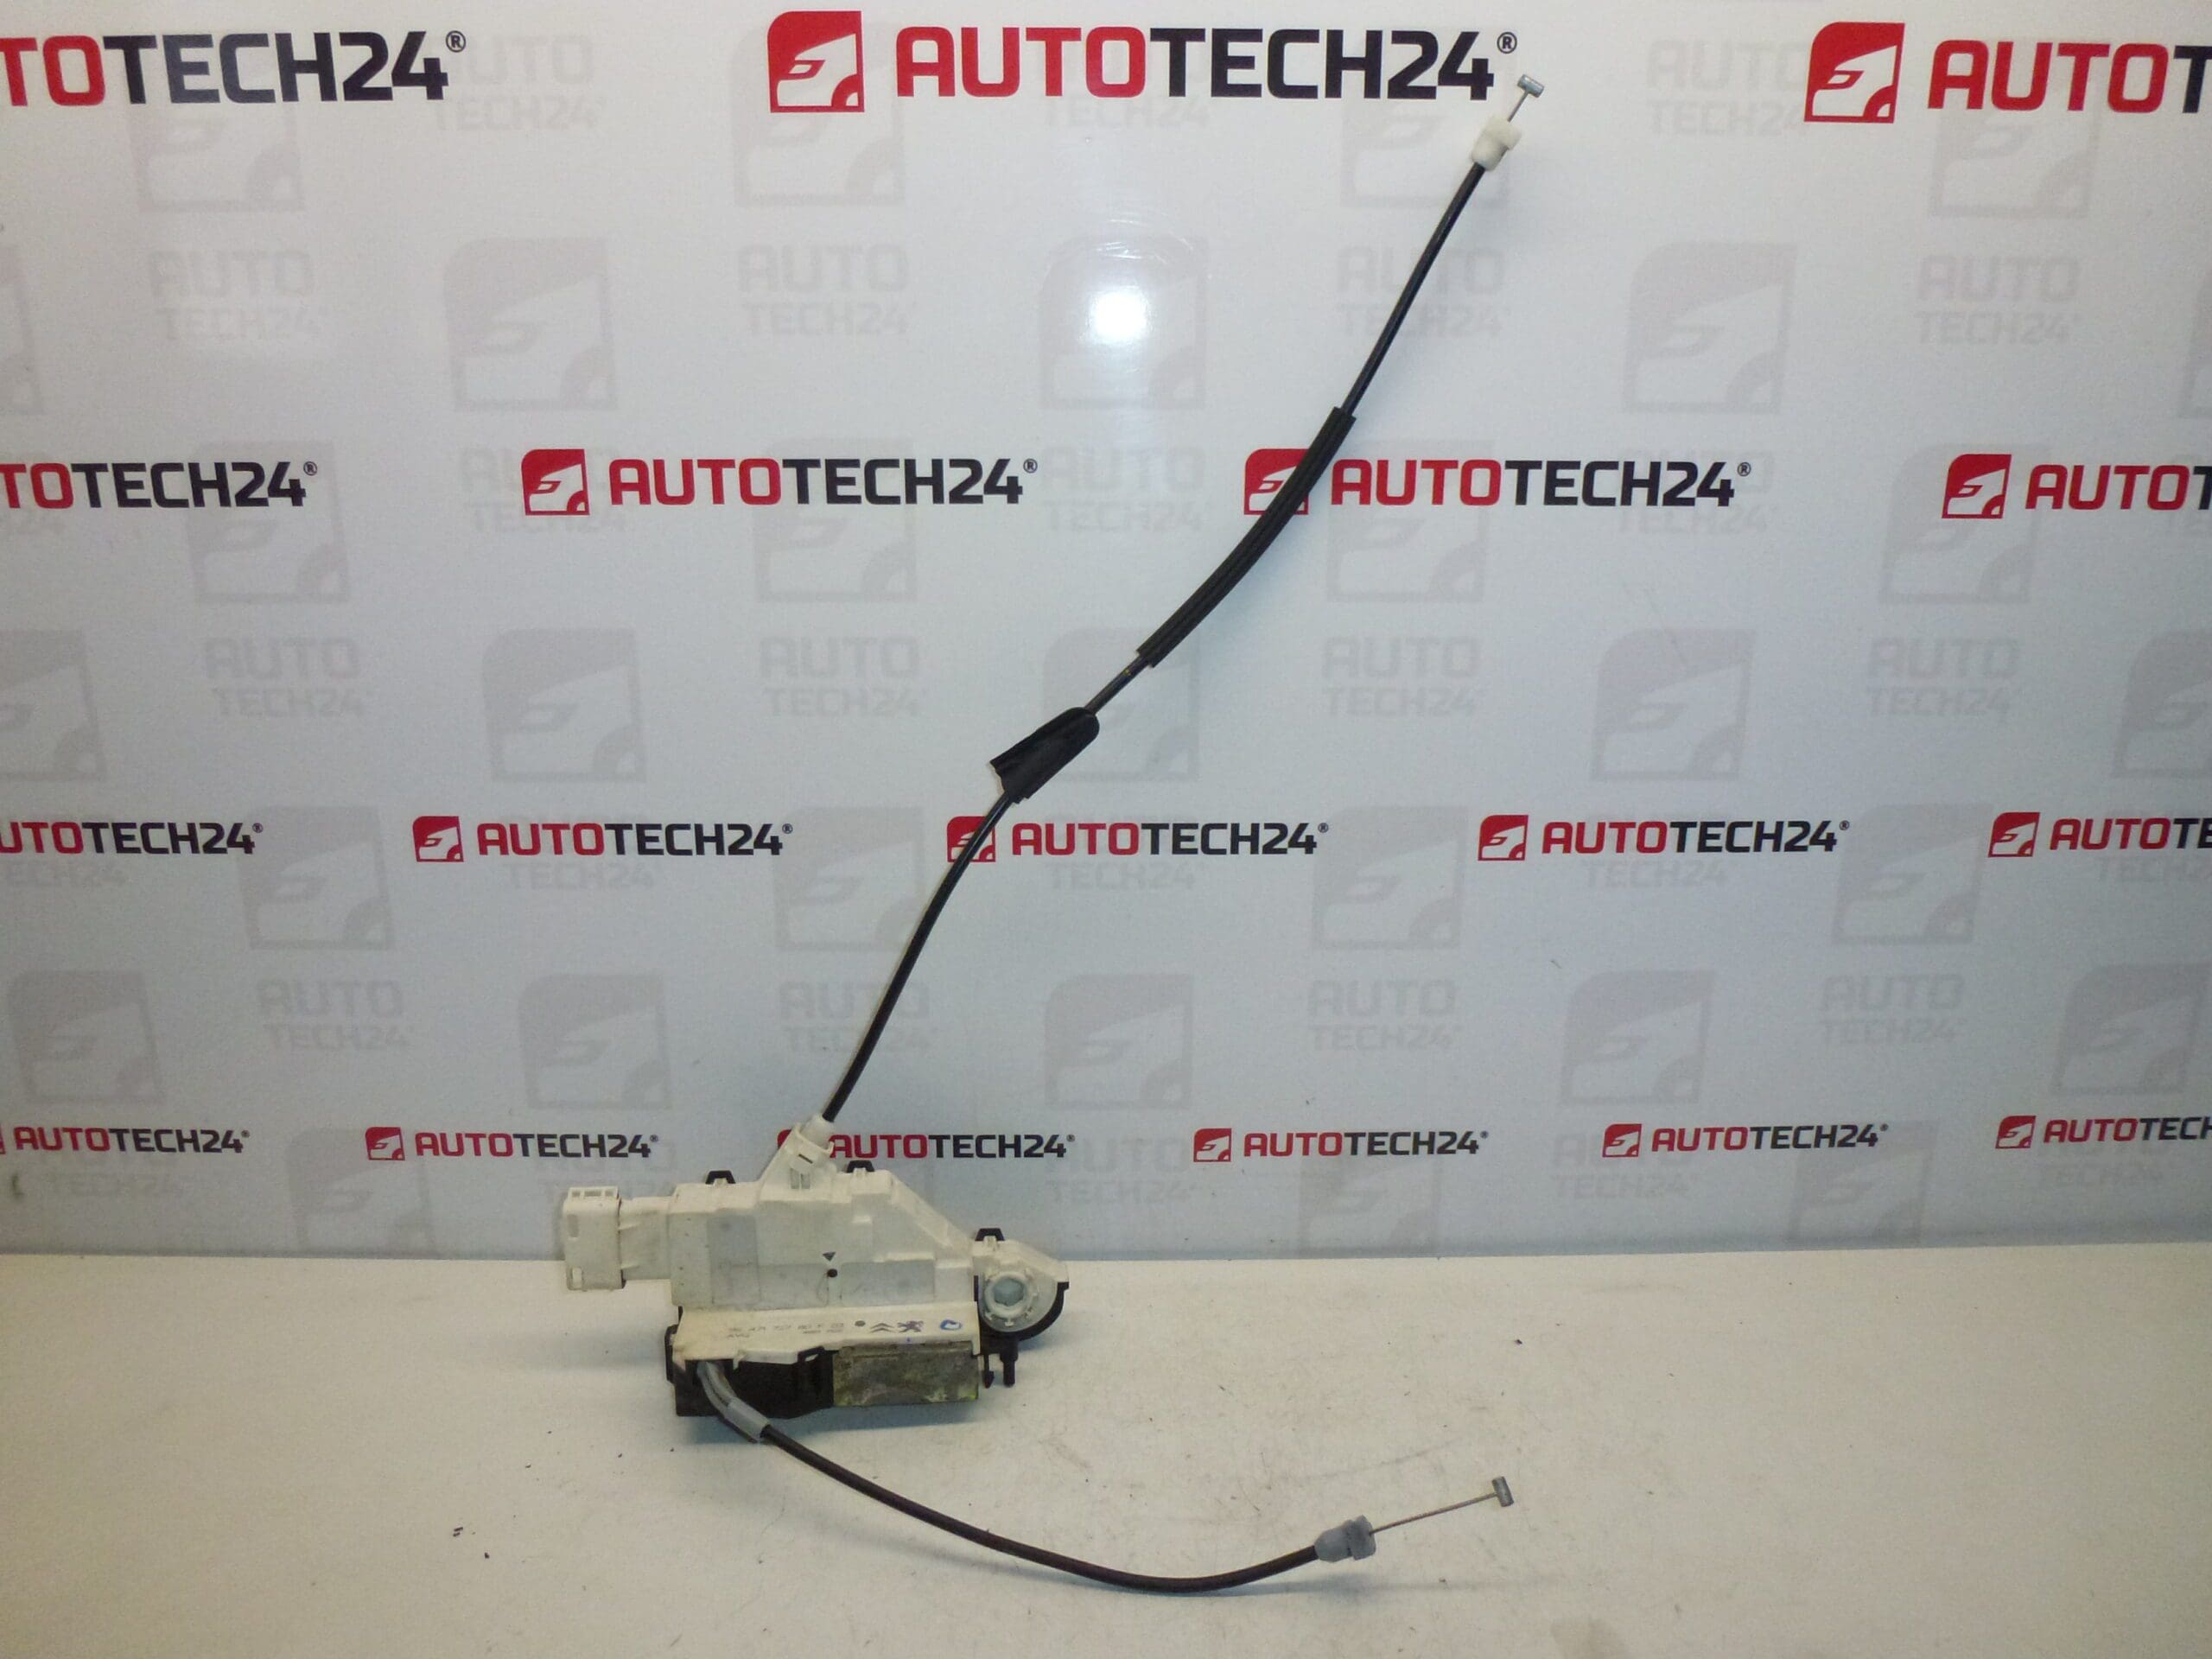
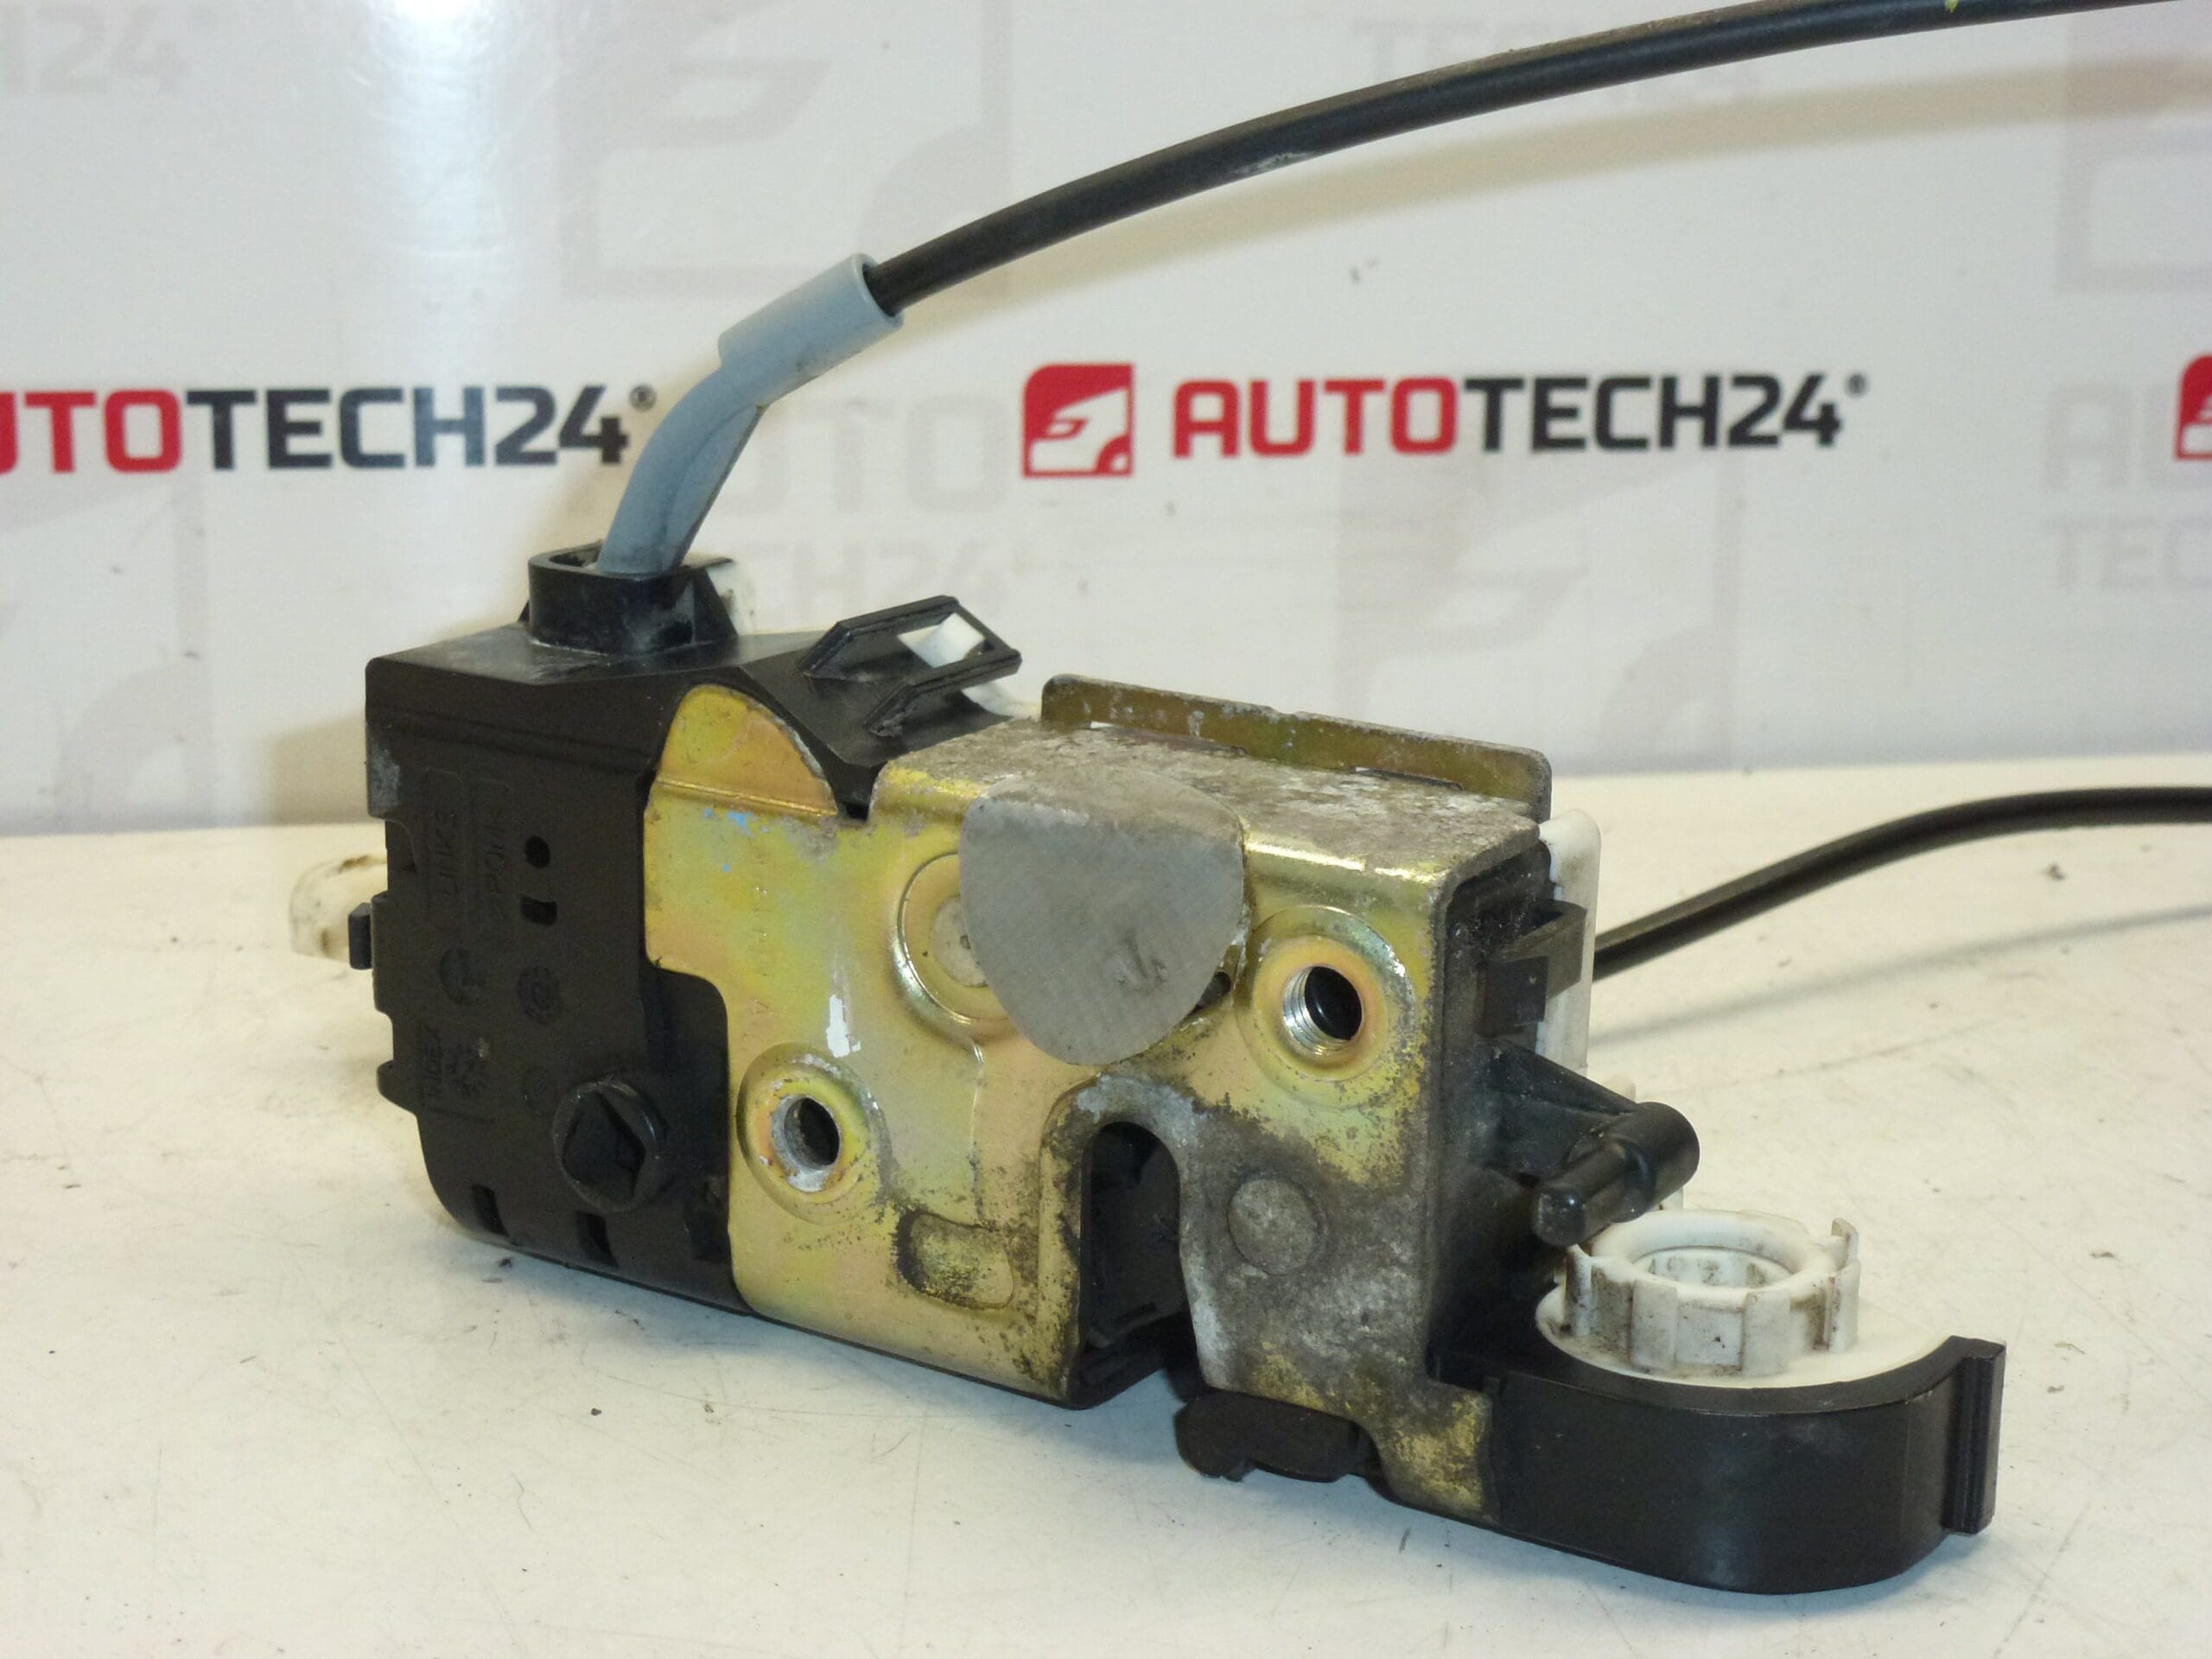
Electric central locking lock for the left front door for Citroën C4 5-door first series. Driver’s door.
Product Overview
High-quality electric central locking lock for the left front (driver’s) door, designed for Citroën C4 5-door models of the first series. This replacement lock restores reliable central locking function, improves door security and eliminates common symptoms such as failure to lock/unlock, intermittent operation or noisy actuator movement. Frequently referenced by part numbers 9681337180 and 9135Z5, this unit is a direct-fit replacement for workshop repairs and DIY servicing.
Compatibility And Fit
- Suitable For: Citroën C4 5-door (First Series) — Left Front (Driver) Door
- Commonly Searched By Part Numbers: 9681337180, 9135Z5
- Also Cross-Referenced With: 9660699880 F03, 9647172780 F03, 9683416080, 9135FA, 9135R0
Technical Information
- Manufacturer: Stellantis (Citroën / Peugeot)
- Model: Citroën C4 5-door (First Series) — Left Front Door
- Product Codes: 9681337180; 9660699880 F03; 9647172780 F03
- Other Numbers: 9683416080; 9135Z5; 9135FA; 9135R0
Function And Symptoms
The unit houses the electric actuator and mechanical latch that operate the central locking and door release functions. Typical failure symptoms include: the door not locking or unlocking with the remote, noisy or grinding operation inside the door, inability to open the door from the interior or exterior, and intermittent electrical operation. Replacing the lock restores normal locking/unlocking, secure latching and proper interaction with central locking system.
Installation And Replacement
General replacement steps (for experienced mechanics or competent DIYers):
- Disconnect Battery: Always disconnect the negative terminal before starting work to avoid short circuits and to protect electrical components.
- Remove Door Trim: Carefully detach the interior door panel and any vapor barriers to access the lock assembly. Use appropriate trim tools to avoid damage.
- Disconnect Electrical Connector: Unplug the central locking actuator connector and any wiring harnesses, noting connector orientation and clips.
- Remove Linkages And Fasteners: Detach control rods or cables and remove mounting screws/bolts securing the lock. Keep track of clips and spacers for reassembly.
- Fit New Unit: Install the replacement lock in the correct orientation, reconnect linkages and electrical connector, then test mechanical and electrical operation before reassembling the door card.
- Function Check: Verify locking/unlocking with remote and manual lever, and check child locks and central locking synchronization.
Recommended Tools: Trim removal tools, Torx/Spline drivers or Torx set, ratchet and socket set, needle-nose pliers, and a multimeter for electrical checks. If unsure, have the replacement performed by a qualified mechanic.
Mounting Recommendations
When installing, ensure connectors are fully seated and clips are secured to prevent rattles or intermittent contacts. Inspect wiring and connector pins for corrosion or damage and replace any brittle plastic clips. Apply light dielectric grease to electrical terminals if exposed to moisture. Always test the lock operation before refitting the trim panel to avoid repeat disassembly.
Most Common Failure Causes
- Actuator Wear: Electric motor or internal gears wear out over time, especially in high-mileage vehicles.
- Plastic Gear Damage: Internal plastic components can break, leading to loss of mechanical engagement.
- Water Ingress And Corrosion: Moisture entering the door cavity can corrode electrical contacts and mechanical parts.
- Damaged Linkages Or Cables: Bent or detached rods and worn cable ends prevent proper latch movement.
- Electrical Faults: Connector corrosion, broken wires or intermittent contacts cause unreliable operation.
Notes For Mechanics And DIY Enthusiasts
This lock is a common workshop replacement part and is often searched by its manufacturer codes (e.g., 9681337180, 9135Z5). Inspect surrounding components (door hinges, striker plate, window regulator) when replacing the lock to ensure no additional wear is contributing to door alignment or latching issues.