
Description
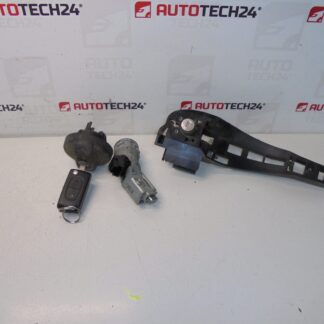
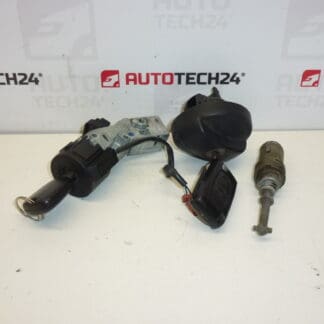
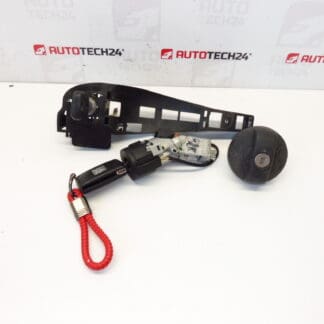
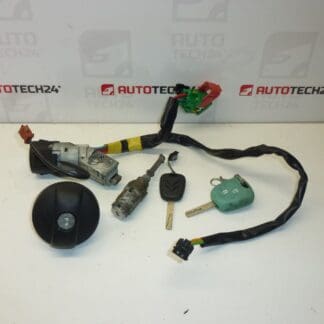
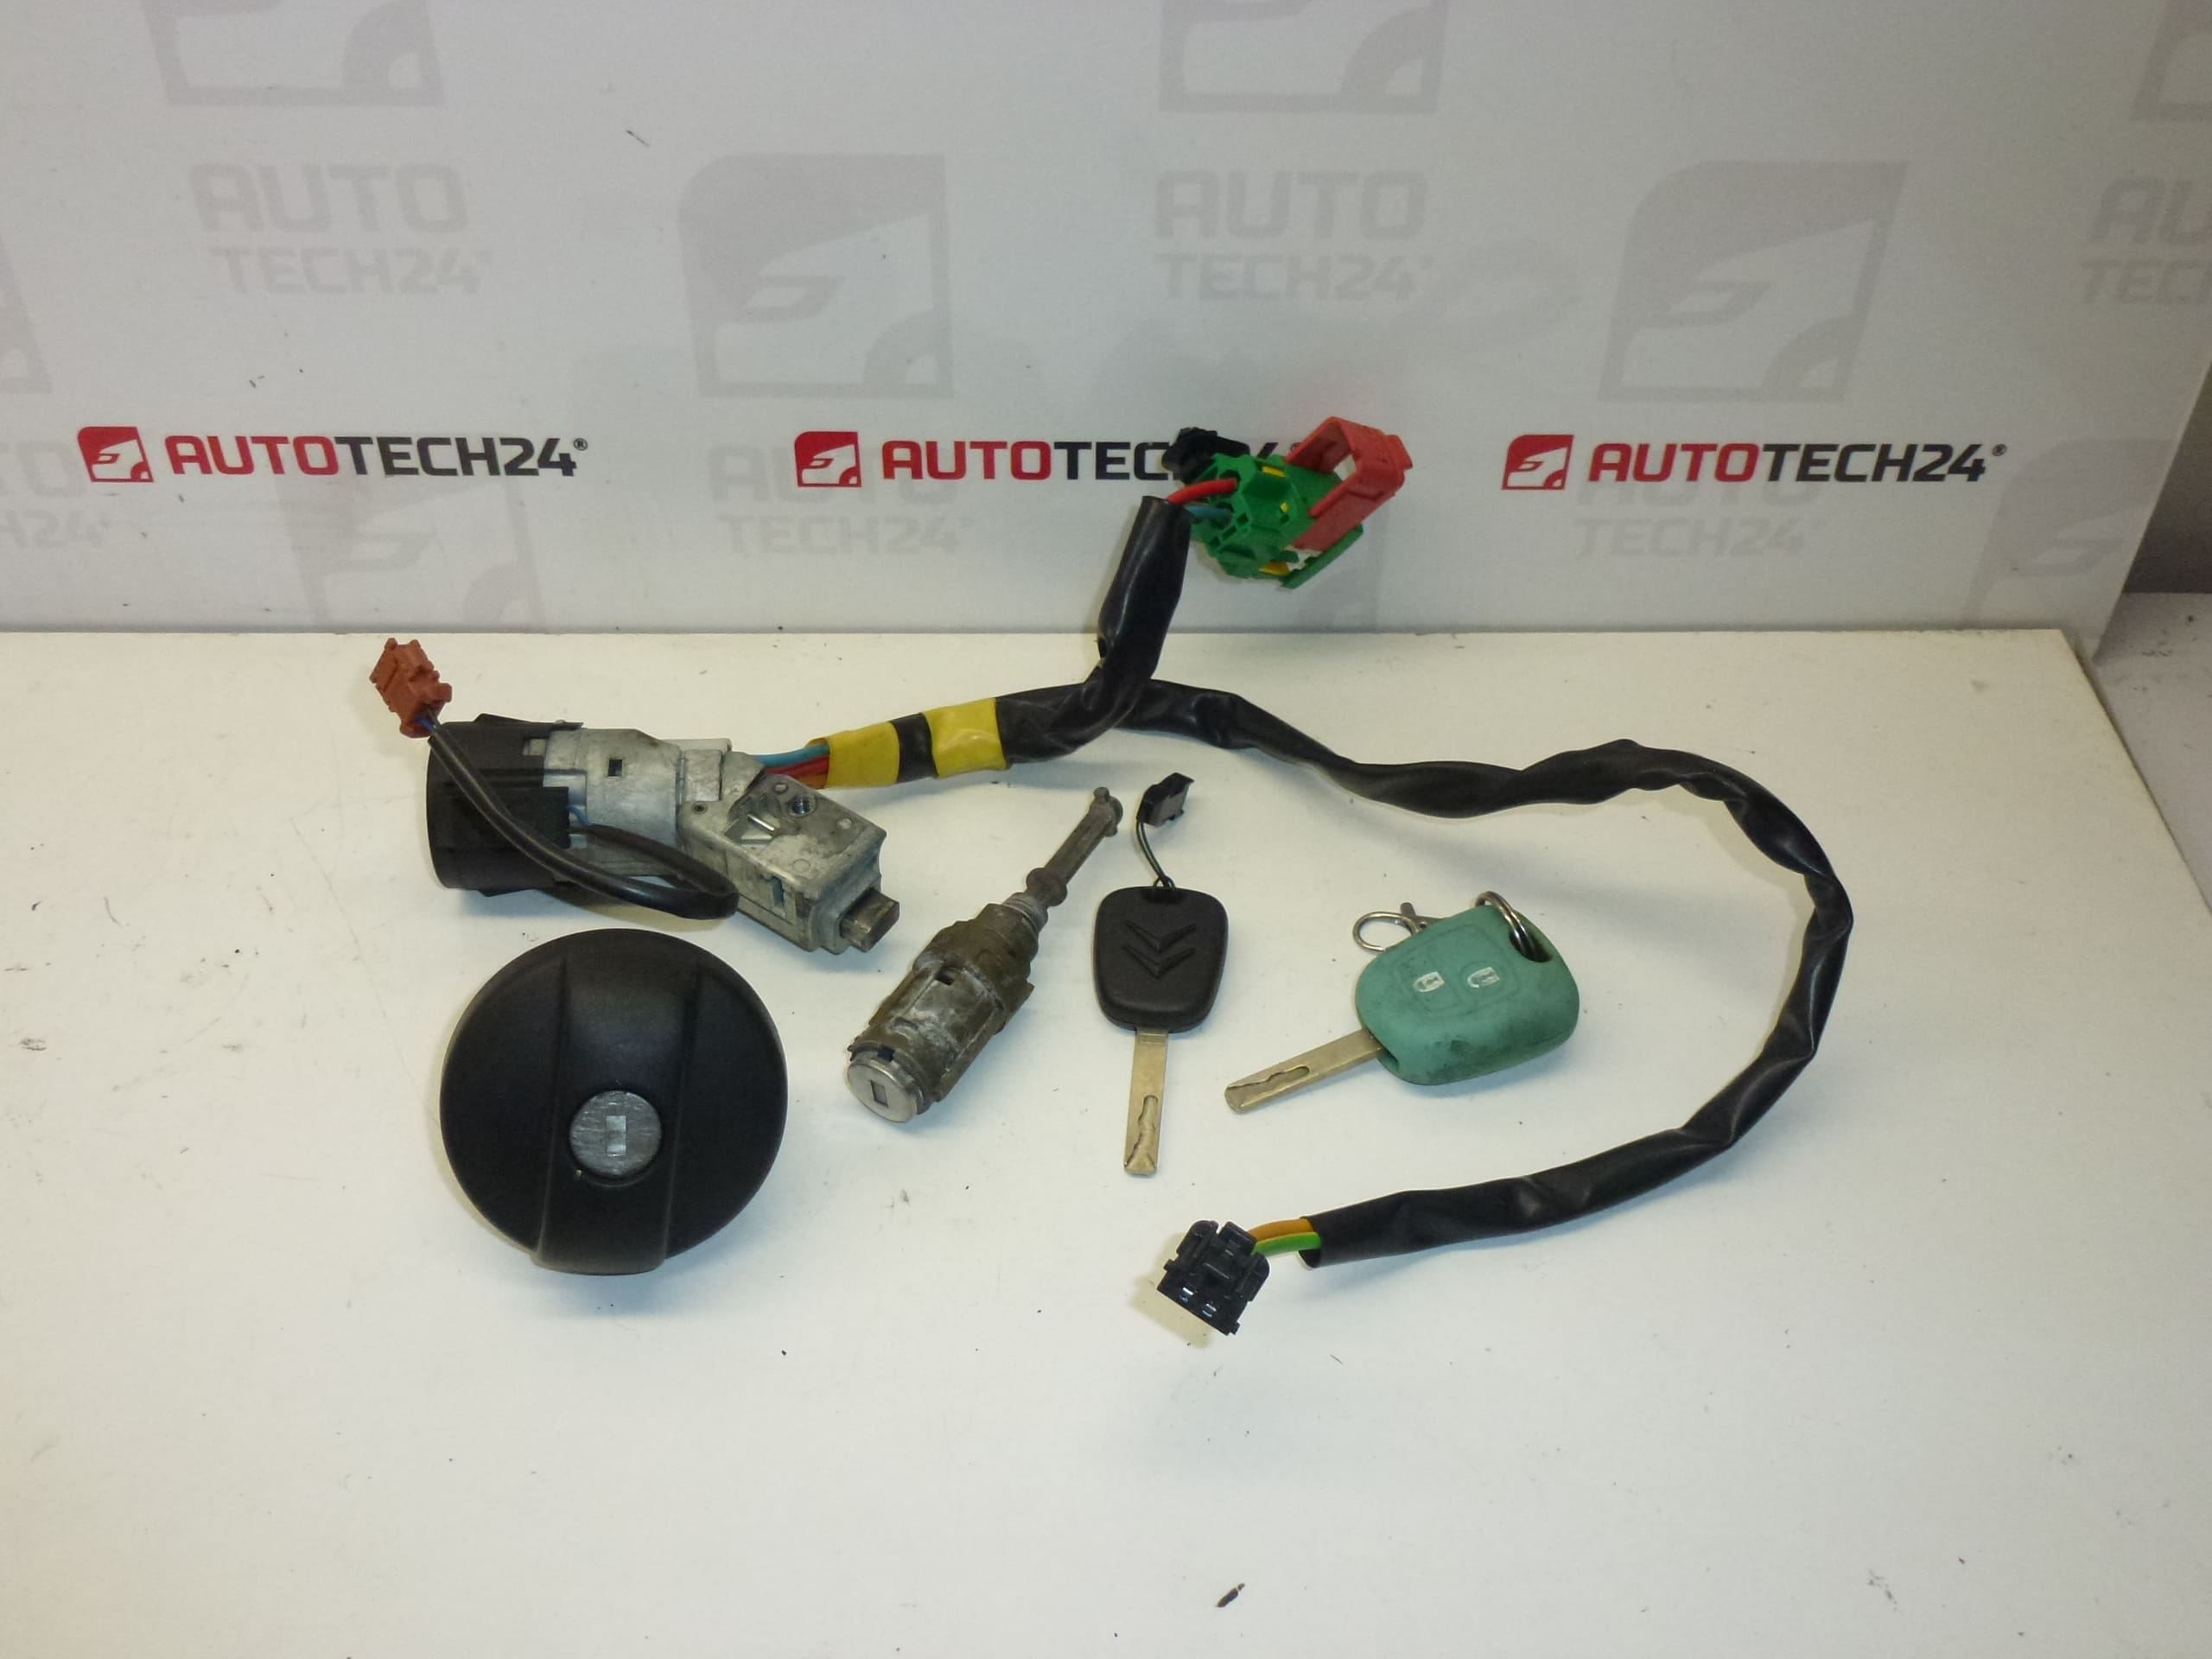
Lock set – Driver’s door, fuel filler flap and ignition barrel plus two keys. The key may not have remote control buttons.
This complete lock kit is designed for fast replacement of worn or damaged locks on Citroën models. It includes the door lock for the driver’s side, the fuel filler flap lock and the ignition barrel together with two keys (keys may be blank or without remote buttons). Ideal for workshops and experienced DIYers looking to restore mechanical security and reliable starting functionality. Common search terms include the product codes 4162AH and 4162AG, as many technicians and owners look up parts by reference number.
The set replaces the mechanical locking components responsible for securing the vehicle and allowing the key to start the engine. Replacing the worn locks reduces the risk of lock jamming, broken keys in the cylinder and fuel cap theft. Keys supplied usually need cutting to match your vehicle; if the vehicle uses a transponder immobiliser, the transponder must be present in the key or reprogrammed to restore engine start functionality.
Technical Information
- Manufacturer: Stellantis (Citroën / Peugeot)
- Model: Citroën C2, Citroën C3, Citroën C3 Pluriel
- Product Codes: 4162AH, 4162AG
- Additional Numbers: 4162AH/4162AG
Installation Recommendations
Installation is straightforward for a trained mechanic and feasible for skilled DIYers with basic tools. Follow these general steps:
- Disconnect the vehicle battery before working on the ignition barrel to avoid electrical shorts or unintended airbag/immobiliser triggers.
- For the driver’s door lock: remove the inner door trim, detach window/lock linkages and remove the fixing screws or rivets securing the lock. Fit the new lock, reconnect linkages and test mechanical operation before reassembling the door panel.
- For the fuel filler flap lock: open the filler flap, remove any retaining screws and replace the lock module, checking the flap operation and seal.
- For the ignition barrel: remove the steering column covers, release the retaining screw or clip, withdraw the old barrel and install the replacement. Ensure the ignition switch positions work correctly and reconnect the battery only after confirming mechanical fit.
- Have the keys cut precisely and, if necessary, ensure transponder programming is performed when required by the vehicle’s immobiliser system.
- Use graphite or lock-specific lubricant for the tumblers; avoid wet oils that attract dirt.
Why This Part Fails
Locks and ignition barrels fail for several common reasons: mechanical wear of tumblers and wafers from long-term use, corrosion and water ingress (especially in older cars or in damp climates), broken or worn key teeth, vandalism or forced entry attempts, and deterioration of plastic components and linkages. Lack of lubrication and accumulation of dirt can accelerate wear and cause sticking or jamming.
Notes For Buyers
Searches by the product codes 4162AH and 4162AG are common—if you have those numbers matching your part, this kit is likely the replacement you need. Keys supplied may not include remote buttons; remote functions and key programming are not included with the mechanical lock set. If you are not experienced with steering column or door disassembly, we recommend professional installation to ensure safe and correct operation.