Description
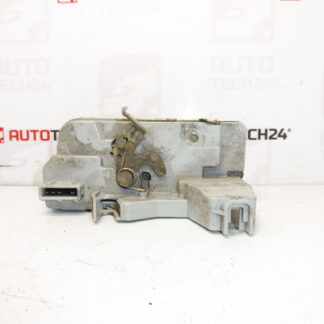
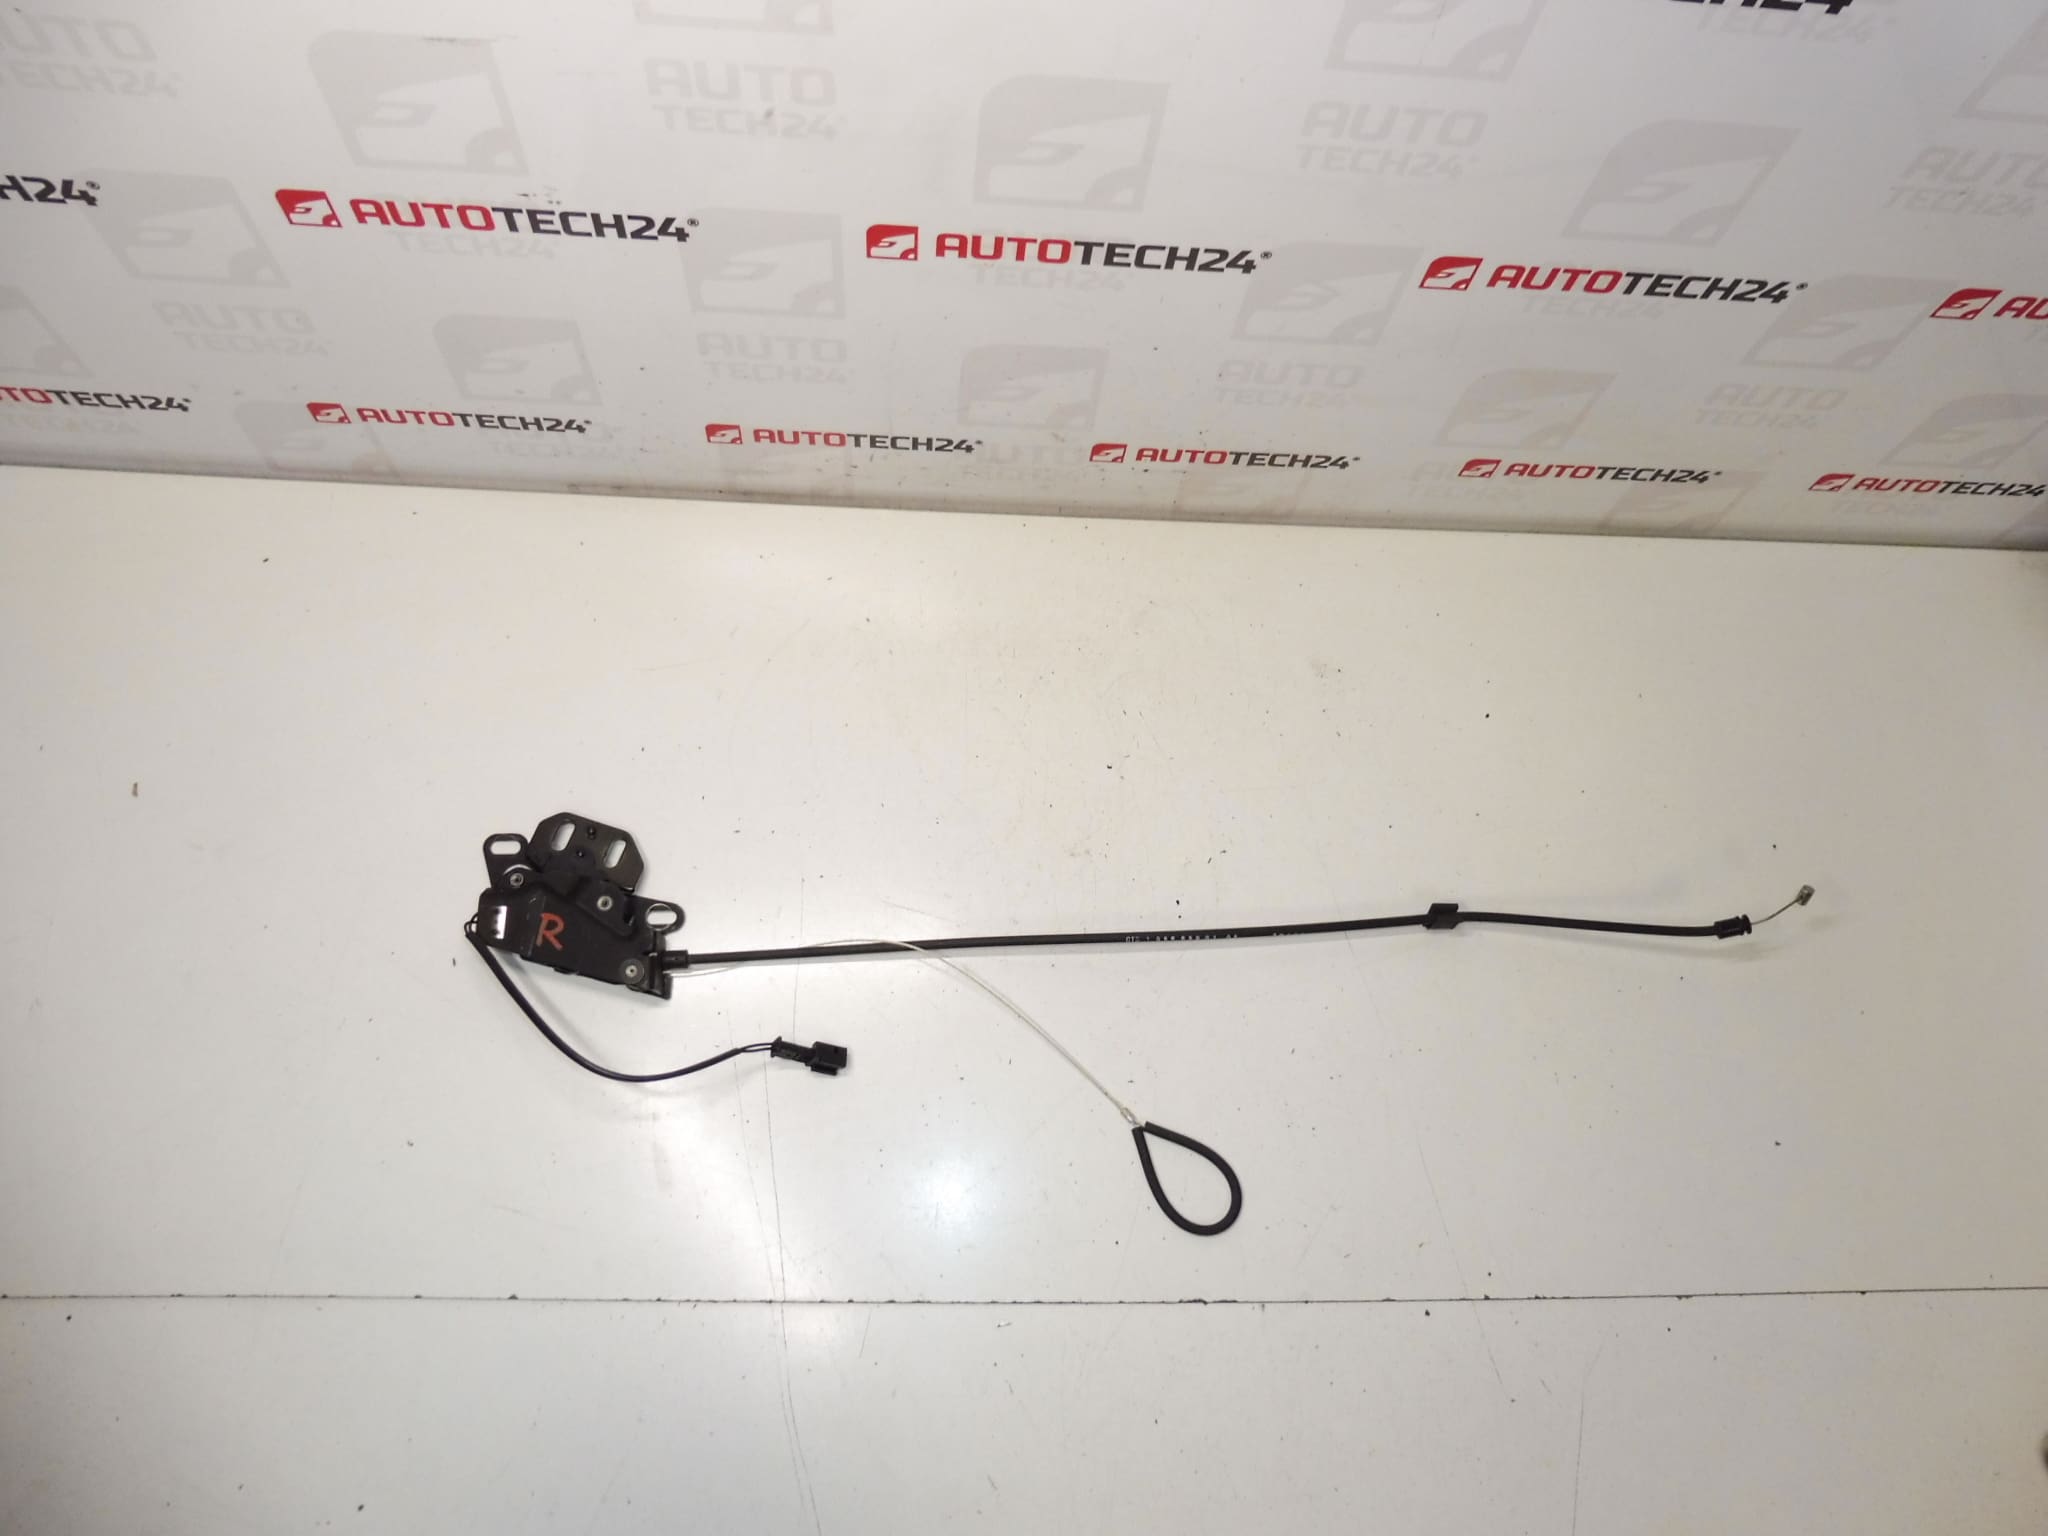
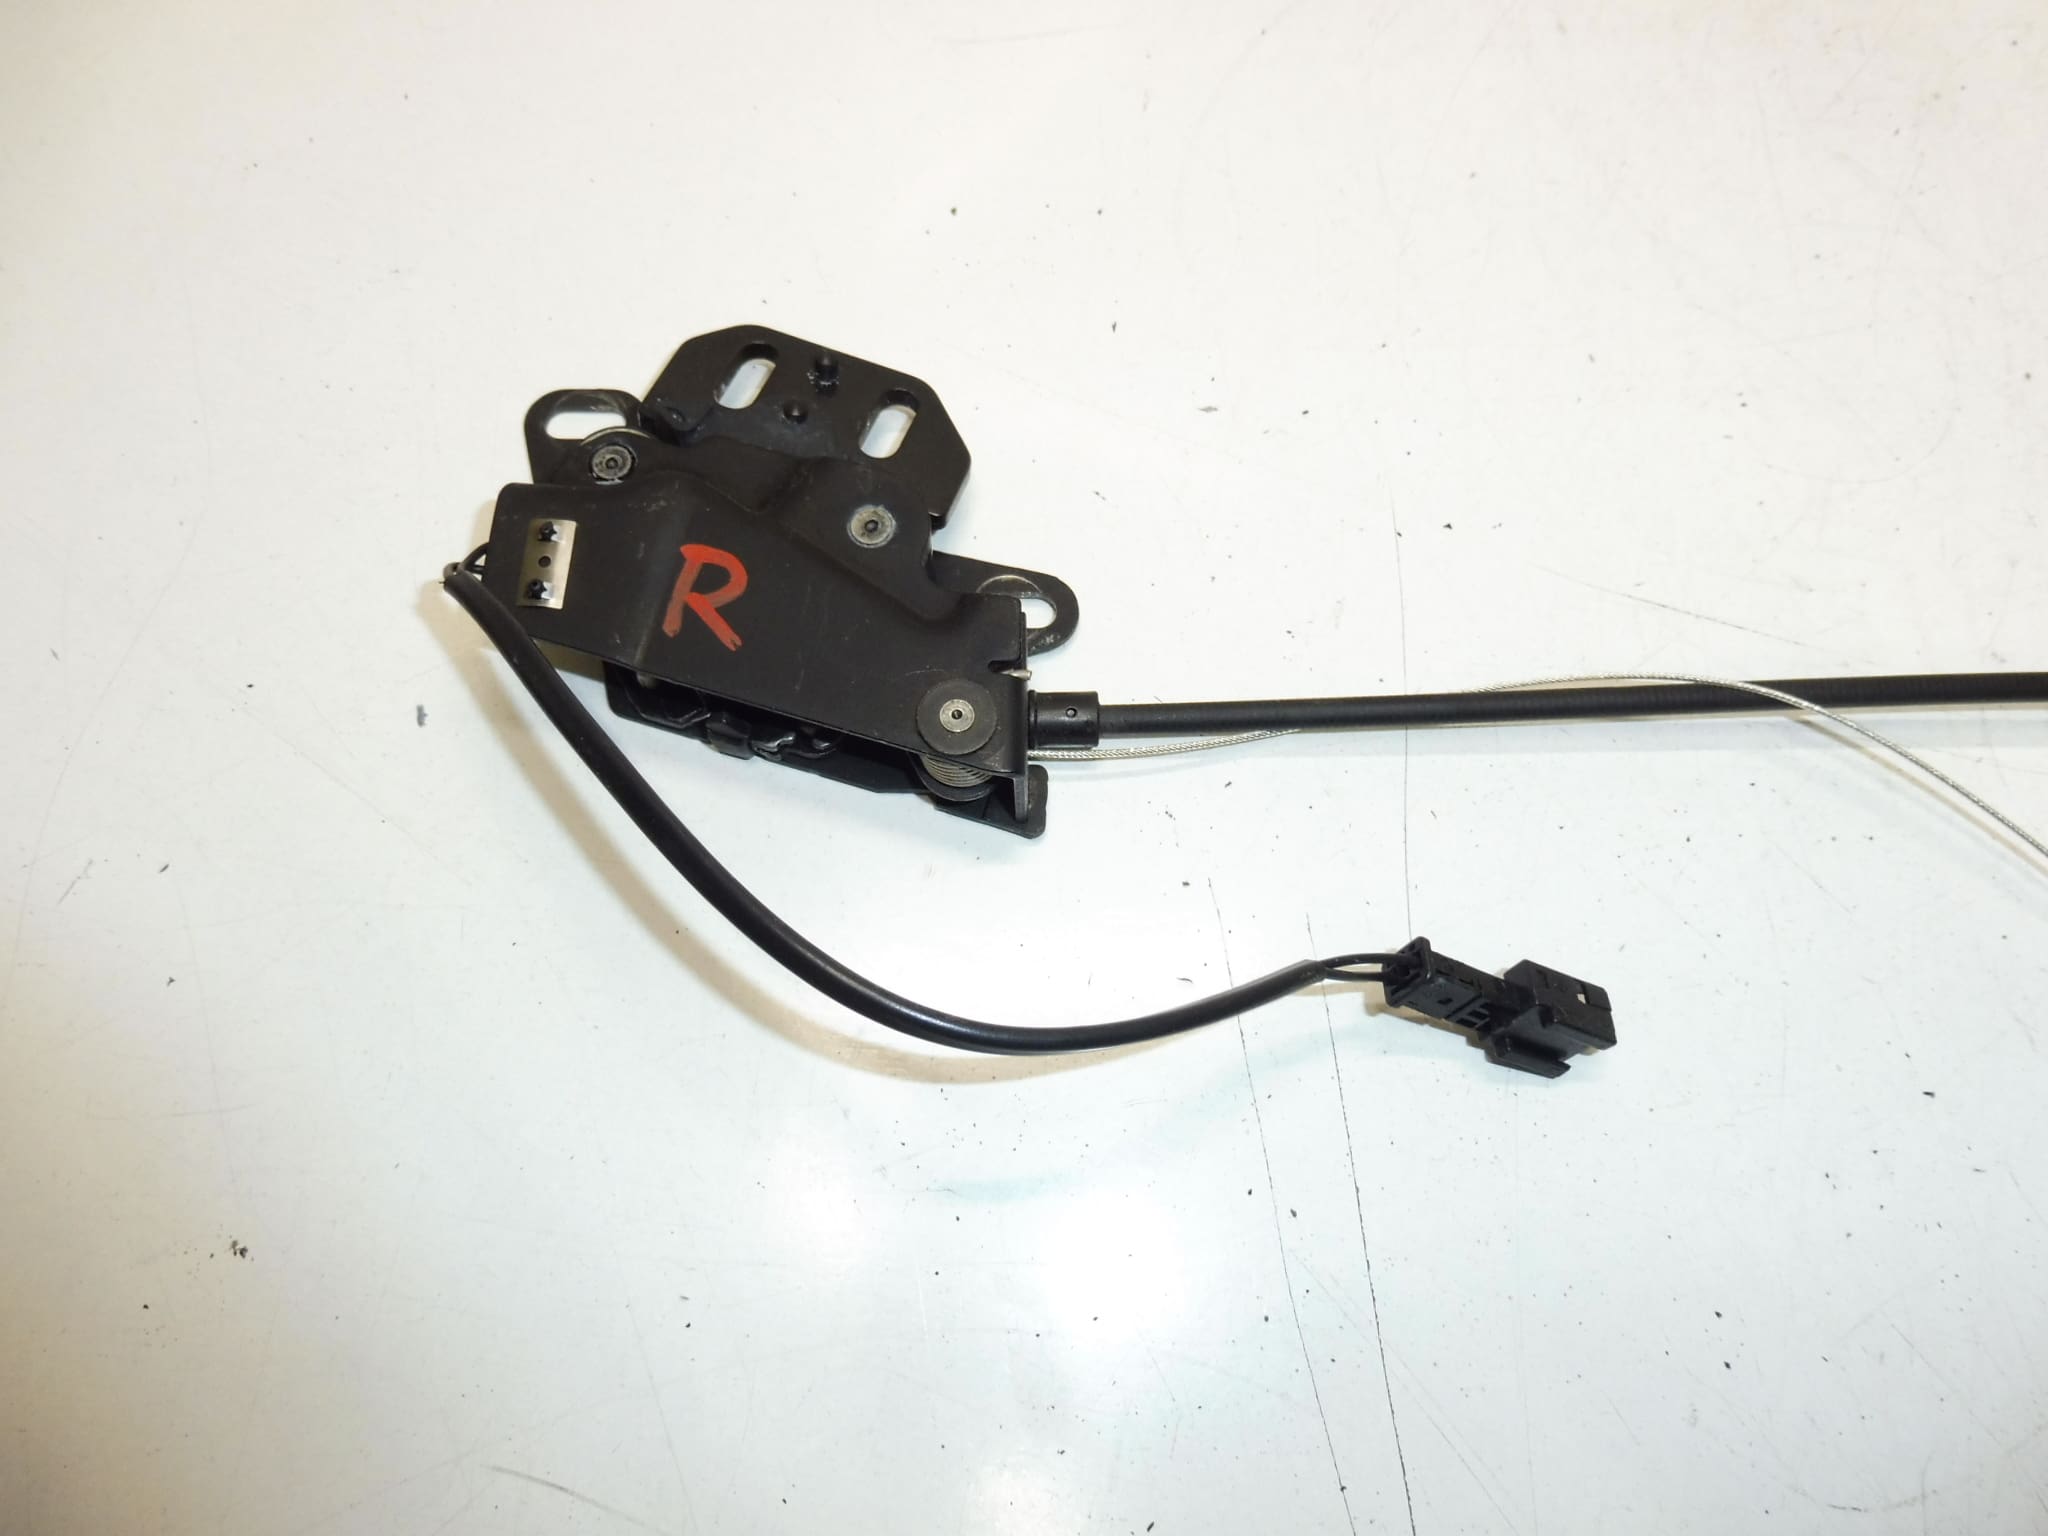
Right boot lock for Peugeot 307 CC with functional microswitch 8484L4
Compact Description
Replacement right-side boot (trunk) lock for the Peugeot 307 CC, fitted with a functional microswitch (8484L4). This unit restores secure latching of the boot lid and proper electrical signalling to the central locking and vehicle electronics.
Benefits and Use
- Direct replacement for the original equipment lock, commonly searched by OE numbers 9651004580, 8484L4 and 8484Z3.
- Restores reliable boot locking, prevents unwanted opening and ensures correct microswitch feedback for central locking, alarm and interior lighting circuits.
- Ideal for professional workshops and DIY mechanics working on Peugeot 307 CC vehicles.
Technical information
- Manufacturer: Peugeot / Stellantis
- Model: 307 CC (Coupe Cabriolet) – Right Boot Lock
- Product Codes: 9651004580, 8484L4
- Other Numbers: 8484Z3
Fitment
Intended for Peugeot 307 CC models (right-hand side boot lock). Always verify that OE numbers match the part required for your specific vehicle version when searching or ordering.
Function
The lock secures the boot lid mechanically and provides an electrical signal via the microswitch to indicate closed/locked status. That signal is used by the central locking system, alarm and interior lighting / boot open warning circuits.
Typical Symptoms Indicating Replacement
- Boot does not latch or pops open while driving.
- Central locking fails to lock or report the boot as closed.
- Interior/boot light remains on or battery drain suspected after closing the boot.
- Physical damage or visible corrosion on the lock mechanism.
Installation recommendations
- Work Safely: Disconnect negative terminal of the battery before unplugging electrical connectors to avoid short circuits or faults in vehicle electronics.
- Access: Open the boot lid and remove the interior trim panel held by clips and screws to expose the lock assembly.
- Disconnect: Unplug the electrical connector for the microswitch and remove the mounting bolts (typically 2–3 fasteners) securing the lock to the boot lid.
- Replace: Remove the old unit, fit the new lock in the same orientation, tighten bolts to a firm setting and reconnect the microswitch connector.
- Adjust and Test: Check latch alignment with the striker, lubricate moving parts with an appropriate grease, test locking/unlocking with the remote and manual key, and verify that the central locking and interior lights respond correctly before reassembling trim.
- Protection: Apply a small amount of dielectric grease to the electrical connector to reduce the risk of future corrosion in damp environments.
Why This Part Commonly Fails
Boot locks on convertible models like the 307 CC are exposed to more moisture and road dirt. The most frequent causes of failure are:
- Corrosion and water ingress affecting the latch mechanism or electrical contacts.
- Mechanical wear of internal springs and pawls after years of use.
- Broken microswitch contacts that stop sending the closed/locked signal to vehicle systems.
- Impact damage from forced opening or trunk collisions.
Notes for Professionals and DIY Mechanics
Search by the OE numbers 9651004580, 8484L4 or 8484Z3 for fast identification. Proper alignment and a clean, lubricated striker are as important as the new lock itself to ensure long service life. If the vehicle shows electrical faults after replacement, check fuse/circuit and ensure connectors are fully seated.