Description
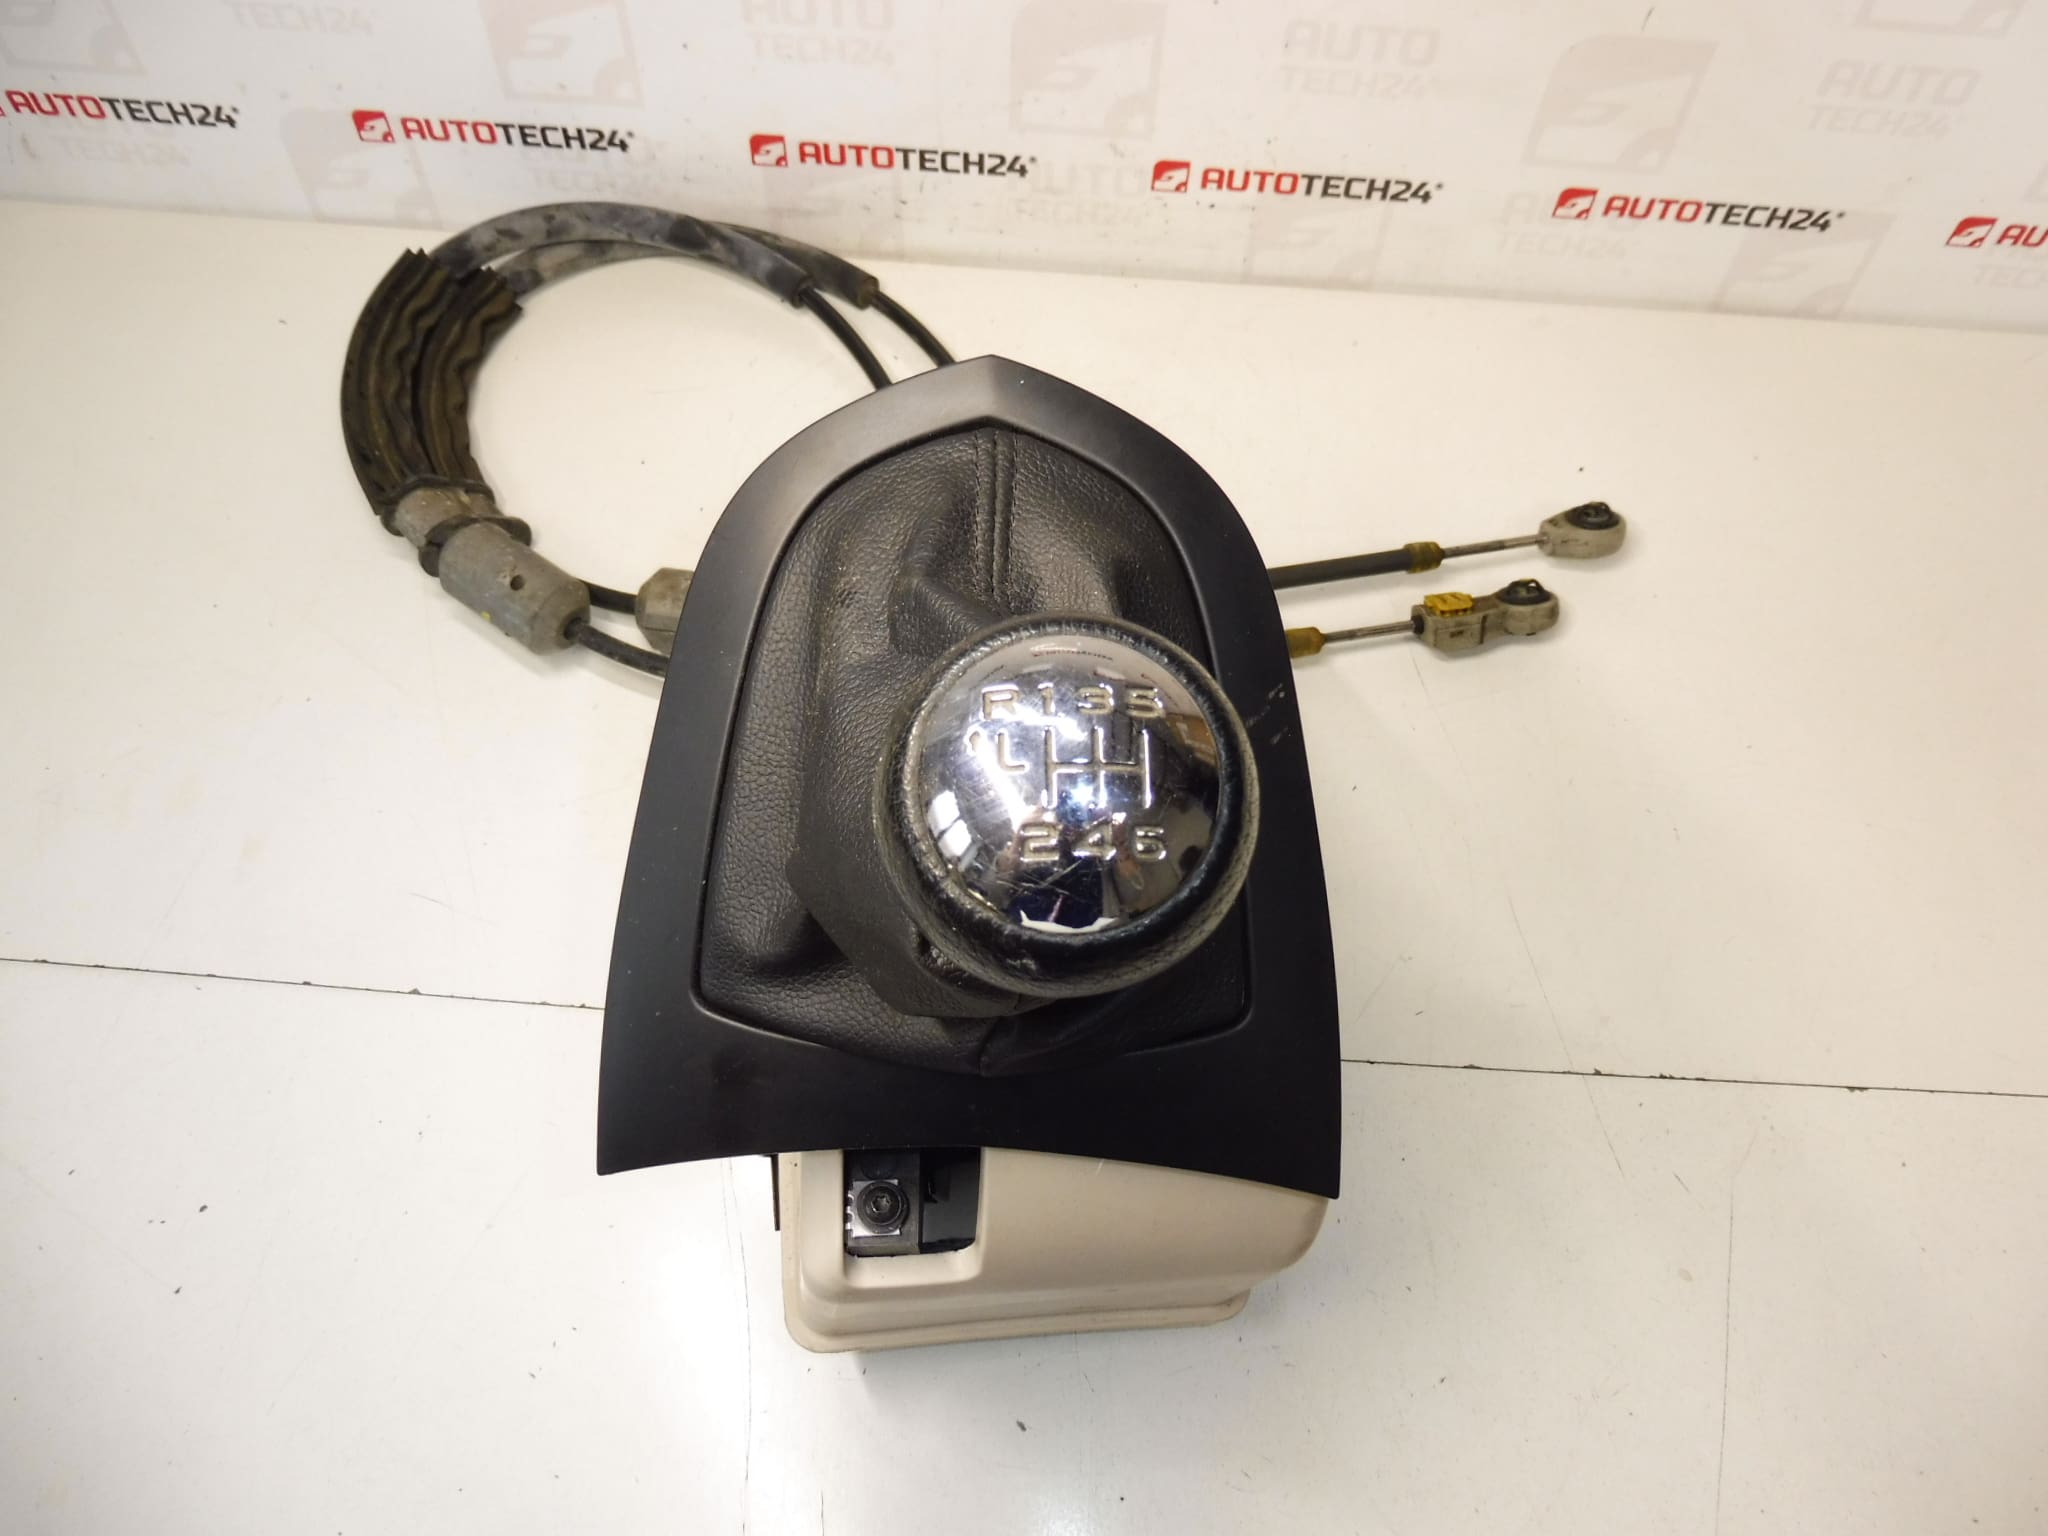
Peugeot gear shifter for 308 T7 6 SPEED cars
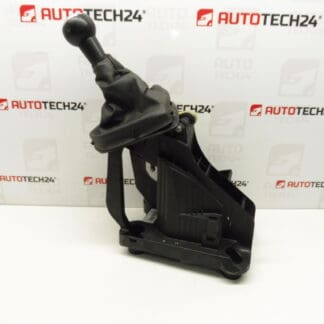
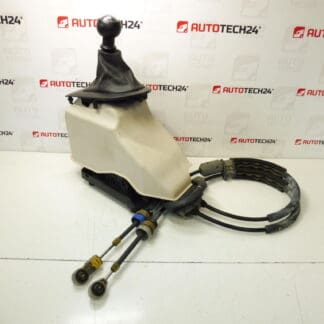
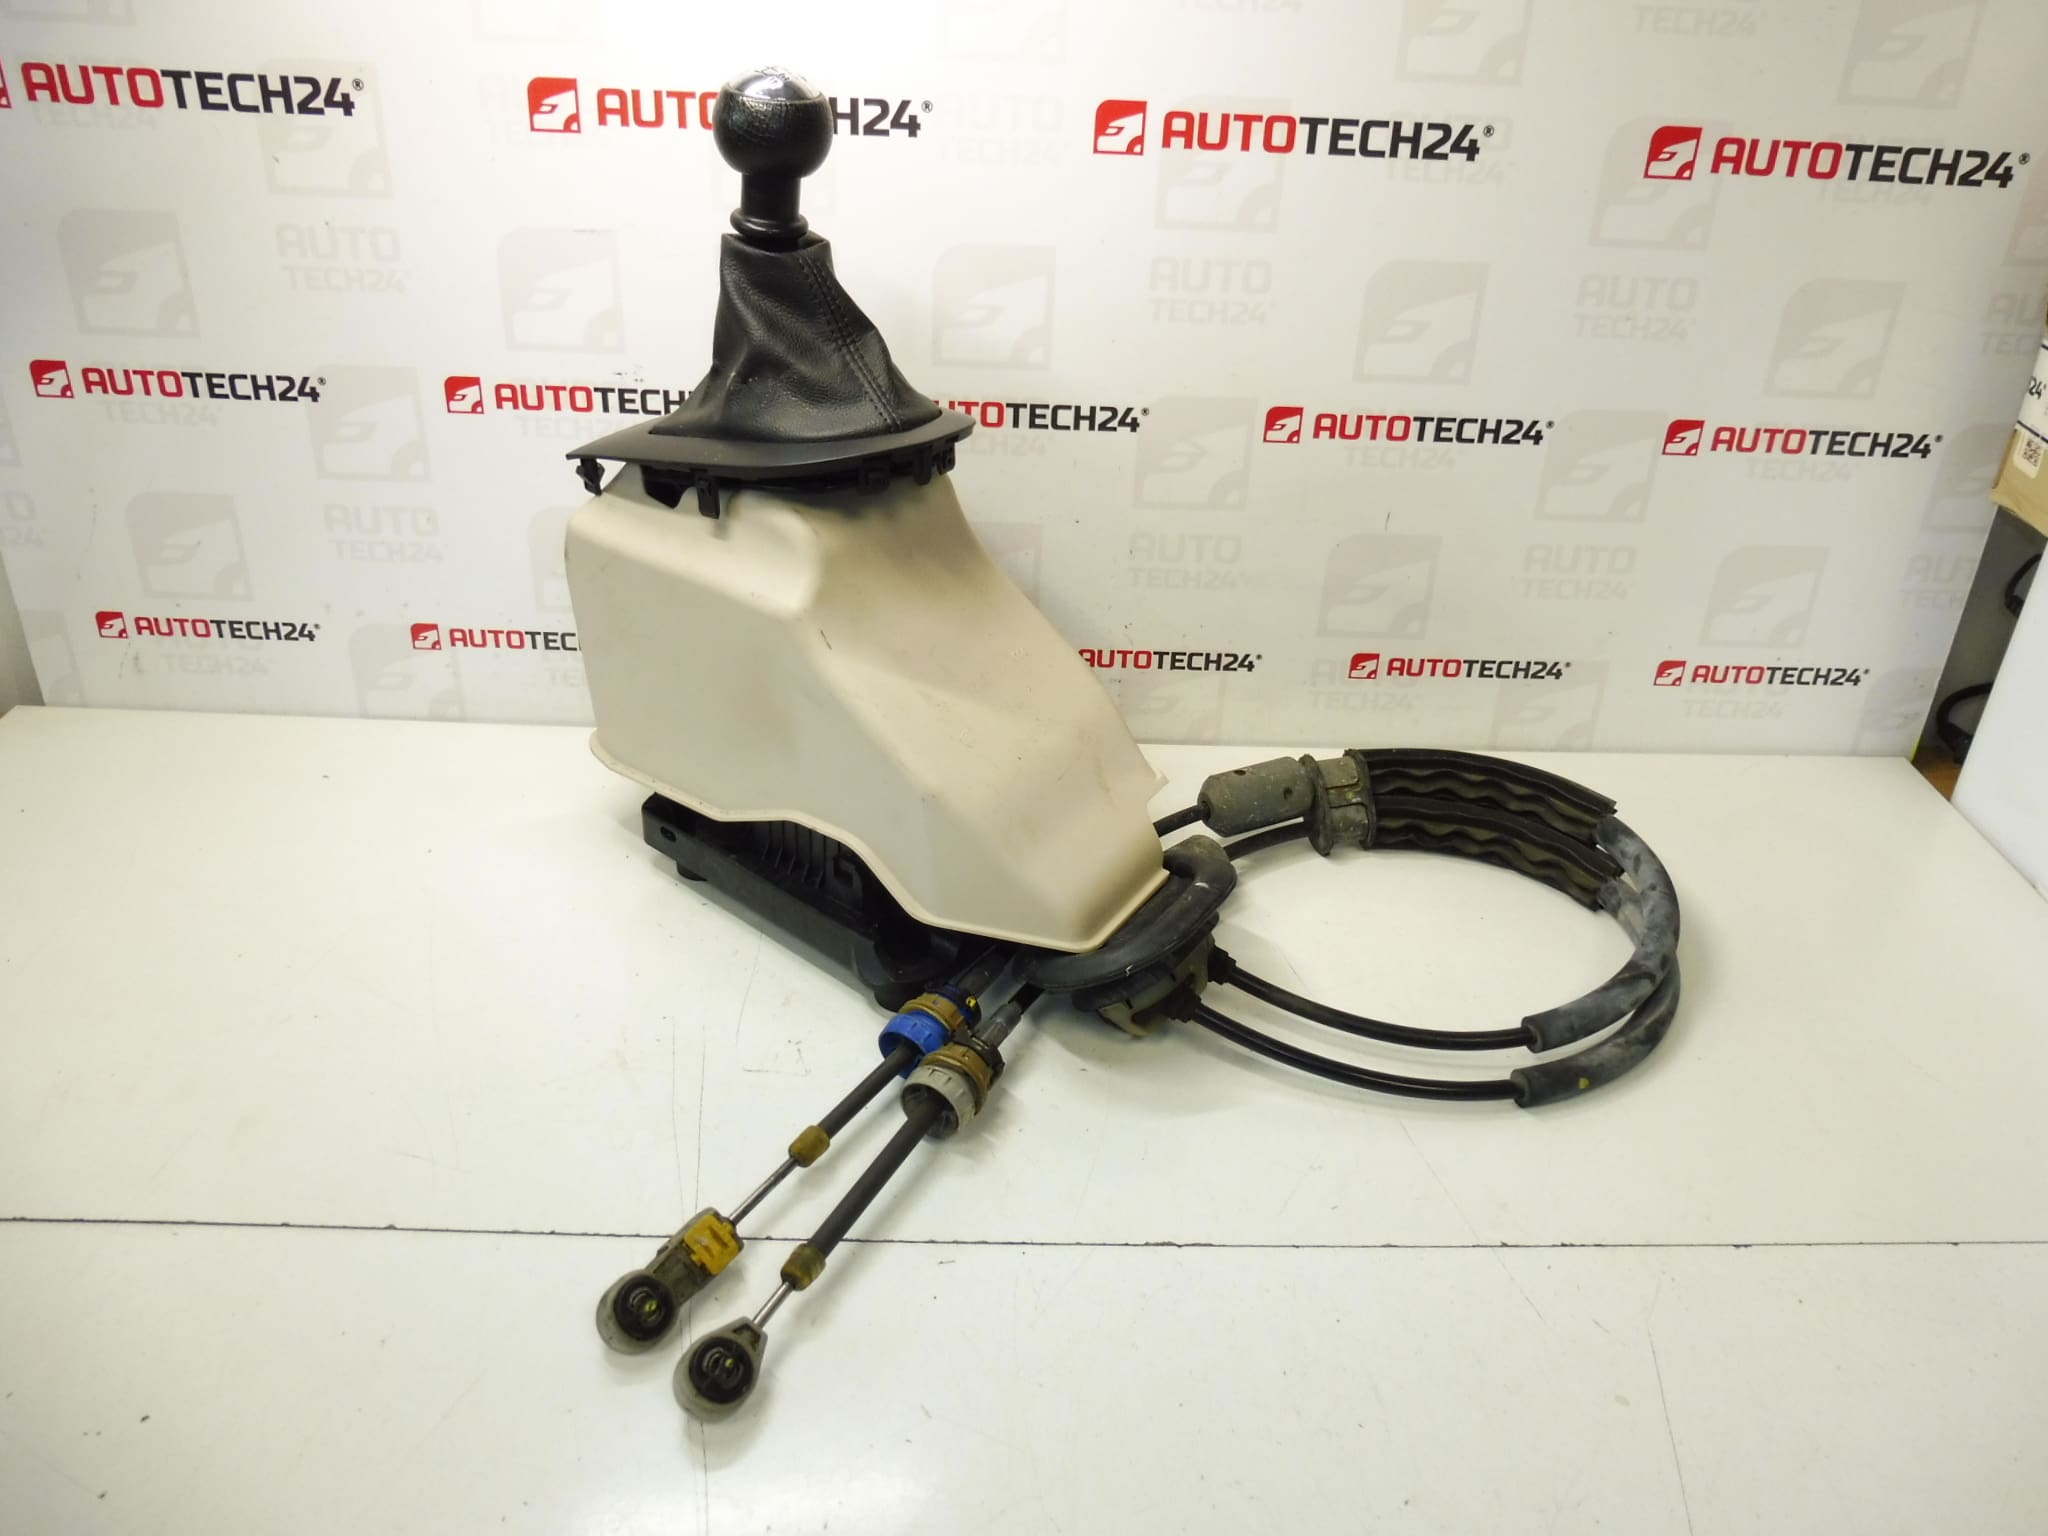
With undamaged shifter head 2403V1
From a car with a mileage of 64,000 km
Part description
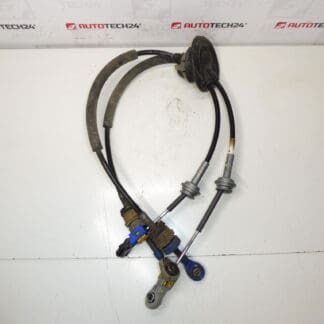
The used Peugeot 308 T7 gear shifter is designed for cars with a 6-speed gear shift. Also included is an undamaged shifter head marked 2403V1. The part comes from a car with 64,000 km on it, which can be an advantage for those looking for a well-preserved original car part to repair or replace a worn shift mechanism.
Shift clearance is an important part of transmission control and has a direct effect on accuracy, smoothness and confidence when shifting. If you are looking for a part by number, the codes 9672735680, 2400KV and 2403V1 are particularly important.
Technical information
- Manufacturer: Stellantis Citroën Peugeot
- Model: Peugeot 308 T7
- Other numbers: 9672735680, 2400KV, 2403V1
Product codes
Product codes: 9672735680, 2400KV, 2403V1
Models from labels and documents: Peugeot 308, Peugeot 308 T7
Installation recommendations
Generally/typically for this type of part, the exact procedure for replacing the gear shifter may vary depending on the specific design of the car. Before the assembly itself, it is advisable to carefully compare the old and new part and to proceed in such a way as to avoid damage to the subsequent parts of the shifting mechanism.
1) Before assembly
- Check that all part markings and shape match the old part.
- Compare the attachment points, tie rod or cable routing, and shifter head design.
- Check the condition of the moving parts used, the play in the mechanism and any cracks or deformation.
- Check whether the part has damaged handles, threads or plastic guide parts.
2) Necessary tools and materials
- A common set of hand tools
- Screwdrivers and gola set
- Plastic pry bar for panel removal
- Detergent for removing dirt
- Cloth or towels
3) Step-by-step assembly procedure
- Secure the vehicle against movement and prepare a work area.
- Dismantle the cover and paneling parts that prevent access to the shift slide.
- Carefully disconnect the downstream control elements of the shift mechanism according to the car design.
- Disconnect or unfasten the old gearshift bracket.
- Remove the original part in such a way as not to damage the surrounding plastics, tie rods or wiring.
- Clean the mounting area and check the condition of the connected parts.
- Compare the used part with the old part before putting it in place.
- Place the gear shifter in the correct position and fasten it in the same way as the original part.
- Reconnect the shift control mechanisms and check for free movement.
- Reinstall all the removed covers, cuffs and trim pieces.
-
4) Post-assembly checks and test drive/function verification
- Try moving the shifter through all positions without applying excessive force.
- Verify that the shifter feels accurate, without rubbing and without excessive play.
- During a test drive, observe whether the individual speeds shift smoothly.
- Check that no cover or fastener has come loose after assembly.
5) The most common assembly mistakes + how to avoid them
- Exchanging a part for a different design – always compare codes and design details.
- Damage to plastic handles during disassembly – use appropriate tools and proceed without violence.
- Incorrect positioning of the stage – check the position and operation of the mechanism before final tightening.
- Long-term mechanical wear during daily shifting.
- Excessive force when shifting or insensitive handling of the gear lever.
- Play or wear of the subsequent parts of the shifting mechanism.
- Damage to plastic parts due to age, vibration and normal operation.
- Unprofessional disassembly or assembly during previous repair.